| Element Name | Plugin Name | Vendor | Linxu/ARM Version | Windows Version | Description |
| pylonsrc | Pylonsrc | PlayGineering | 3.5 | 3.5 | A GStreamer element that uses Basler's USB3 Vision cameras to capture images |
| filesrc | coreelements | GStreamer | 1.14.5 | 1.16.2 | Reads from an arbitrary point in a file |
| rtspsrc | rtsp | GStreamer | 1.14.5 | 1.16.2 | Receives network data via RTSP (RFC 2326) |
| v4l2src | video4linux2 | GStreamer | 1.14.5 | 1.16.2 | Reads frames from a Video4Linux2 device |
| multifilesrc | multifile | GStreamer | 1.14.5 | 1.16.2 | Reads buffers from sequentially named files |
| ksvideosrc | winks | GStreamer | - | 1.16.2 | Provides low-latency video capture from WDM cameras on Windows |
| hikplugin | hikplugin | ADLINK | 3.5 | 3.5 | A GStreamer element that uses Hikrobot's USB & GigE vision cameras to capture images |
| flirplugin | flirplugin | ADLINK | 3.5 | 3.5 | A GStreamer element that uses FLIR's USB & GigE vision cameras to capture images |
# 3.1 Element Descriptions
This section describes each element of the video capture plugin in greater detail.
# 3.1.1 pylonsrc
This is a GStreamer element that uses Basler's USB3 Vision cameras and Basler’s GigE Vision cameras for image capture.
When multiple cameras are available, use the camera parameter to specify the specific camera for image capture. To find out the IDs for each camera, launch the pipeline without specifying the camera parameter, and the plugin will output the camera IDs.
The width and height parameters are used to set a custom resolution. To find out the maximum resolution of the camera, refer to the camera's technical specifications, or launch the plugin with logging tuned to loglevel4 (GST\_DEBUG=pylonsrc:4). Note that the camera saves the manually set resolution. Launching a pipeline with a camera while specifying a resolution will result in the following runs using the same resolution unless the device is reconnected or a different resolution is specified.
Resolution offsets can be specified to move the image. Possible offsets are calculated by max(width|height)- current(width|height). The parameters to specify offsets are offsetx and offsety. To center the image, use centerx and centery. Note that setting the centering parameters will cause the plugin to ignore the offset values.
The ADLINK EVA SDK uses the pylonsrc source code included in gst-plugins-vision. https://github.com/joshdoe/gst-plugins-vision/tree/master/sys/pylon
For more details, refer to the gst-pylonsrc documentation at https://gitlab.com/zingmars/gst-pylonsrc/- /blob/master/README.MD. Note that use ‘pixel-format’ property instead of ‘imageformat’ property when referencing this document.
# Notes:
1. Download and install the ADLINK EVA SDK to access the pylonsrc plugin. For more details, refer to the ADLINK EVA Installation Guide.
2. The downstream elements may waste a lot of time handling frames. If the camera's frame rate is too fast, the pipeline will drop a lot of frames, resulting in rendering delays. However, the rendering and AI inference performance of each platform are not the same. It is recommended to reduce the frame rate of the camera source or image resolution to make the rendered screen output smoother.
# 3.1.1.1 Examples Using gst-launch
Displaying a pylon video with ycbcr422\_8 format.
```txt
gst-launch-1.0 pylonsrc pixel-format=ycbcr422_8 ! videoconvert ! xvimagesink
```
Recording a pylon video at 150fps.
```txt
gst-launch-1.0 pylonsrc limitbandwidth=false sensorreadoutmode=fast fps=150 ! videoconvert ! matroskamux ! filesink location='recording.mkv'
```
Setting the resolution width and height to 960x540 and displaying the pylon video.
```txt
gst-launch-1.0 pylonsrc width= 960 height=540 ! videoconvert ! xvimagesink
```
Centering the pylon video and display.
```javascript
gst-launch-1.0 pylonsrc centerx=true centery=true ! videoconvert ! xvimagesink
```
Note: It is recommended to use xvimagesink to display the window on Linux and use glimagesink or d3dvideosink to display the window on Windows.
# 3.1.1.2 Hierarchy
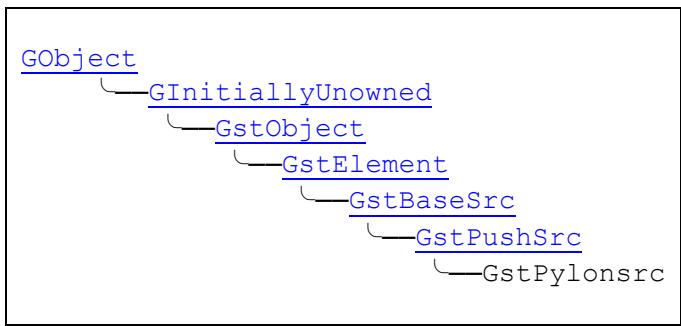
# 3.1.1.3 Pad Templates
src
ANY
Presence – always
Direction – src
# 3.1.1.4 Properties
# camera
“camera” gint
(Number) Camera ID as defined by Basler's API. If only one camera is connected this parameter will be ignored and the camera will be used. If there are multiple cameras and this parameter is not defined, the plugin will output a list of available cameras and their IDs. Note that if there are multiple cameras available to the API and the camera parameter is not defined then this plugin will not run. Range: 0 to 100
Flags: Read, Write
Default value: 9999
# height
“height” gint
(Pixel) The height of the picture. Note that the camera will remember this setting, and will use values from the previous runs if you relaunch without specifying this parameter. Reconnect the camera or use the reset parameter to reset. Range: 0 to 10000
Flags: Read, Write
Default value: 0
# width
“width” gint
(Pixels) The width of the picture. Note that the camera will remember this setting, and will use values from the previous runs if you relaunch without specifying this parameter. Reconnect the camera or use the reset parameter to reset. Range: 0 to 10000
Flags: Read, Write
Default value: 0
# binningh
“binningh” gint
(Pixels) The number of pixels to be binned in the horizontal direction. Note that the camera will remember this setting, and will use values from the previous runs if you relaunch without specifying this parameter. Reconnect the camera or use the reset parameter to reset. Range: 1 to 6
Flags: Read, Write
Default value: 1
# binningv
“binningv” gint
(Pixels) The number of pixels to be binned in the vertical direction. Note that the camera will remember this setting, and will use values from the previous runs if you relaunch without specifying this parameter. Reconnect the camera or use the reset parameter to reset. Range: 1 to 6
Flags: Read, Write
Default value: 1
# limitbandwidth
“limitbandwidth” gboolean
(true/false) Bandwidth limit mode. CAUTION! Disabling this will allow the camera to reach higher frames per second, but can damage the camera. Running the plugin without specifying this parameter will reset the value stored on the camera to \`true\`.
Flags: Read, Write
Default value: true
# maxbandwidth
“maxbandwidth” gint64
(Bytes per second) This property sets the maximum bandwidth the camera can use. The camera will only use as much as it needs for the specified resolution and framerate. This setting will have no effect if limitbandwidth is set to off. Note that the camera will remember this setting, and will use values from the previous runs if you relaunch without specifying this parameter. Reconnect the camera or use the reset parameter to reset. Range: 0 to 999999999
Flags: Read, Write
Default value: 0
# sensorreadoutmode
“sensorreadoutmode” gchararray
(normal/fast) This property changes the sensor readout mode. Fast will allow for faster framerates but might cause quality loss. It might be required that either increasing the maximum bandwidth or disabling bandwidth limits be configured for this to cause any noticeable change. Running the plugin without specifying this parameter will reset the value stored on the camera to "normal".
Flags: Read, Write
Default value: "normal"
# acquisitionframerateenable
“acquisitionframerateenable” gboolean
(true/false) Enables the use of custom fps values. This parameter will be set to true if the fps property is set. Running the plugin without specifying this parameter will reset the value stored on the camera to false.
Flags: Read, Write
Default value: false
# fps
“fps” gdouble
(Frames per second) Sets the framerate of the video coming from the camera. Setting the value too high might cause the plugin to crash. Note that if the pipeline causes the computer to hang, or stall, then the resulting video will not be in the resolution that was set. Setting this parameter will set acquisitionframerateenable to true. The value of this parameter will be saved to the camera, but it will have no effect unless either this or the acquisitionframerateenable parameters are set. Reconnect the camera or use the reset parameter to reset.
Range: 0.0 to 1024.0
Flags: Read, Write
Default value: 0.0
# lightsource
“lightsource” gchararray
(off, 2800k, 5000k, 6500k) Changes the color balance settings to those defined by the presets. For best results, select a color balance setting closest to the environment's lighting. Running the plugin without specifying this parameter will reset the value stored on the camera to "5000k".
Flags: Read, Write
Default value: "5000k"
# autoexposure
“autoexposure” gchararray
(off, once, continuous) Controls whether the camera will try to adjust the exposure settings. Setting this parameter to anything but "off" will override the exposure parameter. Running the plugin without specifying this parameter will reset the value stored on the camera to "off".
Flags: Read, Write
Default value: "off"
# exposure
“exposure” gdouble
(Microseconds) Exposure time for the camera in microseconds, but only has an effect if autoexposure is set to off (default). Higher numbers will cause a lower frame rate. Note that the camera will remember this setting, and will use values from the previous runs if you relaunch without specifying this parameter. Reconnect the camera or use the reset parameter to reset. Range: 0.0 to 1000000.0
Flags: Read, Write
Default value: 0.0
# autowhitebalance
“autowhitebalance” gchararray
(off, once, continuous) Controls whether the camera will try to adjust the white balance settings. Setting this parameter to anything but "off" will override the exposure parameter. Running the plugin without specifying this parameter will reset the value stored on the camera to "off".
Flags: Read, Write
Default value: "off"
# balancered
“balancered” gdouble
Specifies the red color balance. The autowhitebalance setting must be set to "off" for this property to have any effect. Note that this value gets saved on the camera, and running this plugin again without specifying this value will cause the previous value to be used. Use the reset parameter or reconnect the camera to reset. Range: 0.0 to 15.9
Flags: Read, Write
Default value: 999
# balancegreen
“balancegreen” gdouble
Specifies the green color balance. The autowhitebalance setting must be set to "off" for this property to have any effect. Note that this value gets saved on the camera, and running this plugin again without specifying this value will cause the previous value to be used. Use the reset parameter or reconnect the camera to reset. Range: 0.0 to 15.9
Flags: Read, Write
Default value: 999
# balanceblue
“balanceblue” gdouble
Specifies the blue color balance. The autowhitebalance setting must be set to "off" for this property to have any effect. Note that this value gets saved on the camera, and running this plugin again without specifying this value will cause the previous value to be used. Use the reset parameter or reconnect the camera to reset. Range: 0.0 to 15.9
Flags: Read, Write
Default value: 999
# colorredhue
“colorredhue” gdouble
Specifies the red hue. Note that this value gets saved on the camera, and running this plugin again without specifying this value will cause the previous value to be used. Use the reset parameter or reconnect the camera to reset. Range: -4.0 to 3.9
Flags: Read, Write
Default value: 999
# colorredsaturation
“colorredsaturation” gdouble
Specifies the red saturation. Note that this value gets saved on the camera, and running this plugin again without specifying this value will cause the previous value to be used. Use the reset parameter or reconnect the camera to reset. Range: 0.0 to 1.9
Flags: Read, Write
Default value: 0.0
# coloryellowhue
“coloryellowhue” gdouble
Specifies the yellow hue. Note that this value gets saved on the camera, and running this plugin again without specifying this value will cause the previous value to be used. Use the reset parameter or reconnect the camera to reset. Range: -4.0 to 3.9
Flags: Read, Write
Default value: 999
# coloryellowsaturation
“coloryellowsaturation” gdouble
Specifies the yellow saturation. Note that this value gets saved on the camera, and running this plugin again without specifying this value will cause the previous value to be used. Use the reset parameter or reconnect the camera to reset. Range: 0.0 to 1.9
Flags: Read, Write
Default value: 999
# colorgreenhue
“colorgreenhue” gdouble
Specifies the green hue. Note that this value gets saved on the camera, and running this plugin again without specifying this value will cause the previous value to be used. Use the reset parameter or reconnect the camera to reset. Range: -4.0 to 3.9
Flags: Read, Write
Default value: 999
# colorgreensaturation
“colorgreensaturation” gdouble
Specifies the green saturation. Note that this value gets saved on the camera, and running this plugin again without specifying this value will cause the previous value to be used. Use the reset parameter or reconnect the camera to reset. Range: 0.0 to 1.9
Flags: Read, Write
Default value: 999
# colorcyanhue
“colorcyanhue” gdouble
Specifies the cyan hue. Note that this value gets saved on the camera, and running this plugin again without specifying this value will cause the previous value to be used. Use the reset parameter or reconnect the camera to reset. Range: -4.0 to 3.9
Flags: Read, Write
Default value: 999
# colorcyansaturation
“colorcyansaturation” gdouble
Specifies the cyan saturation. Note that this value gets saved on the camera, and running this plugin again without specifying this value will cause the previous value to be used. Use the reset parameter or reconnect the camera to reset. Range: 0.0 to 1.9
Flags: Read, Write
Default value: 999
# colorbluehue
“colorbluehue” gdouble
Specifies the blue hue. Note that this value gets saved on the camera, and running this plugin again without specifying this value will cause the previous value to be used. Use the reset parameter or reconnect the camera to reset. Range: -4.0 to 3.9
Flags: Read, Write
Default value: 0.0
# colorbluesaturation
“colorbluesaturation” gdouble
Specifies the blue saturation. Note that this value gets saved on the camera, and running this plugin again without specifying this value will cause the previous value to be used. Use the reset parameter or reconnect the camera to reset. Range: 0.0 to 1.9
Flags: Read, Write
Default value: 999
# colormagentahue
“colormagentahue” gdouble
Specifies the magenta hue. Note that this value gets saved on the camera, and running this plugin again without specifying this value will cause the previous value to be used. Use the reset parameter or reconnect the camera to reset. Range: -4.0 to 3.9
Flags: Read, Write
Default value: 999
# colormagentasaturation
“colormagentasaturation” gdouble
Specifies the magenta saturation. Note that this value gets saved on the camera, and running this plugin again without specifying this value will cause the previous value to be used. Use the reset parameter or reconnect the camera to reset. Range: 0.0 to 1.9
Flags: Read, Write
Default value: 999
# autogain
“autogain” gchararray
(off, once, continuous) Controls whether the camera will try to adjust the gain settings. Setting this parameter to anything but "off" will override the exposure parameter. Running the plugin without specifying this parameter will reset the value stored on the camera to "off".
Flags: Read, Write
Default value: "off"
# gain
“gain” gdouble
(dB) Sets the gain added on the camera before sending the frame to the computer. The value of this parameter will be saved to the camera, but it will be set to 0 every time this plugin is launched without specifying gain, or it will be overridden if the autogain parameter is set to anything that is not "off". Reconnect the camera or use the reset parameter to reset the stored value. Range: 0.0 to 12.0
Flags: Read, Write
Default value: 0.0
# blacklevel
“blacklevel” gdouble
(DN) Sets the stream's black level. This parameter is processed on the camera before the picture is sent to the computer. The value of this parameter will be saved to the camera, but it will be set to 0 every time this plugin is launched without specifying this parameter. Reconnect the camera or use the reset parameter to reset the stored value. Range: 0.0 to 63.75
Flags: Read, Write
Default value: 0.0
# gamma
“gamma” gdouble
Sets the gamma correction value. This parameter is processed on the camera before the picture is sent to the computer. The value of this parameter will be saved to the camera, but it will be set to 1.0 every time this plugin is launched without specifying this parameter. Reconnect the camera or use the reset parameter to reset the stored value. Range: 0.0 to 3.9
Flags: Read, Write
Default value: 1.0
# reset
“reset” gchararray
(off, before, after). Controls whether or when the camera's settings will be reset. Setting this to "before" will wipe the settings before the camera initialization begins. Setting this to "after" will reset the device once the pipeline closes. This can be useful for debugging or when using the camera with other software that does not reset the camera settings before use (such as PylonViewerApp).
Flags: Read, Write
Default value: "off"
# testimage
“testimage” gint
(1 to 6) Specifies a test image to show instead of a video stream. It is useful for debugging and is disabled by default. Range: 0 to 6
Flags: Read, Write
Default value: 0
# continuous
“continuous” gboolean
(true/false) Used to switch between triggered and continuous mode. Set to “false” to switch to triggered mode.
Flags: Read, Write
Default value: True
# pixel-format
“pixel-format” gchararray
(Mono8 / BayerBG8 / BayerGR8 / BayerRG8 / BayerGB8 / RGB8 / BGR8 / YCbCr422\_8 / YUV422Packed). Determines the pixel format for sending frames. The default is auto which will query the camera for supported pixel formats and allow GStreamer to negotiate the format with downstream elements.
Flags: Read, Write
Default value: "auto"
# userid
“userid” gchararray
(<string>) Sets the device custom ID.
Flags: Read, Write
Default value: NULL
# demosaicing
“demosaicing” gboolean
(true/false) Switches between simple and Basler's demosaicing (PGI) mode. This does not work if bayer output is used.
Flags: Read, Write
Default value: False
# noisereduction
“noisereduction” gdouble
Specifies the amount of noise reduction to apply. To use this, Basler's demosaicing mode must be enabled. Setting this will enable demosaicing mode. Range: 0.0 to 2.0
Flags: Read, Write
Default value: 999
# sharpnessenhancement
“sharpnessenhancement” gdouble
Specifies the amount of sharpness enhancement to apply. To use this, Basler's demosaicing mode must be enabled. Setting this will enable demosaicing mode. Range: 1.0 to 3.98
Flags: Read, Write
Default value: 999
# offsetx
“offsetx” gint
(0 to 10000) Determines the horizontal offset. Note that the maximum offset value is calculated during initialization, and will not be shown in this output.
Flags: Read, Write
Default value: 99999
# centerx
“centerx” gboolean
(true/false) Setting this to true will center the horizontal offset and cause the plugin to ignore the offsetx value.
Flags: Read, Write
Default value: False
# offsety
“offsety” gint
(0 to 10000) Determines the vertical offset. Note that the maximum offset value is calculated during initialization, and will not be shown in this output.
Flags: Read, Write
Default value: 99999
# centery
“centery” gboolean
(true/false) Setting this to true will center the vertical offset and cause the plugin to ignore the offsety value.
Flags: Read, Write
Default value: False
# flipx
“flipx” gboolean
(true/false) Setting this to true will flip the image horizontally.
Flags: Read, Write
Default value: False
# flipy
“flipy” gboolean
(true/false) Setting this to true will flip the image vertically.
Flags: Read, Write
Default value: False
# exposureupperlimit
“exposureupperlimit” gdouble
(105 to 1000000) Sets the upper limit for the auto exposure function.
Flags: Read, Write
Default value: 999
# exposurelowerlimit
“exposurelowerlimit” gdouble
(105 to 1000000) Sets the lower limit for the auto exposure function.
Flags: Read, Write
Default value: 999
# gainupperlimit
“gainupperlimit” gdouble
(0 to 12.00921) Sets the upper limit for the auto gain function.
Flags: Read, Write
Default value: 999
# gainlowerlimit
“gainlowerlimit” gdouble
(0 to 12.00921) Sets the lower limit for the auto gain function.
Flags: Read, Write
Default value: 999
# autoprofile
“autoprofile” gchararray
(gain/exposure) When the auto functions are on, this determines whether to focus on minimizing gain or exposure.
Flags: Read, Write
Default value: "default"
# autobrightnesstarget
“autobrightnesstarget” gdouble
(0.19608 to 0.80392) Sets the auto exposure brightness target value.
Flags: Read, Write
Default value: 999
# transformationselector
“transformationselector” gchararray
(RGBRGB, RGBYUV, YUVRGB) Sets the type of color transformation done by the color transformation selectors.
Flags: Read, Write
Default value: "default"
# transformation00
“transformation00” gdouble
Gain00 transformation selector. Range: -8.0 to 7.96875
Flags: Read, Write
Default value: 999
# transformation01
“transformation01” gdouble
Gain01 transformation selector. Range: -8.0 to 7.96875
Flags: Read, Write
Default value: 999
# transformation02
“transformation02” gdouble
Gain02 transformation selector. Range: -8.0 to 7.96875
Flags: Read, Write
Default value: 999
# transformation10
“transformation10” gdouble
Gain10 transformation selector. Range: -8.0 to 7.96875
Flags: Read, Write
Default value: 999
# transformation11
“transformation11” gdouble
Gain11 transformation selector. Range: -8.0 to 7.96875
Flags: Read, Write
Default value: 999
# transformation12
“transformation12” gdouble
Gain12 transformation selector. Range: -8.0 to 7.96875
Flags: Read, Write
Default value: 999
# transformation20
“transformation20” gdouble
Gain20 transformation selector. Range: -8.0 to 7.96875
Flags: Read, Write
Default value: 999
# transformation21
“transformation21” gdouble
Gain21 transformation selector. Range: -8.0 to 7.96875
Flags: Read, Write
Default value: 999
# transformation22
“transformation22” gdouble
Gain22 transformation selector. Range: -8.0 to 7.96875
Flags: Read, Write
Default value: 999
# maxtransfersize
“maxtransfersize” gdouble
The default value is appropriate for most applications. Reducing the value may cause a higher CPU load. USB host adapter drivers may require decreasing the value in case the application fails to receive the image stream. The maximum value for the Maximum Transfer Size depends on the operating system version and may be limited by the host adapter drivers. Range: 65536 to 4194304
Flags: Read, Write
Default value: 1045876
# 3.1.2 filesrc
This element reads data from a file on the local system. For more details, refer to the official GStreamer documentation at: https://gstreamer.freedesktop.org/documentation/coreelements/filesrc.html?gilanguage=c#filesrc
# 3.1.2.1 Examples Using gst-launch
Play the song.ogg audio file located in the current working directory.
```txt
gst-launch-1.0 filesrc location=song.ogg ! decodebin ! audioconvert ! audioresample ! autoaudiosink
```
Play the song.ogg audio file located in the current working directory.
```txt
gst-launch-1.0 filesrc location=video.avi ! decodebin ! videoconvert ! xvimagesink
```
The following file formats are supported in GStreamer: avi, m4v, mov, mp4, mpg (MPEG-1/MPEG-2), flv, mkv, and wmv.
Note: The element ‘xvimagesink’ is only supported on Linux. It is recommended to use the ‘glimagesink’ or ‘d3dvideosink’ elements to display the window on Windows.
# 3.1.3 rtspsrc
This element receives data over a network via RTSP (RFC 2326). For more details, refer to the official documentation at: https://gstreamer.freedesktop.org/documentation/rtsp/rtspsrc.html?gi-language=c#rtspsrc-page
# 3.1.3.1 Examples Using gst-launch
Establish a connection to an RTSP server and send the raw RTP packets to a fakesink.
```txt
gst-launch-1.0 rtspsrc location=rtsp://some.server/url ! fakesink
```
Launch an RTSP video stream from a Bosch camera with the H.264 codec. The example specifies the IP address as 192.168.1.20 with a user ID of ooo, and xxx as the password.
```txt
gst-launch-1.0 rtspsrc location=rtsp://192.168.1.20 user-id=ooo user-pw=xxx ! rtph264depay ! h264parse ! avdec_h264 ! xvimagesink sync=false
```
Note: The element ‘xvimagesink’ is only supported on Linux. It is recommended to use the ‘glimagesink’ or ‘d3dvideosink’ elements to display the window on Windows.
# 3.1.4 v4l2src
This element can be used to capture video from v4l2 devices, such as webcams and TV tuner cards.
Note: Only supported on Linux.
For more details, refer to the official documentation at:
https://gstreamer.freedesktop.org/documentation/video4linux2/v4l2src.html?gi-language=c#v4l2src-page
# 3.1.4.1 Examples Using gst-launch
This pipeline shows the video captured from a webcam with jpeg images.
```txt
gst-launch-1.0 v4l2src ! jpegdec ! xvimagesink
```
This pipeline shows the video captured from a webcam with jpeg images and the buffer number set to output before sending EOS. For auto-function testing, the output automatically stops when the buffer is reached.
```txt
gst-launch-1.0 v4l2src num-buffers=100 ! jpegdec ! xvimagesink
```
Note: The element ‘xvimagesink’ is only supported on Linux. It is recommended to use the ‘glimagesink’ or ‘d3dvideosink’ elements to display the window on Windows.
# 3.1.5 multifilesrc
This element reads buffers from sequentially named files. If used together with an image decoder, the “caps” property or a capsfilter must be used to force to caps containing a framerate, otherwise the image decoders send EOS after the first frame. A videorate element is needed to set timestamps on all buffers after the first one in accordance with the corresponding framerate.
File names are created by replacing "%d" with the index using printf().
For more details, refer to the official documentation at:
https://gstreamer.freedesktop.org/documentation/multifile/multifilesrc.html?gi-language=c#multifilesrc-page
# 3.1.5.1 Example Using gst-launch
This pipeline displays a video by joining multiple sequentially named PNG files (img.0000.png, img.0001.png, etc.)..
gst-launch-1.0 multifilesrc location="img.%04d.png" index=0
caps="image/png,framerate= $fraction$ 12/1" ! pngdec ! videoconvert ! videorate !
ximagesink
Note: The element ‘xvimagesink’ is only supported on Linux. It is recommended to use the ‘glimagesink’ or ‘d3dvideosink’ elements to display the window on Windows.
# 3.1.6 ksvideosrc
This element provides low-latency video capture from WDM cameras on Windows.
For more details, refer to the official documentation at:
https://gstreamer.freedesktop.org/documentation/winks/index.html?gi-language=c
# 3.1.6.1 Example Using gst-launch
This pipeline shows the video captured from a webcam.
```txt
gst-launch-1.0 ksvideosrc num-buffers=1000 ! glimagesink sync=false
```
# 3.1.7 hikplugin
This is a GStreamer element that uses Hikrobot's USB3 and GigE vision cameras. When multiple cameras are available, use the camera property to specify the specific camera for image capture.
# Notes:
1. Hikrobot MVC can access other vendor USB3 cameras with the HIK USB filter driver.
2. The downstream elements may waste a lot of time handling frames. If the camera's frame rate is too fast, the pipeline will drop a lot of frames, resulting in rendering delays. However, the rendering and AI inference performance of each platform are not the same. It is recommended to reduce the frame rate of the camera source or image resolution to make the rendered screen output smoother.
# 3.1.7.1 Examples Using gst-launch
This pipeline shows the video captured from a Hikrobot camera.
```txt
gst-launch-1.0 hikplugin ! videoconvert ! glimagesink
```
Use the pixel-format property if the camera module supports other pixel fomats. The example is YUV422\_8\_UYVY.
```txt
Gst-launch-1.0 hikplugin pixel-format=YUV422_8_UYVY ! videoconvert ! glimagesink
```
This pipeline use BayerBG8 format to display a Hikrobot video.
```txt
gst-launch-1.0 hikplugin pixel-format=BayerBG8 ! bayer2rgb ! videoconvert ! glimagesink
```
Use the camera property to set the camera ID if the system has multiple camera modules.
```txt
gst-launch-1.0 hikplugin camera=0 ! videoconvert ! glimagesink
```
# Notes:
1. The avalible pixel formats are:
BayerRG8\BayerGR8\BayerGB8\BayerBG8\YUV422\_8\_UYVY\RGB8Packed\Mono8
2. The available pixel formats differ depending on the selected camera model.
3. If the pixel-format is not specified, the element will use the camera’s setting. When using the camera’s setting, add the corresponding decoder element according to the actual pixel format. For example, if a camera uses Bayer format, the pipeline must add a bayer2rgb element after the hikplugin element for decoding.
# 3.1.7.2 Hierarchy
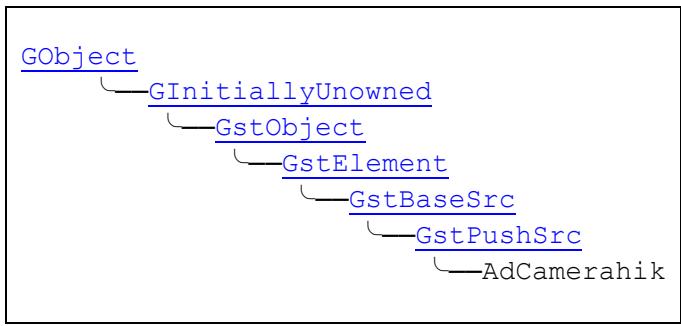
# 3.1.7.3 Pad Templates
src
ANY
Presence – always
Direction – src
# 3.1.7.4 Properties
# autoexposure
“autoexposure” gchararray
(Off/Continuous/Once) Controls whether the camera can adjust the exposure settings.
Flags: Read, Write
Default value: Once
# autogain
“autogain” gchararray
(Off/Continuous/Once) Controls whether the camera can adjust the gain settings.
Flags: Read, Write
Default value: Off
# binningh
“binningh” gint
Number of pixels to be binned in the horizontal direction. (GigE: 1,2,4/USB3: 1,2) Range: 0 to10000
Flags: Read, Write
Default value: 0
# binningv
“binningv” gint
Number of pixels to be binned in the vertical direction. (GigE: 1,2,4/USB3: 1,2) Range: 0 to10000
Flags: Read, Write
Default value: 1
# blacklevel
“blacklevel” gdouble
This will adjust the black level amount in an image. Range: 0 to 4095.0
Flags: Read, Write
Default value: 1
# camera
“camera” gint
If multiple cameras are enumerated, this will allow selection of a specific camera. Range: 0 to 10000
Flags: Read, Write
Default value: -1
# continuous
“continuous” gboolean
(true/false) Toggles between triggered and continuous mode. True is for continuous mode.
Flags: Read, Write
Default value: false
# exposure
“exposure” gdouble
Sets the custom exposure value. (GigE: 21 – 1000000/USB3: 24 – 2500000) Range: 0 to 30000000.0
Flags: Read, Write
Default value: 0
#
“flipx” gboolean
(true/false) Setting this flips the image horizontally.
Flags: Read, Write
Default value: false
# flipy
“flipy” gboolean
(true/false) Setting this flips the image vertically.
Flags: Read, Write
Default value: false
# fps
“fps” gdouble
Sets a custom fps value. (GigE: 0.96 – 100000 /USB3:0.4 – 1000) Range: 0 – 100000.0
Flags: Read, Write
Default value: 0
# gain
“gain” gdouble
Sets the gain added to a camera before sending a frame to the computer.
(GigE: 0.96 – 100000/USB3: 0.4 – 1000) Range: 0 – 100000.0
Flags: Read, Write
Default value: 0
Note: Set autogain off before using gain.
# gamma
“gamma” gdouble
Sets the gamma correction value. (GigE: 0 – 4/USB3: 0 – 4) Range: 0 – 1000.0
Flags: Read, Write
Default value: 1
# width
“gain” gint64
Sets the image width. Range: 0 to 10000
Flags: Read, Write
Default value: 0
# height
“height” gint64
Sets the image height. Range: 0 to 10000
Flags: Read, Write
Default value: 0
# offsetx
“offsetx” gint64
Sets the horizontal offset. The maximum offset will be calculated during initialization. Range: 0 to 10000
Flags: Read, Write
Default value: 99999
# offsety
“offsety” gint64
Sets the vertical offset. The maximum offset will be calculated during initialization. Range: 0 to 10000
Flags: Read, Write
Default value: 99999
# pixel-format
“pixel-format” gchararray
Sets the camera output data pixel format value. Valid values include: YUV422\_8\_UYVY, BayerRG8, BayerBG8, BayerGB8, BayerGR8, RGB8Packed, and Mono8. If an invalid value is passed, the plugin will print a list of the supported formats. The default pixel format is NULL and is retrieved from the camera during initialization.
Flags: Read, Write
Default value: NULL
# setfps
“setfps” gboolean
(true/false) Setting this will enable custom fps.
Flags: Read, Write
Default value: false
# triggerselector
“triggerselector” gchararray
Selects the trigger for camera capture. This is valid only when the “continuous” property is set to false.
Flags: Read, Write
Default value: FrameBrustStart
# triggersource
“triggersource” gchararray
Sets the camera capture trigger source. This is valid only when the “continuous” property set to false.
Flags: Read, Write
Default value: Software
# 3.1.8 flirplugin
This is a GStreamer element that uses FLIR's USB3 and GigE vision cameras When multiple cameras are available, use the camera property to specify the specific camera for image capture.
Note: The downstream elements may waste a lot of time handling frames. If the camera's frame rate is too fast, the pipeline will drop a lot of frames, resulting in rendering delays. However, the rendering and AI inference performance of each platform are not the same. It is recommended to reduce the frame rate of the camera source or image resolution to make the rendered screen output smoother.
# 3.1.8.1 Examples Using gst-launch
This pipeline launches the plugin.
```txt
gst-launch-1.0 flirplugin ! videoconvert ! glimagesink
```
Use the pixel-format property if the camera module supports other pixel fomats. The example is YUV422\_8\_UYVY.
```txt
gst-launch-1.0 flirplugin pixel-format= YUV422_8_UYVY ! videoconvert ! glimagesink
```
This pipeline uses the BayerBG8 format to display a Hikrobot video.
```txt
gst-launch-1.0 flirplugin pixel-format=BayerBG8 ! bayer2rgb ! videoconvert ! glimagesink
```
Use the camera property to set the camera ID if the system has multiple camera modules.
```txt
gst-launch-1.0 flirplugin camera=0 ! videoconvert ! glimagesink
gst-launch-1.0 flirplugin camera=1 ! videoconvert ! glimagesink
```
# Notes:
1. The avalible pixel formats are: BayerRG8\BayerGR8\BayerGB8\BayerBG8\YUV422Packed\YCbCr422\_8\RGB8Packed\BGR8\Mono8
2. The available pixel formats differ depending on the selected camera model.
3. If the pixel-foramt is not specified, the element will use the camera’s setting. If using camera’s setting, add the corresponding decoder element according to the actual pixel format. For example, if a camera uses Bayer format, the pipeline must add a bayer2rgb element after flirplugin element for decoding.
# 3.1.8.1 Hierarchy
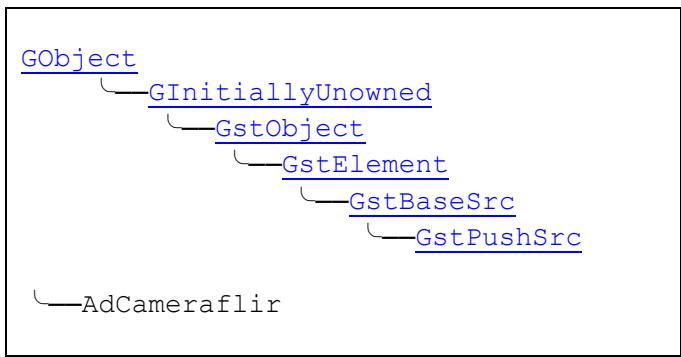
# 3.1.8.2 Pad Templates
src
ANY
Presence – always
Direction – src
# 3.1.8.3 Properties
# autoexposure
“autoexposure” gchararray
(Off/Continuous/Once) Controls whether the camera can adjust the exposure settings.
Flags: Read, Write
Default value: Once
# autogain
“autogain” gchararray
(Off/Once/Continoust) Controls whether the camera can adjust the gain settings.
Flags: Read, Write
Default value: Off
# binningh
“binningh” gint
Number of pixels to be binned in horizontal direction. (GigE: 1-4 /USB3:1-4) Range: 0 to10000
Flags: Read, Write
Default value: 1
# binningv
“binningv” gint
Number of pixels to be binned in vertical direction. (GigE: 1-4/USB3: 1-4) Range: 0 to10000
Flags: Read, Write
Default value: 1
# blacklevel
“blacklevel” gdouble
This will adjust the black level amount in an image. (GigE: 0-10/USB3: 1.37-7.42) Range:0 to 10.0
Flags: Read, Write
Default value: 0
# camera
“camera” gint
If multiple cameras are enumerated, this will allow selection of a specific camera. Range:0 to 10000
Flags: Read, Write
Default value: 0
# continuous
“continuous” gboolean
(true/false) Toggles between triggered and continuous mode. True is for continuous mode.
Flags: Read, Write
Default value: false
# exposure
“exposure” gdouble
Sets the custom exposure value. (GigE: 45.6-32754.12/USB3: 12-30000000) Range: 0 to 30000000.0
Flags: Read, Write
Default value: 0
Note: Set autoexposure to off before using exposure.
# flipx
“flipx” gboolean
(true/false) Setting this flips the image horizontally.
Flags: Read, Write
Default value: false
#
“flipy” gboolean
(true/false) Setting this flips the image vertically.
Flags: Read, Write
Default value: false
# fps
“fps” gdouble
Sets a custom fps value. (GigE: 1-30/USB3: 1-76.18) Range: 0 to 1000.0
Flags: Read, Write
Default value: 0
# gain
“gain” gdouble
Sets the gain added to a camera before sending a frame to the computer. Range: 0 – 1000.0
Flags: Read, Write
Default value: 0
# gamma
“gamma” gdouble
Sets the gamma correction value. (GigE: 0.5-4/USB3: 0.25-4) Range: 0 to 1000.0
Flags: Read, Write
Default value: 1
# width
“gain” gint64
Sets the image width. Range: 0 to 10000
Flags: Read, Write
Default value: 0
# height
“height” gint64
Sets the image height. Range: 0 to 10000
Flags: Read, Write
Default value: 0
# offsetx
“offsetx” gint64
Sets the horizontal offset. The maximum offset will be calculated during initialization. Range: 0 to 10000
Flags: Read, Write
Default value: 99999
# offsety
“offsety” gint64
Sets the vertical offset. The maximum offset will be calculated during initialization. Range: 0 to 10000
Flags: Read, Write
Default value: 99999
# pixel-format
“pixel-format” gchararray
Sets the camera output data pixel format value. Valid values include: YUV422Packed, BayerRG8, BayerBG8, BayerGB8,BayerGR8, RGB8Packed, BGR8, and Mono8. If an invalid value is passed, the plugin will print a list of the supported formats. The default pixel format is NULL and is retrieved from the camera during initialization. Flags: Read, Write
Default value: NULL
# setfps
“setfps” gboolean
(true/false) Setting this will enable custom fps
Flags: Read, Write
Default value: false
# triggerselector
“triggerselector” gchararray
Selects the trigger for camera capture. This is valid only when the “continuous” property is set to false.
Flags: Read, Write
Default value: FrameBurstStart
# triggersource
“triggersource” gchararray
Sets the camera capture trigger source. This is valid only when the “continuous” property set to false.
Flags: Read, Write
Default value: Software
# 4 Image Processing Plugins
The following table lists the element of the supported image processing plugins.
| Element Name | Plugin Name | Vendor | Linux/ARM Version | Windows Version | Description |
| jpegdec | jpeg | GStreamer | 1.14.5 | 1.16.2 | Decodes jpeg images |
| jpegenc | jpeg | GStreamer | 1.14.5 | 1.16.2 | Encodes jpeg images |
| pngdec | png | GStreamer | 1.14.5 | 1.16.2 | Decodes png images. If there is no framerate set on sink caps, it sends EOS after the first picture. |
| pngenc | png | GStreamer | 1.14.5 | 1.16.2 | Encodes png images |
| gdkpixbufdec | gdkpixbuf | GStreamer | 1.14.5 | 1.16.2 | Decodes images in a video stream using GdkPixbuf |
| avenc_tiff | libva | GStreamer | 1.14.5 | 1.16.2 | libav tiff encoder |
| avdec_tiff | libva | GStreamer | 1.14.5 | 1.16.2 | libav tiff decoder |
| avenc_bmp | libva | GStreamer | 1.14.5 | 1.16.2 | libav bmp encoder |
| avdec_bmp | libva | GStreamer | 1.14.5 | 1.16.2 | libav bmp decoder |
| videorate | gstvideorate | GStreamer | 1.14.5 | 1.16.2 | Drops/duplicates/adjusts timestamps on video frames to make a perfect stream |
| videoconvert | videoconvert | GStreamer | 1.14.5 | 1.16.2 | Converts video frames between video formats |
| x264enc | x264 | GStreamer | 1.14.5 | 1.16.2 | H264 encoder |
| x265enc | x265 | GStreamer | 1.14.5 | 1.16.2 | HEVC encoder |
| msdkh264enc | msdk | GStreamer | 1.14.5 | 1.16.2 | Intel MSDK H264 encoder in gst-pulings-bad mode |
| msdkh265enc | msdk | GStreamer | 1.14.5 | 1.16.2 | Intel MSDK H265 encoder in gst-pulings-bad mode |
| msdkh264dec | msdk | GStreamer | 1.14.5 | 1.16.2 | Intel MSDK H264 decoder in gst-pulings-bad mode |
| msdkh265dec | msdk | GStreamer | 1.14.5 | 1.16.2 | Intel MSDK H265 encoder in gst-pulings-bad mode |
| avdec_h264 | libva | GStreamer | 1.14.5 | 1.16.2 | libav h264 decoder |
| avdec_h265 | libva | GStreamer | 1.14.5 | 1.16.2 | libav hevc decoder |
| videoscale | videoscale | GStreamer | 1.14.5 | 1.16.2 | Resizes video frame |
| videocrop | videocrop | GStreamer | 1.14.5 | 1.16.2 | Crops video to a user-defined region |
| admetawriter | admetadata | ADLINK | 3.5 | 3.5 | Writes admeta data to stream |
| admetadrawer | admetadata | ADLINK | 3.5 | 3.5 | Draws admeta data to stream |
| admetadumper | admetadata | ADLINK | 3.5 | 3.5 | Dumps admeta data to console |
| admetadbuger | admetadata | ADLINK | 3.5 | 3.5 | Writes fake admeta data to stream |
| nvv4l2decoder | nvvideo4linux2 | NVIDIA DeepStream | 5.1/5.0 | - | Decodes video streams via V4L2 API |
| nvv4l2h264enc | nvvideo4linux2 | NVIDIA DeepStream | 5.1/5.0 | - | Encodes H.264 video streams via V4L2 API |
| nvv4l2h265enc | nvvideo4linux2 | NVIDIA DeepStream | 5.1/5.0 | - | Encodes H.265 video streams via V4L2 API |
| rotate | geometrictransform | GStreamer | 1.14.5 | 1.16.2 | Transforms the image by rotating it by a specified angle |
| gamma | videofilter | GStreamer | 1.14.5 | 1.16.2 | Performs gamma correction on a video stream |
| videobalance | videofilter | GStreamer | 1.14.5 | 1.16.2 | Adjusts brightness, contrast, hue, saturation on a video stream |
| videoflip | videofilter | GStreamer | 1.14.5 | 1.16.2 | Flips and rotates video |
| videomedian | videofilter | GStreamer | 1.14.5 | 1.16.2 | Applies a median filter to an image |
| nvdec | nvdec | GStreamer | - | 1.16.2 | NVENC H.264 Video Decoder |
| nvh264enc | nvenc | GStreamer | - | 1.16.2 | NVENC H.264 Video Encoder |
| nvh265enc | nvenc | GStreamer | - | 1.16.2 | NVENC HEVC Video Encoder |
# 4.1 Element Descriptions
This section describes each element of the image processing plugin in greater detail.
# 4.1.1 jpegdec
This element decodes jpeg images.
For more details, refer to the official documentation at:
https://gstreamer.freedesktop.org/documentation/jpeg/jpegdec.html?gi-language=c
# 4.1.1.1 Examples Using gst-launch
This pipeline transcodes a jpeg to png and saves it as a png file.
```txt
gst-launch-1.0 filesrc location="frameJ1.jpeg" ! jpegdec ! videoconvert ! pngenc ! filesink location="frameJP1.png"
```
Similarly, jpeg images can be transcoded to tiff, bmp, or raw image formats.
```txt
gst-launch-1.0 filesrc location="frameJ1.jpeg" ! jpegdec ! videoconvert !
avenc_tiff ! filesink location="frameJT1.tiff"
gst-launch-1.0 filesrc location="frameJ1.jpeg" ! jpegdec ! videoconvert !
avenc_bmp ! filesink location="frameJB1.bmp"
gst-launch-1.0 filesrc location="frameJ1.jpeg" ! jpegdec ! videoconvert ! filesink
location="frameJR1.raw"
```
The "idct-method" property controls the jpeg transcoding method.
1. islow (0) – Slow, but accurate integer algorithm
2. ifast (1) – Faster, but less accurate integer method
3. float (2) – Floating-point: accurate, but faster speed depends on better hardware
For example,
```shell
gst-launch-1.0 filesrc location="frame1.jpeg" ! jpegdec idct-method=float !
videoconvert ! filesink location="frameP1.raw"
```
# 4.1.2 jpegenc
This element encodes jpeg images.
For more details, refer to the official documentation at:
https://gstreamer.freedesktop.org/documentation/jpeg/jpegenc.html?gi-language=c
# 4.1.2.1 Example Using gst-launch
This pipeline encodes the video test pattern to jpeg images and saves them.
```txt
gst-launch-1.0 videotestsrc ! queue ! jpegenc ! multifilesink location="frame%d.jpeg"
```
The "idct-method" property controls the jpeg encoding method.
1. islow (0) – Slow, but accurate integer algorithm
2. ifast (1) – Faster, but less accurate integer method
3. float (2) – Floating-point: accurate, but faster speed depends on better hardware
The "quality" property sets the encoding quality within a range of 0 to 100, with a default setting of 85.
# 4.1.3 pngdec
This element decodes png images.
For more details, refer to the official documentation at:
https://gstreamer.freedesktop.org/documentation/png/pngdec.html?gi-language=c
# 4.1.3.1 Examples Using gst-launch
This pipeline transcodes a png to jpeg and saves it as a jpeg file.
```txt
gst-launch-1.0 filesrc location="frameP1.png" ! pngdec ! videoconvert ! jpegenc ! filesink location="framePJ1.jpeg"
```
Similarly, png images can be transcoded to tiff, bmp, or raw image formats.
```shell
gst-launch-1.0 filesrc location="frameP1.png" ! pngdec ! videoconvert !
avenc_tiff ! filesink location="framePT1.tiff"
gst-launch-1.0 filesrc location="frameP1.png" ! pngdec ! videoconvert !
avenc_bmp ! filesink location="frameB1.bmp"
gst-launch-1.0 filesrc location="frameP1.png" ! pngdec ! videoconvert ! filesink
location="framePR1.raw"
```
# 4.1.4 pngenc
This element encodes png images.
For more details, refer to the official documentation at:
https://gstreamer.freedesktop.org/documentation/png/pngenc.html?gi-language=c
# 4.1.4.1 Example Using gst-launch
This pipeline encodes the video test pattern to png images and saves them.
```txt
gst-launch-1.0 videotestsrc ! queue ! pngenc ! multifilesink location="frame%d.png"
```
The "compression-level" property sets the PNG compression level within a range of 0 to 9, with a default setting of 6. A higher number creates a smaller file size..
# 4.1.5 gdkpixbufdec
This element decodes images in a video stream using GdkPixbuf.
Note: Only supported on Linux.
For more details, refer to the official documentation at:
https://gstreamer.freedesktop.org/documentation/gdkpixbuf/gdkpixbufdec.html?gi-language=c#gdkpixbufdec-page
# 4.1.5.1 Examples Using gst-launch
These pipelines transcode a tiff or bmp to png and saves it as a png file.
```txt
gst-launch-1.0 filesrc location="frameT1.tiff" ! gdkpixbufdec ! videoconvert ! pngenc ! filesink location="frameTP1.png"
gst-launch-1.0 filesrc location="frameB1.bmp" ! gdkpixbufdec ! videoconvert ! pngenc ! filesink location="frameBP1.png"
```
Similarly, tiff or bmp images can be transcoded to other image formats.
```txt
gst-launch-1.0 filesrc location="frameB1.bmp" ! gdkpixbufdec ! videoconvert ! avenc_tiff ! filesink location="frameBT1.tiff"
gst-launch-1.0 filesrc location="frameT1.tiff" ! gdkpixbufdec ! videoconvert ! avenc_bmp ! filesink location="frameTB1.bmp"
gst-launch-1.0 filesrc location="frameT1.tiff" ! gdkpixbufdec ! videoconvert ! filesink location="frameTR1.raw"
gst-launch-1.0 filesrc location="frameB1.bmp" ! gdkpixbufdec ! videoconvert ! filesink location="frameBR1.raw"
```
# 4.1.6 avenc\_tiff
This element encodes images in tiff format (based on libav).
For more details, refer to the official documentation at:
https://gstreamer.freedesktop.org/documentation/libav/avenc\_tiff.html?gi-language=c#avenc\_tiff-page
# 4.1.6.1 Example Using gst-launch
This pipeline encodes the video test pattern to tiff images and saves them.
```txt
gst-launch-1.0 videotestsrc ! queue ! avenc_tiff ! multifilesink location="frame%d.tiff"
```
# 4.1.7 avdec\_tiff
This element decodes tiff format images (based on libav).
For more details, refer to the official documentation at:
https://gstreamer.freedesktop.org/documentation/libav/avdec\_tiff.html?gi-language=c
Note: It is recommended to use gdkpixbufdec to decode tiff files in Linux.
# 4.1.7.1 Example Using gst-launch
This pipeline transcodes a tiff to jpeg and saves it as a jpeg file.
```txt
gst-launch-1.0 multifilesrc location=frame3.tiff caps=image/tiff stop-index=10 ! avdec_tiff ! videoconvert ! jpegenc ! filesink location=frameT2J.jpeg
```
# 4.1.8 avenc\_bmp
This element encodes images in bmp format (based on libav).
For more details, refer to the official documentation at:
```txt
https://gstreamer.freedesktop.org/documentation/libav/avenc_bmp.html?gi-language=c#avenc_bmp-page
```
# 4.1.8.1 Example Using gst-launch
This pipeline encodes the video test pattern to bmp images and saves them.
```txt
gst-launch-1.0 videotestsrc ! queue ! avenc_bmp ! multifilesink location="frame%d.bmp"
```
# 4.1.9 avdec\_bmp
This element decodes bmp format images (based on libav).
For more details, refer to the official documentation at:
```txt
https://gstreamer.freedesktop.org/documentation/libav/avdec_bmp.html?gi-language=c
```
Note: It is recommended to use gdkpixbufdec to decode tiff files in Linux.
# 4.1.9.1 Example Using gst-launch
This pipeline transcodes a bmp to jpeg and saves it as a jpeg file.
```html
gst-launch-1.0 multifilesrc location=frame.bmp caps=image/bmp stop-index=1 ! avdec_bmp ! videoconvert ! jpegenc ! filesink location=frameB2J.jepg
```
# 4.1.10 videorate
This element takes an incoming stream of timestamped video frames and produces a perfect stream that matches the source pad's frame rate.
The operation is performed by dropping and duplicating frames. No algorithm is used to interpolate frames.
By default the element will simply negotiate the same frame rate on its source and sink pad.
This operation is useful to link to elements that require a perfect stream. Typical examples are formats that do not store timestamps for video frames, but only store a frame rate, like Ogg and AVI.
A conversion to a specific frame rate can be forced by using filtered caps on the source pad.
For more details, refer to the official documentation at:
```txt
https://gstreamer.freedesktop.org/documentation/videorate/index.html?gi-language=c#videorate
```
# 4.1.10.1 Examples Using gst-launch
There are two ways to set the stream frame rate.
1. Directly use caps types to define the properties of the stream. The syntax is:
```txt
<type>[,<property>=<value>]...
```
The supported video types are listed in "List of Defined Media Types" from the GStreamer documentation at: https://gstreamer.freedesktop.org/documentation/plugin-development/advanced/media-types.html?gilanguage=c#table-of-video-types
The following example shows how to directly set the stream frame rate.
```txt
gst-launch-1.0 videotestsrc ! video/x-raw, framerate=25/1 ! xvimagesink
```
This will set the stream frame rate to 25. This frame rate setting method is only supported when the pipeline is generated at the beginning of the stream, meaning there is no opportunity to have two different frame rates in the pipeline. To set two different frame rates in the pipeline, follow the example below.
2. The "videorate" element is used to adjust the frame rate of the video in the pipeline.
For example, the following pipeline has a framerate of 25.
```txt
gst-launch-1.0 videotestsrc ! video/x-raw, framerate=25/1 ! gaussianblur ! videoconvert ! xvimagesink
```
To change the frame rate to 5 before applying xvimagesink, add the videorate element before it. The videorate will change the frame rate to adopt the coming media type setting in its src pad.
```txt
gst-launch-1.0 videotestsrc ! video/x-raw, framerate=25/1 ! gaussianblur ! videorate ! video/x-raw, framerate=5/1 ! videoconvert ! xvimagesink
```
Note: The element ‘xvimagesink’ is only supported on Linux. It is recommended to use the ‘glimagesink’ or ‘d3dvideosink’ elements to display the window on Windows.
# 4.1.11 videoconvert
This element converts from one color space to another (e.g. RGB to YUV). It can also convert between different YUV formats (e.g. I420, NV12, YUY2…) or RGB format arrangements (e.g. RGBA, ARGB, BGRA…).
This is normally the first choice when solving negotiation problems. When not needed, because its upstream and downstream elements can already understand each other, it acts in pass-through mode having minimal impact on performance.
As a general rule, always use videoconvert whenever you use elements whose Caps are unknown at design time, like autovideosink, or that can vary depending on external factors, like decoding a user-provided file.
For more details, refer to the official documentation at:
```txt
https://gstreamer.freedesktop.org/documentation/videoconvert/index.html?gi-language=c#videoconvert-page
```
# 4.1.11.1 Example Using gst-launch
This pipeline outputs a test video generated in YUY2 format in a video window.
```txt
gst-launch-1.0 videotestsrc ! video/x-raw, format=YUY2 ! videoconvert ! xvimagesink
```
If the video sink selected does not support YUY2, videoconvert will automatically convert the video to a format understood by the video sink.
Note: The element ‘xvimagesink’ is only supported on Linux. It is recommended to use the ‘glimagesink’ or ‘d3dvideosink’ elements to display the window on Windows.
# 4.1.12 videoscale
This element resizes video frames. By default the element will try to negotiate to the same size on the source and sinkpad so that no scaling is needed. It is therefore safe to insert this element in a pipeline to get more robust behavior without any cost if no scaling is needed.
This element supports a wide range of color spaces including various YUV and RGB formats and is therefore generally able to operate anywhere in a pipeline.
For more details, refer to the official documentation at:
```txt
https://gstreamer.freedesktop.org/documentation/videoscale/index.html?gi-language=c#videoscale-page
```
# 4.1.12.1 Example Using gst-launch
This pipeline resizes the frames from videotestsrc to 720x576 and displays it via xvimagesink.
```javascript
gst-launch-1.0 videotestsrc ! videoscale ! video/x-raw,width=720,height=576 ! xvimagesink
```
Note: The element ‘xvimagesink’ is only supported on Linux. It is recommended to use the ‘glimagesink’ or ‘d3dvideosink’ elements to display the window on Windows.
# 4.1.13 videocrop
This element crops video frames, meaning it can remove parts of the picture on the left, right, top or bottom of the picture and output a smaller picture with the unwanted parts removed.
For more details, refer to the official documentation at:
```txt
https://gstreamer.freedesktop.org/documentation/videocrop/videocrop.html?gi-language=c#videocrop
```
Note: No special effort is made to handle chroma-subsampled formats in the case of odd-valued cropping and compensation for sub-unit chroma plane shifts in the case where the left or top property is set to an odd number.
# 4.1.13.1 Example Using gst-launch
```txt
gst-launch-1.0 videotestsrc ! videocrop top=42 left=1 right=4 bottom=0 ! xvimagesink
```
Note: The element ‘xvimagesink’ is only supported on Linux. It is recommended to use the ‘glimagesink’ or ‘d3dvideosink’ elements to display the window on Windows.
# 4.1.14 x264enc
This element encodes raw video into H264 compressed data, otherwise known as MPEG-4 AVC (Advanced Video Codec).
For more details, refer to the official documentation at:
https://gstreamer.freedesktop.org/documentation/x264/?gi-language=c
# 4.1.14.1 Example Using gst-launch
This pipeline encodes a test video source to H264 using fixed quantization, and muxes it in a Matroska container.
```txt
gst-launch-1.0 videotestsrc num-buffers=1000 ! x264enc pass=quant ! matroskamux ! filesink location=x264enc.mkv
```
Note: Some settings, including the default settings, may lead to considerable latency (i.e. frame buffering) in the encoder. This may cause problems with pipeline stalling in non-trivial pipelines, because the encoder latency is often considerably higher than the default size of a simple queue element. Such problems are caused by one of the queues in the other non-x264enc streams/branches filling up and blocking upstream. They can be fixed by relaxing the default time/size/buffer limits on the queue elements in the non-x264 branches, or using a (single) multiqueue element for all branches. Another workaround for this problem is setting the tune=zerolatency property, but this will affect overall encoding quality so may not be appropriate for every use case.
# 4.1.15 x265enc
This element encodes raw video into H265 compressed data.
Note: Only supported on Linux.
For more details, refer to the official documentation at:
https://gstreamer.freedesktop.org/documentation/x265/?gi-language=c
# 4.1.15.1 Example Using gst-launch
This pipeline encodes a test video source to H265 and muxes it in a Matroska container.
```txt
gst-launch-1.0 videotestsrc num-buffers=2000 ! x265enc ! h265parse ! matroskamux ! filesink location=x265enc.mkv
```
# 4.1.16 avdec\_h264
This element is a libav h264 decoder.
For more details, refer to the official documentation at:
https://gstreamer.freedesktop.org/documentation/libav/avdec\_h264.html?gi-language=c
# 4.1.16.1 Example Using gst-launch
This pipeline decodes an H.264 video file.
```txt
gst-launch-1.0 filesrc location=sample_1080p_h264.mp4 ! qtdemux ! h264parse ! queue ! avdec_h264 ! xvimagesink
```
Note: The element ‘xvimagesink’ is only supported on Linux. It is recommended to use the ‘glimagesink’ or ‘d3dvideosink’ elements to display the window on Windows.
# 4.1.17 avdec\_h265
This element is a libav HEVC decoder.
For more details, refer to the official documentation at:
https://gstreamer.freedesktop.org/documentation/libav/avdec\_h265.html?gi-language=c
# 4.1.17.1 Example Using gst-launch
This pipeline decodes an HEVC video file.
```txt
gst-launch-1.0 filesrc location=4K_h265.mkv ! matroskademux ! h265parse ! avdec_h265 ! videoconvert ! xvimagesink sync=false
```
Note: The element ‘xvimagesink’ is only supported on Linux. It is recommended to use the ‘glimagesink’ or ‘d3dvideosink’ elements to display the window on Windows.
# 4.1.18 msdkh264enc
This element is an Intel® Media SDK H.264 encoder.
# Notes:
1. Only supported on Intel platforms.
2. Refer to the EVA SDK Installation Guide to install OpenVino toolkits and Media SDK for GStreamer before using the MSDK plugin.
# 4.1.18.1 Example Using gst-launch
This pipeline encodes the video test pattern as H.264 image and saves it as an mkv file.
```txt
gst-launch-1.0 videotestsrc num-buffers=1000 ! msdkh264enc ! h264parse ! matroskamux ! filesink location=msdkh264enc.mkv
```
# 4.1.18.2 Hierarchy
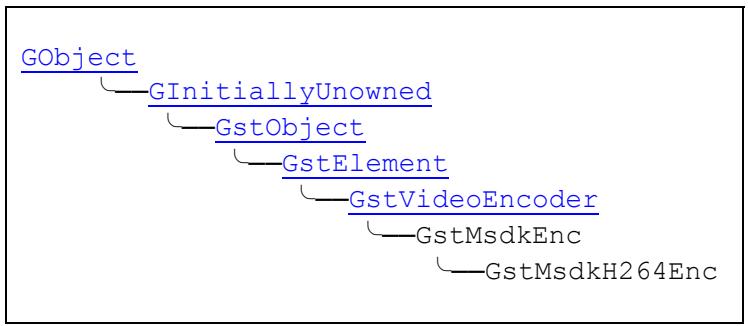
# 4.1.18.3 Pad Templates
sink
```txt
video/x-raw:
format: { (string)NV12, (string)I420, (string)YV12, (string)YUY2, (string)UYVY, (string)BGRA }
framerate: [ 0/1, 2147483647/1 ]
width: [ 16, 2147483647 ]
height: [ 16, 2147483647 ]
interlace-mode: progressive
```
Presence – always
Direction – sink
src
```yaml
video/x-h264:
framerate: [ 0/1, 2147483647/1 ]
width: [ 1, 2147483647 ]
height: [ 1, 2147483647 ]
stream-format: byte-stream
alignment: au
profile: { (string)high, (string)main, (string)baseline, (string)constrained-baseline }
```
Presence – always
Direction – src
# 4.1.18.4 Properties
hardware
```txt
"hardware" gboolean
```
Enables hardware encoders
Flags: Read, Write
Default value: True
async-depth
```txt
"async-depth" guint
```
Depth of asynchronous pipeline. Range: 1 to 20
Flags: Read, Write
Default value: 4
# target-usage
```txt
"target-usage" guint
```
1: Best quality, 4: Balanced, 7: Best speed. Range: 1 to 7
Flags: Read, Write
Default value: 4
# rate-control
```txt
"rate-control" GstMsdkEncRateControl
```
Rate control method
Flags: Read, Write
Default value: cbr (1)
# GstMsdkEncRateControl
Members
```txt
cbr (1) – Constant Bitrate
vbr (2) – Variable Bitrate
cqp (3) – Constant Quantizer
avbr (4) – Average Bitrate
la_vbr (8) – VBR with look ahead (Non HRD compliant)
icq (9) – Intelligent CQP
vcm (10) – Video Conferencing Mode (Non HRD compliant)
la_icq (11) – Intelligent CQP with LA (Non HRD compliant)
la_hrd (13) – HRD compliant LA
qvbr (14) – VBR with CQP
```
# bitrate
```txt
"bitrate" guint
```
Bitrate in kbit/sec. Range: 1 to 2048000
Flags: Read, Write
Default value: 2048
# max-frame-size
```txt
"max-frame-size" guint
```
Maximum possible size (kb) of any compressed frames (0: auto-calculate). Range: 0 to 65535
Flags: Read, Write
Default value: 0
# max-vbv-bitrate
“max-vbv-bitrate” guint
Maximum bitrate (kbit/sec) at which data enters the video buffering verifier (0: auto-calculate). Range: 0 to 65535
Flags: Read, Write
Default value: 0
# accuracy
“accuracy” guint
The AVBR accuracy per one tenth of one percent. Range: 0 to 65535
Flags: Read, Write
Default value: 0
# convergence
“convergence” guint
The AVBR convergence per 100 frames. Range: 0 to 65535
Flags: Read, Write
Default value: 0
# rc-lookahead
“rc-lookahead” guint
Number of frames to look ahead for rate control. Range: 0 to 100
Flags: Read, Write
Default value: 0
# qpi
“qpi” guint
Constant quantizer for I frames (0 unlimited). Also used as ICQQuality or QVBRQuality for different RateControl methods. Range: 0 to 51
Flags: Read, Write
Default value: 0
# qpp
“qpp” guint
Constant quantizer for P frames (0 unlimited). Range: 0 to 51
Flags: Read, Write
Default value: 0
# qpb
“qpb” guint
Constant quantizer for B frames (0 unlimited) Range: 0 to 51
Flags: Read, Write
Default value: 0
# gop-size
“gop-size” guint
GOP Size. Range: 0 to 2147483647
Flags: Read, Write
Default value: 256
# ref-frames
“ref-frames” guint
Number of reference frames. Range: 0 to 2147483647
Flags: Read, Write
Default value: 1
# i-frames
“i-frames” guint
Number of I frames between IDR frames. Range: 0 to 2147483647
Flags: Read, Write
Default value: 0
# b-frames
“b-frames” guint
Number of B frames between I and P frames. Range: 0 to 2147483647
Flags: Read, Write
Default value: 0
# num-slices
“num-slices” guint
Number of slices per frame. Zero tells the encoder to choose any slice partitioning allowed by the codec standard. Range: 0 to 2147483647
Flags: Read, Write
Default value: 0
# mbbrc
“mbbrc” GstMsdkEncMbBitrateControl
Macroblock level bitrate control
Flags: Read, Write
Default value: 32, "off"
# GstMsdkEncMbBitrateControl
# Members
(0): auto - SDK decides what to do
(32): off - Disable Macroblock level bit rate control
(16): on - Enable Macroblock level bit rate control
# i-adapt
“i-adapt” GstMsdkEncAdaptiveI
Adaptive I-Frame Insertion control
Flags: Read, Write
Default value: 32, "off"
# GstMsdkEncAdaptiveI
# Members
(0): auto - SDK decides what to do
(32): off - Disable Adaptive I frame insertion
(16): on - Enable Adaptive I frame insertion
# b-adapt
“b-adapt” GstMsdkEncAdaptiveB
Adaptive B-Frame Insertion control
Flags: Read, Write
Default value: 32, "off"
# GstMsdkEncAdaptiveB
# Members
(0): auto - SDK decides what to do
(32): off - Disable Adaptive B Frame insertion
(16): on - Enable Adaptive B Frame insertion
# cabac
“cabac” gboolean
Enable CABAC entropy coding
Flags: Read, Write
Default value: true
# low-power
“low-power” gboolean
Enable low power mode
Flags: Read, Write
Default value: false
# frame-packing
“frame-packing” GstMsdkH264EncFramePacking
Set frame packing mode for stereoscopic content.
Flags: Read, Write
Default value: Default: -1, "none"
# GstMsdkH264EncFramePacking
# Members
(-1): none (default)
(3): side-by-side
(7): top-bottom
# rc-lookahead-ds
“rc-lookahead-ds” GstMsdkEncRCLookAheadDownsampling
Downsampling mode in look ahead bitrate control.
Flags: Read, Write
Default value: 0, "default"
# GstMsdkEncRCLookAheadDownsampling
# Members
(0): default - SDK decides what to do
(1): off - No downsampling
(2): 2x - Downsample 2 times before estimation
(3): 4x - Downsample 4 times before estimation
# trellis
“trellis” GstMsdkEncTrellisQuantization
Enable Trellis Quantization
Flags: Read, Write
Default value: 0x00000000, "None"
# GstMsdkEncTrellisQuantization
Members
(0x00000000): None - Disable for all frames
(0x00000002): i - Enable for I frames
(0x00000004): p - Enable for P frames
(0x00000008): b - Enable for B frames
max-slice-size
```txt
"max-slice-size" guint
```
Maximum slice size in bytes (if enabled MSDK will ignore the control over num-slices). Range: 0 to 4294967295
Flags: Read, Write
Default value: 0
b-pyramid
```txt
"b-pyramid" gboolean
```
Enable B-Pyramid reference structure
Flags: Read, Write
Default value: false
# 4.1.19 msdkh265enc
This element is an Intel® Media SDK H.265 encoder.
# Notes:
1. Only supported on Intel platforms.
2. Refer to the EVA SDK Installation Guide to install OpenVino toolkits and Media SDK for GStreamer before using the MSDK plugin.
# 4.1.19.1 Example Using gst-launch
This pipeline encodes the video test pattern as an H.265 image and saves it as an mkv file.
```txt
gst-launch-1.0 videotestsrc num-buffers=1000 ! msdkh265enc ! h265parse ! matroskamux ! filesink location=msdkh265enc.mkv
```
# 4.1.19.2 Hierarchy
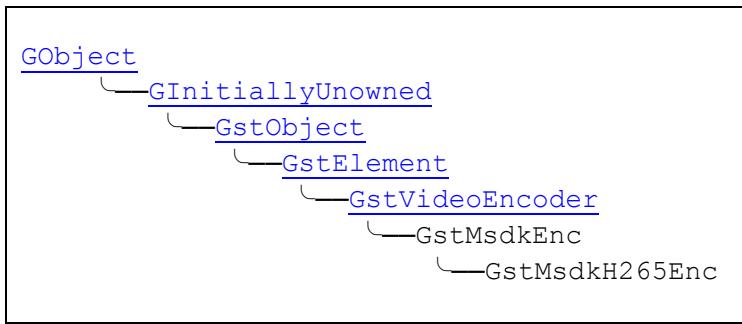
# 4.1.19.3 Pad Templates
sink
```txt
video/x-raw:
format: { (string)NV12, (string)I420, (string)YV12, (string)YUY2, (string)UYVY, (string)BGRA }
framerate: [ 0/1, 2147483647/1 ]
width: [ 16, 2147483647 ]
height: [ 16, 2147483647 ]
interlace-mode: progressive
```
Presence – always
Direction – sink
src
```yaml
video/x-h265:
framerate: [ 0/1, 2147483647/1 ]
width: [ 1, 2147483647 ]
height: [ 1, 2147483647 ]
stream-format: byte-stream
alignment: au
profile: main
```
Presence – always
Direction – src
# 4.1.19.4 Properties
hardware
```txt
"hardware" gboolean
```
Enables hardware encoders
Flags: Read, Write
Default value: True
async-depth
```txt
"async-depth" guint
```
Depth of asynchronous pipeline. Range: 1 to 20
Flags: Read, Write
Default value: 4
# target-usage
“target-usage” guint
1: Best quality, 4: Balanced, 7: Best speed. Range: 1 to 7
Flags: Read, Write
Default value: 4
# rate-control
“rate-control” GstMsdkEncRateControl
Rate control method
Flags: Read, Write
Default value: cbr (1)
# GstMsdkEncRateControl
# Members
```txt
cbr (1) – Constant Bitrate
vbr (2) – Variable Bitrate
cqp (3) – Constant Quantizer
avbr (4) – Average Bitrate
la_vbr (8) – VBR with look ahead (Non HRD compliant)
icq (9) – Intelligent CQP
vcm (10) – Video Conferencing Mode (Non HRD compliant)
la_icq (11) – Intelligent CQP with LA (Non HRD compliant)
la_hrd (13) – HRD compliant LA
qvbr (14) – VBR with CQP
```
# bitrate
“bitrate” guint
Bitrate in kbit/sec. Range: 1 to 2048000
Flags: Read, Write
Default value: 2048
# max-frame-size
“max-frame-size” guint
Maximum possible size (kb) of any compressed frames (0: auto-calculate). Range: 0 to 65535
Flags: Read, Write
Default value: 0
# max-vbv-bitrate
“max-vbv-bitrate” guint
Maximum bitrate (kbit/sec) at which data enters the video buffering verifier (0: auto-calculate). Range: 0 to 65535
Flags: Read, Write
Default value: 0
# accuracy
“accuracy” guint
The AVBR accuracy per one tenth of one percent. Range: 0 to 65535
Flags: Read, Write
Default value: 0
# convergence
“convergence” guint
The AVBR convergence per 100 frames. Range: 0 to 65535
Flags: Read, Write
Default value: 0
# rc-lookahead
“rc-lookahead” guint
Number of frames to look ahead for rate control. Range: 0 to 100
Flags: Read, Write
Default value: 0
# qpi
“qpi” guint
Constant quantizer for I frames (0 unlimited). Also used as ICQQuality or QVBRQuality for different RateControl methods. Range: 0 to 51
Flags: Read, Write
Default value: 0
# qpp
“qpp” guint
Constant quantizer for P frames (0 unlimited). Range: 0 to 51
Flags: Read, Write
Default value: 0
# qpb
“qpb” guint
Constant quantizer for B frames (0 unlimited). Range: 0 to 51
Flags: Read, Write
Default value: 0
# gop-size
“gop-size” guint
GOP Size. Range: 0 to 2147483647
Flags: Read, Write
Default value: 256
# ref-frames
“ref-frames” guint
Number of reference frames. Range: 0 to 2147483647
Flags: Read, Write
Default value: 1
# i-frames
“i-frames” guint
Number of I frames between IDR frames. Range: 0 to 2147483647
Flags: Read, Write
Default value: 0
# b-frames
“b-frames” guint
Number of B frames between I and P frames. Range: 0 to 2147483647
Flags: Read, Write
Default value: 0
# 4.1.20 msdkh264dec
This element is an Intel® Media SDK H.264 decoder.
# Notes:
1. Only supported on Intel platforms.
2. Refer to the EVA SDK Installation Guide to install OpenVino toolkits and Media SDK for GStreamer before using the MSDK plugin.
# 4.1.20.1 Example Using gst-launch
This pipeline decodes and displays an H.264 format image.
```txt
gst-launch-1.0 filesrc location=sample_720p.h264 ! h264parse ! msdkh264dec ! videoconvert ! xvimagesink
```
Note: The element ‘xvimagesink’ is only supported on Linux. It is recommended to use the ‘glimagesink’ or ‘d3dvideosink’ elements to display the window on Windows.
# 4.1.20.2 Hierarchy
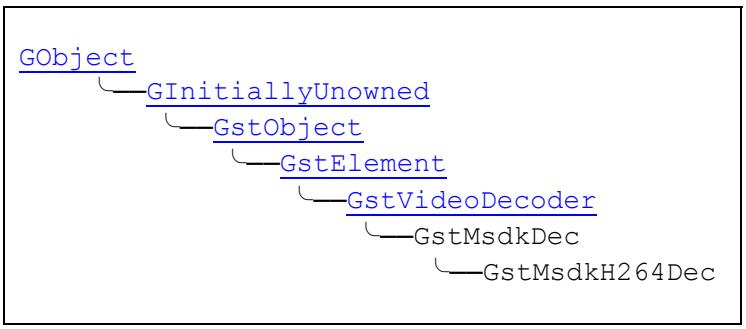
# 4.1.20.3 Pad Templates
sink
```txt
video/x-h264:
width: [1, 2147483647]
height: [1, 2147483647]
stream-format: byte-stream
alignment: au
profile: { (string)high, (string)main, (string)baseline, (string)constrained-baseline }
```
Presence – always
Direction – sink
src
```txt
video/x-raw:
format: { (string)NV12 }
framerate: [ 0/1, 2147483647/1 ]
width: [ 16, 2147483647 ]
height: [ 16, 2147483647 ]
interlace-mode: progressive
```
Presence – always
Direction – src
# 4.1.20.4 Properties
# hardware
```txt
"hardware" gboolean
```
Enables hardware decoders
Flags: Read, Write
Default value: True
# async-depth
```txt
"async-depth" guint
```
Depth of asynchronous pipeline. Range: 1 to 20
Flags: Read, Write
Default value: 4
# 4.1.21 msdkh265dec
This element is an Intel® Media SDK H.265 decoder.
# Notes:
1. Only supported on Intel platforms.
2. Refer to the EVA SDK Installation Guide to install OpenVino toolkits and Media SDK for GStreamer before using the MSDK plugin.
# 4.1.21.1 Example Using gst-launch
This pipeline decodes and displays an H.265 format image.
```txt
gst-launch-1.0 filesrc location=4K_h265.mkv ! matroskademux ! h265parse ! avdec_h265 ! videoconvert ! xvimagesink sync=false
```
Note: The element ‘xvimagesink’ is only supported on Linux. It is recommended to use the ‘glimagesink’ or ‘d3dvideosink’ elements to display the window on Windows.
# 4.1.21.2 Hierarchy
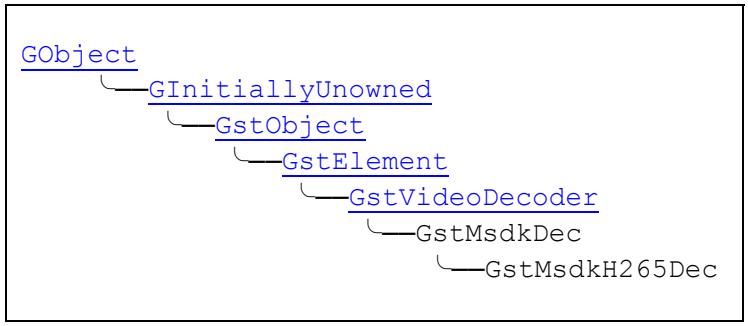
# 4.1.21.3 Pad Templates
sink
```yaml
video/x-h265:
width: [1, 2147483647]
height: [1, 2147483647]
stream-format: byte-stream
alignment: au
profile: main
```
Presence – always
Direction – sink
src
```txt
video/x-raw:
format: { (string)NV12 }
framerate: [ 0/1, 2147483647/1 ]
width: [ 16, 2147483647 ]
height: [ 16, 2147483647 ]
interlace-mode: progressive
```
Presence – always
Direction – src
# 4.1.21.4 Properties
hardware
```txt
"hardware" gboolean
```
Enables hardware decoders.
Flags: Read, Write
Default value: True
async-depth
```txt
"async-depth" guint
```
Depth of asynchronous pipeline. Range: 1 to 20
Flags: Read, Write
Default value: 4
# 4.1.22 admetawriter
Writes admeta data to stream with device information read from a packed text file. Also provides the ability to count frames on an input stream to add to the admeta frame id field.
Note: This must be the first plugin to add metadata to the stream, so it must be used before any other plugins that add to admeta data (admetadrawer, admetadebuger, advino, adrt)
# 4.1.22.1 Example Using gst-launch
This pipeline decodes and displays an H.265 format image.
```txt
gst-launch-1.0 videotestsrc ! admetawriter devinfo=dev1.txt count-frame=TRUE !
videoconvert ! ximagesink
```
Note: The element ‘xvimagesink’ is only supported on Linux. It is recommended to use the ‘glimagesink’ or ‘d3dvideosink’ elements to display the window on Windows.
# 4.1.22.2 Hierarchy
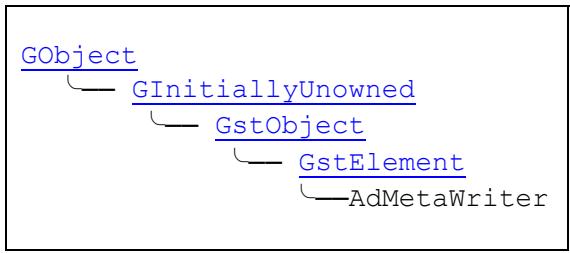
# 4.1.22.3 Pad Templates
sink
```yaml
video/x-raw:
format: {RGBx, xRGB, BGRx, xBGR, RGBA, ARGB, BGRA, ABGR, RGB, BGR,
AYUV, YUY2, YVYU, UYVY, I420, YV12, RGB16, RGB15, GRAY8, NV12, NV21, GRAY16_LE,
GRAY16_BE}
width: [ 0, 2147483647 ]
height: [ 0, 2147483647 ]
framerate: [ 0/1, 2147483647/1 ]
```
Presence – always
Direction – sink
src
```yaml
video/x-raw:
format: {RGBx, xRGB, BGRx, xBGR, RGBA, ARGB, BGRA, ABGR, RGB, BGR,
AYUV, YUY2, YVYU, UYVY, I420, YV12, RGB16, RGB15, GRAY8, NV12, NV21, GRAY16_LE,
GRAY16_BE}
width: [ 0, 2147483647 ]
height: [ 0, 2147483647 ]
framerate: [ 0/1, 2147483647/1 ]
```
Presence – always
Direction – sink
# 4.1.22.4 Properties
devinfo
```txt
"devinfo" gchararray
```
Provides the location to the device information text file. The format of the device information text file is as follows.
```csv
0
0
10.9.2.1.2
8088
0
ADLINK2
0
0
0
0
0
0
0
```
The following table lists the data definitions represented by each line of the device information text file.
| Element Name | Plugin Name | Vendor | Linux/ARM Version | Windows Version | Description |
| adtrans_classifier | adtrans | ADLINK | 3.5 | 3.5 | ADLINK inference's classification translator |
| adtrans_ssd | adtrans | ADLINK | 3.5 | 3.5 | ADLINK inference's ssd translator |
| adtrans_segment | adtrans | ADLINK | 3.5 | 3.5 | ADLINK inference's segmentation translator |
| adtrans_yolo | adtrans | ADLINK | 3.5 | 3.5 | ADLINK inference's yolo translator |
| adtrans_fcn | adtrans | ADLINK | 3.5 | 3.5 | ADLINK inference's fcn translator |
| adtrans_openpose_py | python | ADLINK | 3.5 | 3.5 | ADLINK inference's openpose translator |
| adrt | adrt | ADLINK | 3.5 | 3.5 | Initializes TensorRT inference engine plugins to infer a data stream |
| advino | advino | ADLINK | 3.5 | 3.5 | Initializes OpenVINO inference engine plugins to infer a data stream |
| advideobatch | adbatch | ADLINK | 3.5 | 3.5 | Batch inputs video streams together |
| adsplitbatch | adbatch | ADLINK | 3.5 | 3.5 | Splits batched streams into a single stream |
| adonnx | python | ADLINK | 3.5 | 3.5 | Initializes OnnxRuntime inference engine plugins to infer a data stream |
| adtrans_tinyyolov2_py | python | ADLINK | 3.5 | 3.5 | ADLINK onnxruntime inference's tiny yolov2 translator |
| adtrans_classifier_AZ_py | python | ADLINK | 3.5 | 3.5 | ADLINK onnxruntime inference's classification translator |
# 5.1 Element Descriptions
This section describes each element of the image analytic plugin in greater detail.
# 5.1.1 adtrans\_classifier
This element implements a buffer list chain function. Previous elements should push a buffer list into this element.
The last buffer in the list will be seen as an inference result.
# 5.1.1.1 Examples Using gst-launch
The following pipeline translates the OpenVINO inference result using the classification type model into a humanreadable format.
```txt
gst-launch-1.0 videotestsrc ! advino model=classification.xml device=GPU ! adtrans_classifier class-num=1000 label=label.txt ! ximagesink
```
The following pipeline translates the TensorRT inference result using the classification type model into a humanreadable format.
```txt
gst-launch-1.0 videotestsrc ! adrt model=mobilenetv2.engine batch=1 scale=0.017 ! adtrans_classifier class-num=1000 label=labels.txt ! ximagesink
```
Note: The element ‘xvimagesink’ is only supported on Linux. It is recommended to use the ‘glimagesink’ or ‘d3dvideosink’ elements to display the window on Windows.
# 5.1.1.2 Hierarchy
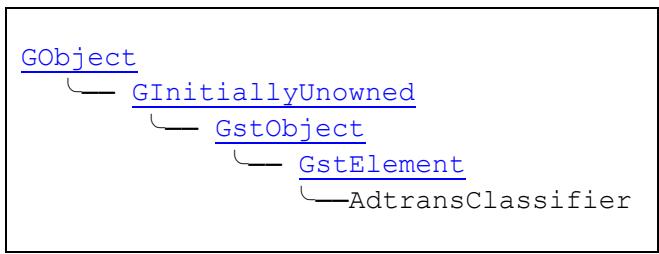
# 5.1.1.3 Pad Templates
sink
ANY
Presence – always
Direction – sink
src
ANY
Presence – always
Direction – src
# 5.1.1.4 Properties
# batch-num
```txt
"batch-num" gint
```
The number of the deep learning model batches. Range: 1 to 256
Flags: Read, Write
Default value: 1
# class-num
```txt
"class-num" gint
```
The classification number. Range: 1000 to 65535
Flags: Read, Write
Default value: 1000
# label
```txt
"label" gchararray
```
The deep learning model label.
Flags: Read, Write
Default value: NULL
# 5.1.2 adtrans\_ssd
This element implements a buffer list chain function. Previous elements should push a buffer list into this element. The last buffer in the list will be seen as an inference result.
# 5.1.2.1 Examples Using gst-launch
The following pipeline translates the OpenVINO inference result using the ssd type model into a human-readable format.
```txt
gst-launch-1.0 videotestsrc ! advino model=ssd.xml device=GPU ! adtrans_ssd max-count=200 label=label.txt ! ximagesink
```
The following pipeline translates the TensorRT inference result using the ssd type model into a human-readable format.
```html
gst-launch-1.0 videotestsrc ! adrt model=ssd_mobilenetv2_tx2.engine batch=1 device=0 scale=0.0078 mean="0 0 0" ! adtrans_ssd max-count=200 label=label.txt ! ximagesink
```
Note: The element ‘xvimagesink’ is only supported on Linux. It is recommended to use the ‘glimagesink’ or ‘d3dvideosink’ elements to display the window on Windows.
# 5.1.2.2 Hierarchy
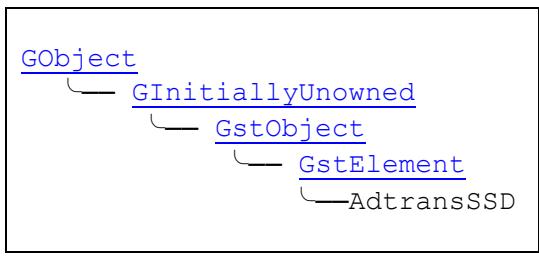
# 5.1.2.3 Pad Templates
sink
ANY
Presence – always
Direction – sink
src
ANY
Presence – always
Direction – src
# 5.1.2.4 Properties
# batch-num
“batch-num” gint
The number of the deep learning model batch. Range: 1 to 256
Flags: Read, Write
Default value: 1
# max-count
“max-count” gint
The maximum count of the SSD results. Range: 1 to 65535
Flags: Read, Write
Default value: 200
# threshold
“threshold” gfloat
The threshold of the inference result. Range: 0 to 1
Flags: Read, Write
Default value: 0.8
# label
```txt
"label" gchararray
```
The deep learning model label.
Flags: Read, Write
Default value: NULL
# 5.1.3 adtrans\_segment
This element implements a buffer list chain function. Previous elements should push a buffer list into this element. The last buffer in the list will be seen as an inference result.
# 5.1.3.1 Examples Using gst-launch
The following pipeline translates the OpenVINO inference result using the segmentation type model into a humanreadable format.
```txt
gst-launch-1.0 videotestsrc ! advino model=segment.xml device=GPU !
adtrans_segment blob-height=1024 blob-width=2048 only-max-prob=true ! ximagesink
```
The following pipeline translates the TensorRT inference result using the segmentation type model with fcn topology into a human-readable format.
```txt
gst-launch-1.0 videotestsrc ! adrt model=road.engine scale=1.0 mean="0 0 0" device=0 batch=1 ! adtrans_segment class-num=4 blob-height=512 blob-width=896 ! ximagesink
```
Note: The element ‘xvimagesink’ is only supported on Linux. It is recommended to use the ‘glimagesink’ or ‘d3dvideosink’ elements to display the window on Windows.
# 5.1.3.2 Hierarchy
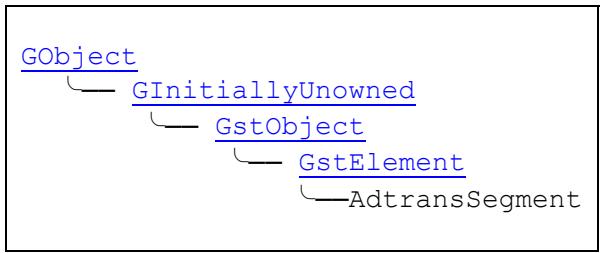
# 5.1.3.3 Pad Templates
sink
ANY
Presence – always
Direction – sink
src
ANY
Presence – always
Direction – src
# 5.1.3.4 Properties
# batch-num
“batch-num” gint
The batch number of the deep learning model. Range: 1 to 256
Flags: Read, Write
Default value: 1
# class-num
“class-num” gint
The class number of the deep learning model. Range: 1 to 65535
Flags: Read, Write
Default value: 1
# blob-width
“blob-width” gint
The blob width of the deep learning inference result. Range: 1 to 65535
Flags: Read, Write
Default value: 640
# blob-height
“blob-height” gint
The blob height of the deep learning inference result. Range: 1 to 65535
Flags: Read, Write
Default value: 640
# only-max-prob
“only-max-prob” gboolean
Keep the remaining maximum probability class of the Inference result. If this is true, the element will ignore the class-num property.
Flags: Read, Write
Default value: false
# label
“label” gchararray
The deep learning model label.
Flags: Read, Write
Default value: NULL
# 5.1.4 adtrans\_yolo
This element implements a buffer list chain function. Previous elements should push a buffer list into this element. The last buffer in the list will be seen as an inference result.
# 5.1.4.1 Examples Using gst-launch
The following pipeline translates the OpenVINO inference result using the yolov3 type model into a humanreadable format.
```txt
gst-launch-1.0 videotestsrc ! advino model=yolov3.xml device=GPU ! adtran_yolo label=yolo_VINO_labels.txt mask="(3,4,5),(0,1,2),(6,7,8)" blob-size=26,52,13 input-width=416 input-height=416 ! ximagesink
```
The following pipeline translates the TensorRT inference result using the detection type model with yolov3 topology into a human-readable format.
```txt
gst-launch-1.0 videotestsrc ! adrt model=yolov3_608_tx2.engine scale=0.004 mean="0 0 0" device=0 batch=1 ! adtran_yolo label=yolo_RT_labels.txt blob-size="13,26,52" mask="(6,7,8),(3,4,5),(0,1,2)" ! ximagesink
```
Note: The element ‘xvimagesink’ is only supported on Linux. It is recommended to use the ‘glimagesink’ or ‘d3dvideosink’ elements to display the window on Windows.
# 5.1.4.2 Hierarchy
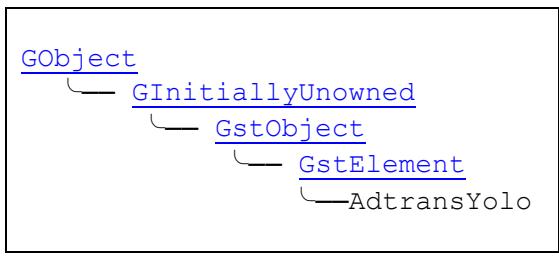
# 5.1.4.3 Pad Templates
sink
ANY
Presence – always
Direction – sink
src
ANY
Presence – always
Direction – src
# 5.1.4.4 Properties
# batch-num
“batch-num” gint
The batch number of the deep learning model. Range: 1 to 256
Flags: Read, Write
Default value: 1
# class-num
“class-num” gint
The class number of the deep learning model. Range: 1 to 65535
Flags: Read, Write
Default value: 80
# blob-size
“blob-size” gchararray
Inference output blob's output width and height. You can use commas to define multiple output blob sizes. For example: '52,26,13' indicates three output blob sizes. You can also define blob sizes by WxH, for example: '26x42,52x68,13x19'
Flags: Read, Write
Default value: "52,26,13"
# mask
“mask” gchararray
Yolo mask
Flags: Read, Write
Default value: "(0,1,2),(3,4,5),(6,7,8)"
# anchor
“anchor” gchararray
Yolo anchor
Flags: Read, Write
Default value: "(10,13),(16,30),(33,23),(30,61),(62,45),(59,119),(116,90),(156,198),(373,326)"
# input-width
“input-width” gint
Input width of image. Range: 1 to 65535
Flags: Read, Write
Default value: 416
# input-height
“input-height” gint
Input height of image. Range: 1 to 65535
Flags: Read, Write
Default value: 416
# threshold
“threshold” gfloat
The threshold of the inference result. Range: 0 to 1
Flags: Read, Write
Default value: 0.8
# label
“label” gchararray
The deep learning model label.
Flags: Read, Write
Default value: NULL
# use-sigmoid
```txt
"use-sigmoid" gboolean
```
Sets whether to apply sigmoid function to output of model. Set to False when use OpenVINO.
Flags: Read / Write
Default value: false
# 5.1.5 adtrans\_fcn
This element implements a buffer list chain function. Previous elements should push a buffer list into this element. The last buffer the list will be seen as an inference result.
# 5.1.5.1 Example Using gst-launch
The following pipeline translates the TensorRT inference result using the fcn type model into a human-readable format.
```txt
gst-launch-1.0 videotestsrc ! adrt model=FCN-Alexnet-Cityscapes-SD_tx2.engine scale=1.0 mean="0 0 0" device=0 batch=1 ! adtrans_fcn class-num=21 blob-height=10 blob-width=26 input-width=1024 input-height=512! ximagesink
```
Note: The element ‘xvimagesink’ is only supported on Linux. It is recommended to use the ‘glimagesink’ or ‘d3dvideosink’ elements to display the window on Windows.
# 5.1.5.2 Hierarchy
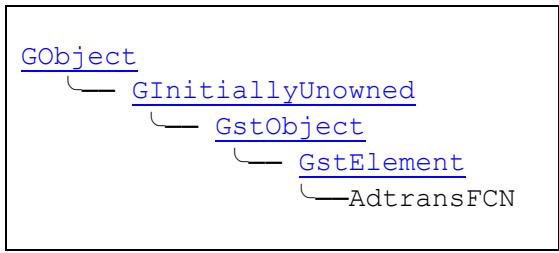
# 5.1.5.3 Pad Templates
sink
ANY
Presence – always
Direction – sink
src
ANY
Presence – always
Direction – src
# 5.1.5.4 Properties
# batch-num
“batch-num” gint
The batch number of the deep learning model. Range: 1 to 256
Flags: Read, Write
Default value: 1
# class-num
“class-num” gint
The class number of the FCN deep learning model. Range: 1 to 65535
Flags: Read, Write
Default value: 21
# input-width
“input-width” gint
The FCN deep learning model input width. Range: 1 to 65535
Flags: Read, Write
Default value: 1024
# input-height
“input-height” gint
The FCN deep learning model input height. Range: 1 to 65535
Flags: Read, Write
Default value: 512
# blob-width
“blob-width” gint
The FCN inference result blob width. Range: 1 to 65535
Flags: Read, Write
Default value: 26
# blob-height
“blob-height” gint
The FCN inference result blob height. Range: 1 to 65535
Flags: Read, Write
Default value: 10
# label
```txt
"label" gchararray
```
The deep learning model label.
Flags: Read, Write
Default value: NULL
# 5.1.6 adtrans\_openpose\_py
This element implements a buffer list chain function. Previous elements should push a buffer list into this element. The last buffer in the list will be seen as an inference result.
# 5.1.6.1 Example Using gst-launch
The following pipeline translates the TensorRT inference result using the pose estimation model into a humanreadable format. Used mode reference at https://github.com/Daniil-Osokin/lightweight-human-poseestimation.pytorch.
```txt
gst-launch-1.0 videotestsrc ! adrt model=pose-b1.engine scale=0.0039 mean="128 128 128" ! adtrans_openpose_py blob-size=' (19,32,57), (38,32,57)' input-height=256 input-width=456 ! ximagesink
```
Note: The element ‘xvimagesink’ is only supported on Linux. It is recommended to use the ‘glimagesink’ or ‘d3dvideosink’ elements to display the window on Windows.
# 5.1.6.2 Hierarchy
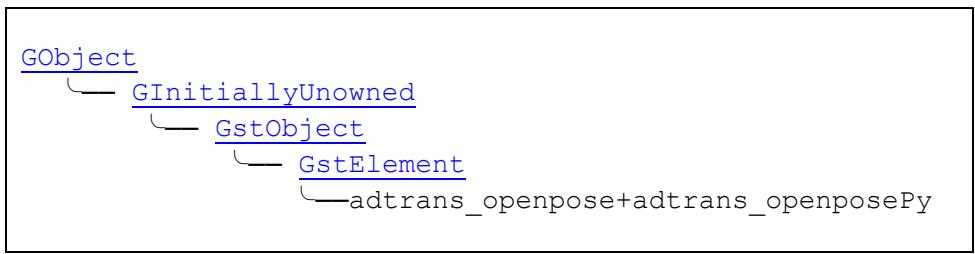
# 5.1.6.3 Pad Templates
sink
ANY
Presence – always
Direction – sink
src
ANY
Presence – always
Direction – src
# 5.1.6.4 Properties
# batch-num
“batch-num” gint
The number of the deep learning model batch. Range: 1 to 256
Flags: Read, Write
Default value: 1
# blob-size
“blob-size” gchararry
The inference output blob's output width and height. You can use commas to define multiple output blob sizes. For example: '52,26,13' indicates three output blob size.s You can also define blob sizes by WxH, for example: '26x42,52x68,13x19'
Flags: Read, Write
Default value: NULL
# input-width
“input-width” gint
Input width of the pose estimation deep learning model. Range: 1 to 65535
Flags: Read, Write
Default value: 416
# input-height
“input-height” gint
Input hieght of the pose estimation deep learning model. Range: 1 to 65535
Flags: Read, Write
Default value: 416
# label-file
“label-file” gchararray
The deep learning model label.
Flags: Read, Write
Default value: NULL
# threshold
“threshold” gfloat
The inference result threshold. Range: 0 to 1
Flags: Read, Write
Default value: 0.8
# 5.1.7 adrt
Initializes the TensorRT inference engine plugins to infer a data stream with the following parameters.
1. TensorRT optimized engine model path
2. Scale (must be a float number)
3. Mean (must be a string of 3 numbers representing a vector of mean values used in training)
For more details about converting a model for TensorRT, refer to the chapter Convert for TensorRT Model.
# Note:
• Only supported on NVIDIA platforms.
• This element must connect with adtranslator plugins to handle inference data, or the pipeline will have unexpected results.
# 5.1.7.1 Example Using gst-launch
```txt
gst-launch-1.0 videotestsrc pattern=snow ! adrt model=classification.engine scale=0.017 mean="103.94 116.78 123.68" batch=1 device=0 ! fakesink
```
# 5.1.7.2 Hierarchy
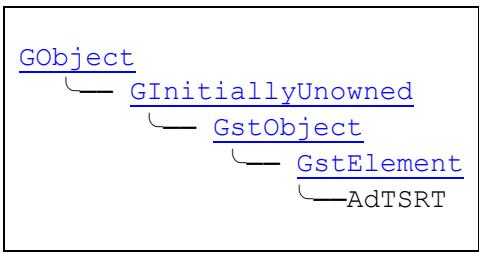
# 5.1.7.3 Pad Templates
sink
```yaml
video/x-raw:
format: {BGR}
width: [0, 2147483647]
height: [0, 2147483647]
framerate: [0/1, 2147483647/1]
video/x-raw(ANY):
format: {BGR}
width: [0, 2147483647]
height: [0, 2147483647]
framerate: [0/1, 2147483647/1]
```
Presence – always
Direction – sink
src
```yaml
video/x-raw:
format: {BGR}
width: [0, 2147483647]
height: [0, 2147483647]
framerate: [0/1, 2147483647/1]
video/x-raw(ANY):
format: {BGR}
width: [0, 2147483647]
height: [0, 2147483647]
framerate: [0/1, 2147483647/1]
```
Presence – always
Direction – sink
# 5.1.7.4 Properties
model
```txt
"model" gchararray
```
The path where the TensorRT optimized engine is located.
Flags: Read / Write
Default value: NULL
scale
```txt
"scale" gfloat
```
Sets the scale needed to apply to input data. Scale is to normalize the input to corresponding range. Please refer to https://en.wikipedia.org/wiki/Feature\_scaling
Flags: Read / Write
Default value: 1.0
mean
```txt
"mean" gchararray
```
Sets the mean vector value needed to apply to input data. The mean value of the dataset is the mean value of the pixels of all the images across all the color channels (e.g. RBG). Grey scale images will have just one mean value and color images like ImageNet will have 3 mean values.
Flags: Read / Write
Default value: "103.94 116.78 123.68"
device
```txt
"device" gchararray
```
Selects which GPU will be used to inference, use GPU index start from 0.
Flags: Read / Write
Default value: "0"
# batch
“batch” gint
Batch size of input to inference (number of image to inference at same time) need at least 1. This value will be limited by the availability of memory on the inference devices. If the batch size is set to larger than 1, the advideobatch element needs to be used before this plugin.
Flags: Read / Write
Default value: 1
# rgbconv
“rebconv” gboolean
Sets whether to convert the color format of an input image to RGB.
Flags: Read / Write
Default value: false
# 5.1.8 advino
Initializes the OpenVINO inference engine plugins to infer a data stream with the following parameters.
1. OpenVINO optimized engine Model path
2. Inference device type: (1) CPU<default>; (2) GPU; (3) VPU; (4) FPGA; (5) MYRIAD (Reference: OpenVINO support devices link)
Some MYRIAD boards contain multiple MYRIAD cores, so users can inference a specific core or select one via the OpenVINO inference scheduler.
The following command can query the available devices.
```python
$ python3 -c "from openvino.inference_engine import IECore; print(IECore().available_devices)"
['CPU', 'GPU', 'HDDL', 'MYRIAD.7.1-ma2480', 'MYRIAD.7.2-ma2480']
```
This element pushes a buffer list where the last buffer is the inference result raw data needed to be analyzed by the next element, and the other result is the original incoming frame buffer.
Unexpected results can occur if you pipe an element that does not implement a buffer list chain function.
For more details, refer to Convert for OpenVINO Model.
# Note:
1. Only supported on Intel platforms.
2. This element must connect with adtranslator plugins to handle inference data, or the pipeline will have unexpected results.
# 5.1.8.1 Example Using gst-launch
```txt
gst-launch-1.0 videotestsrc pattern=snow ! advino model=yolov3.xml ! fakesink
```
# 5.1.8.2 Hierarchy
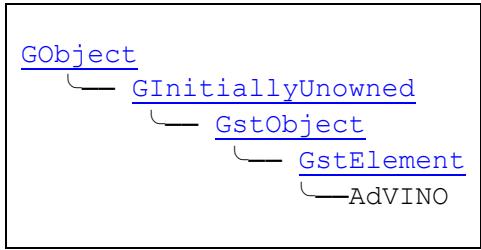
# 5.1.8.3 Pad Templates
sink
```yaml
video/x-raw:
format: {BGR}
width: [0, 2147483647]
height: [0, 2147483647]
framerate: [0/1, 2147483647/1]
video/x-raw(ANY):
format: {BGR}
width: [0, 2147483647]
height: [0, 2147483647]
framerate: [0/1, 2147483647/1]
```
Presence – always
Direction – sink
src
```yaml
video/x-raw:
format: {BGR}
width: [0, 2147483647]
height: [0, 2147483647]
framerate: [0/1, 2147483647/1]
video/x-raw(ANY):
format: {BGR}
width: [0, 2147483647]
height: [0, 2147483647]
framerate: [0/1, 2147483647/1]
```
Presence – always
Direction – sink
# 5.1.8.4 Properties
# model
“model” gchararray
The path where the OpenVINO optimized engine is located.
Flags: Read / Write
Default value: NULL
# scale
“scale” gfloat
Sets the scale needed to apply to input data.
Flags: Read / Write
Default value: 1.0
# mean
“mean” gchararray
Sets the mean vector value needed to apply to input data.
Flags: Read / Write
Default value: NULL
# device
“device” gchararray
Deep learning device, ex: CPU, GPU or MYRIAD. User may also using following command to list available devices. "python3 -c 'from openvino.inference\_engine import IECore; print(IECore().available\_devices)'"
Flags: Read / Write
Default value: "CPU"
# batch
“batch” gint
Batch size of input to inference (number of image to inference at same time). Must be at least 1. This value will be limited by the availability of memory on the inference devices. If the batch size is set to larger than 1, the advideobatch element needs to be used before this plugin.
Flags: Read / Write
Default value: 1
# rgbconv
```txt
"rebconv" gboolean
```
Sets whether to convert the color format of an input image to RGB.
Flags: Read / Write
Default value: false
# 5.1.9 advideobatch
This element batches multiple streams to a single vertical stream fitting the data format of the inference engine and collects all admeta data of the individual streams into batch meta data.
# 5.1.9.1 Example Using gst-launch
```shell
gst-launch-1.0 advideobatch name=mix ! videoconvert ! ximagesink \
videotestsrc pattern="red" ! admetawriter devinfo=dev1.txt count-frame=TRUE !
mix.sink_0 \
videotestsrc pattern="blue" ! admetawriter devinfo=dev1.txt count-frame=TRUE !
mix.sink_1
```
‘glimagesink’ or ‘d3dvideosink’ elements to display the window on Windows.
# 5.1.9.2 Hierarchy
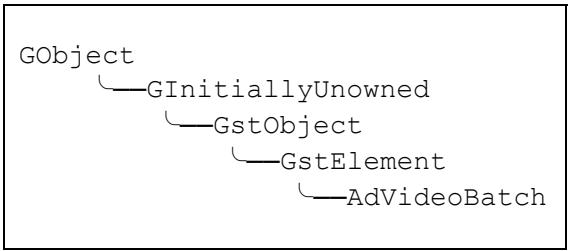
# 5.1.9.3 Pad Templates
sink\_%u
```yaml
video/x-raw:
format: { BGR }
width: [ 0, 2147483647 ]
height: [ 0, 2147483647 ]
framerate: [ 0/1, 2147483647/1 ]
```
Presence – always
Direction – sink
src
```yaml
video/x-raw:
format: { BGR }
width: [ 0, 2147483647 ]
height: [ 0, 2147483647 ]
framerate: [ 0/1, 2147483647/1 ]
```
Presence – always
Direction – src
# 5.1.10 adsplitbatch
A batched stream is a stream in which each of its frames is the combination of several smaller frames from several sources. This element will split a batched stream frame back to its original component frames and display it sequentially as a single stream.
This element must run after an advideobatch element with admeta data in its stream.
Note: The fps of the stream at sink pad will be equal to the number of batched streams multiplied with the fps of the src stream. For example, a stream of 30fps with a batch of 4 will generate a stream of 120fps.
# 5.1.10.1 Example Using gst-launch
```shell
gst-launch-1.0 advideobatch name=mix ! videoconvert ! adsplitbatch !
videoconvert ! ximagesink \
videotestsrc pattern="red" ! admetawriter devinfo=dev1.txt count-frame=TRUE !
mix.sink_0 \
videotestsrc pattern="blue" ! admetawriter devinfo=dev1.txt count-frame=TRUE !
mix.sink_1 \
```
‘glimagesink’ or ‘d3dvideosink’ elements to display the window on Windows.
# 5.1.10.2 Hierarchy
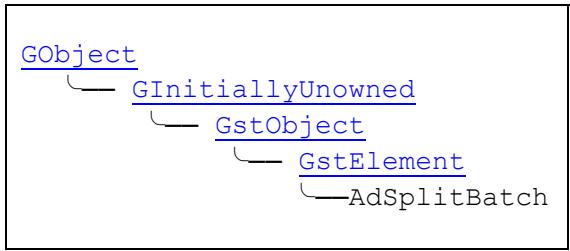
# 5.1.10.3 Pad Templates
sink\_%u
```yaml
video/x-raw:
format: { BGR }
width: [ 0, 2147483647 ]
height: [ 0, 2147483647 ]
framerate: [ 0/1, 2147483647/1 ]
```
Presence – always
Direction – sink
src
```yaml
video/x-raw:
format: { BGR }
width: [0, 2147483647]
height: [0, 2147483647]
framerate: [0/1, 2147483647/1]
```
Presence – always
Direction – src
# 5.1.11 adonnx
Initializes the ONNXRuntime inference engine plugins to infer a data stream with the following parameters.
1. Onnx model path
2. Scale (must be a float number)
3. Mean (must be a string of 3 numbers representing a vector of mean values used in training)
4. Standard deviation (must be a string of 3 numbers representing a vector of standard deviation values used in training)
5. rgbconv—converts image input order to RGB from BGR
6. nchw—converts input to nchw (batch, channel, height, width), or keeps it at nhwc (batch, height, width, channel )
7. Device—string of device used to inference
Note: This element must connect with adtranslator plugins to handle inference data, or the pipeline will have unexpected results.
# 5.1.11.1 Examples Using gst-launch
```html
gst-launch-1.0 videotestsrc pattern=snow ! adonnx model=classification.onnx scale=1 mean="127,127,127" std="128,128,128" rgbconv=True nchw=False device=gpu:0 ! fakesink
```
```html
gst-launch-1.0 videotestsrc pattern=snow ! adonnx model=human-pose-estimation-6-9-sim.onnx scale=0.0039 mean="128,128,128" ! adtrans_openpose_py input-width=456 input-height=256 blob-size="(38,32,57),(19,32,57)" ! admetadrawer ! videoconvert ! ximagesink
```
```javascript
gst-launch-1.0 videotestsrc pattern=snow ! adonnx model=yolov3.onnx scale=0.0039 mean="128,128,128" ! adtran_yolo label=yolo_RT_labels.txt blob-size="13,26,52" mask="(6,7,8),(3,4,5),(0,1,2)" ! admetadrawer ! videoconvert ! ximagesink
```
# 5.1.11.2 Hierarchy
# 5.1.11.3 Pad Templates
sink
```yaml
video/x-raw:
format: {BGR}
width: [0, 2147483647]
height: [0, 2147483647]
framerate: [0/1, 2147483647/1]
video/x-raw(ANY):
format: {BGR}
width: [0, 2147483647]
height: [0, 2147483647]
framerate: [0/1, 2147483647/1]
```
Presence – always
Direction – sink
src
```yaml
video/x-raw:
format: {BGR}
width: [0, 2147483647]
height: [0, 2147483647]
framerate: [0/1, 2147483647/1]
video/x-raw(ANY):
format: {BGR}
width: [0, 2147483647]
height: [0, 2147483647]
framerate: [0/1, 2147483647/1]
```
Presence – always
Direction – sink
# 5.1.11.4 Properties
model
```txt
"model" gchararray
```
The path where the TensorRT optimized engine is located.
Flags: Read / Write
Default value: NULL
scale
```txt
"scale" gfloat
```
Sets the scale to apply to input data to normalize the input of the corresponding range. Refer to https://en.wikipedia.org/wiki/Feature\_scaling
Flags: Read / Write
Default value: 1.0
mean
```txt
"mean" gchararray
```
Sets the mean vector value needed to apply to input data. The mean value of the dataset is the mean value of the pixels of all the images across all the color channels (e.g. RBG). Greyscale images will have just one mean value and color images like ImageNet will have 3 mean values.
Flags: Read / Write
Default value: "127,127,127"
# std
“mean” gchararray
Sets the standard deviation vector value needed to apply to input data. The standard deviation value of the dataset is the standard deviation value of the pixels of all the images across all the color channels (e.g. RBG). Greyscale images will have just one mean value and color images like ImageNet will have 3 mean values.
Flags: Read / Write
Default value: "1,1,1"
# device
“device” gchararray
Selects which device will be used to inference, use GPU index start from 0. The format is “cpu:0” for CPU and “gpu:index” for GPU.
Flags: Read / Write
Default value: "gpu:0"
#
“inps” gint
Specifies which input size is used. Only use with a model that does not list input size of the input layer. If set to 0, uses the model defined size.
Flags: Read / Write
Default value: 0
# rgbconv
“rebconv” gboolean
Sets whether to convert the color format of an input image to RGB.
Flags: Read / Write
Default value: False
# nchw
“nchw” gboolean
Sets whether to convert the input order of an input image to from nhwc (number of image, height, width, channel) to nchw (number of image, channel, height, width).
Flags: Read / Write
Default value: True
# 5.1.12 adtrans\_tinyyolov2\_py
This element implements a buffer list chain function. Previous elements should push a buffer list into this element.
The last buffer in the list will be seen as an inference result.
# 5.1.12.1 Examples Using gst-launch
The following pipeline translates the onnxruntime inference result using the Microsoft Custom Vision detector (tiny yolov2 type) model into a human-readable format.
```txt
gst-launch-1.0 videotestsrc ! adonnx model=detection.onnx mean="0,0,0" std="1,1,1" rgbconv=False nchw=True device=gpu:0 ! adtrans_tinyyolov2_py class-num=2 label-file=label.txt threshold=0.5 ! admetadrawer ! videoconvert ! ximagesink
```
Note: The element ‘ximagesink’ is only supported on Linux. It is recommended to use the ‘glimagesink’ or ‘d3dvideosink’ elements to display the window on Windows.
# 5.1.12.2 Hierarchy
# 5.1.12.3 Pad Templates
sink
ANY
Presence – always
Direction – sink
src
ANY
Presence – always
Direction – src
# 5.1.12.4 Properties
# batch-num
“batch-num” gint
The batch number of the deep learning model. Range: 1 to 256
Flags: Read, Write
Default value: 1
# class-num
“class-num” gint
The class number of the deep learning model. Range: 1 to 65535
Flags: Read, Write
Default value: 20
# blob-size
“blob-size” gchararray
Inference output blob's output width and height. You can use commas to define multiple output blob sizes. For example: '52,26,13' indicates three output blob sizes. You can also define blob sizes by WxH, for example: '26x42,52x68,13x19'
Flags: Read, Write
Default value: "13"
# mask
“mask” gchararray
Yolo mask
Flags: Read, Write
Default value: "(0,1,2),(3,4,5),(6,7,8)"
# anchor
“anchor” gchararray
Yolo anchor
Flags: Read, Write
Default value: "(0.573, 0.677), (1.87, 2.06), (3.34, 5.47), (7.88, 3.53), (9.77, 9.17)"
# input-width
“input-width” gint
Input width of image. Range: 1 to 65535
Flags: Read, Write
Default value: 416
# input-height
“input-height” gint
Input height of image. Range: 1 to 65535
Flags: Read, Write
Default value: 416
# threshold
“threshold” gfloat
The threshold of the inference result. Range: 0 to 1
Flags: Read, Write
Default value: 0.8
# Label-file
```txt
"label-file" gchararray
```
The deep learning model label.
Flags: Read, Write
Default value: NULL
# 5.1.13 adtrans\_classifier\_AZ\_py
This element implements a buffer list chain function. Previous elements should push a buffer list into this element. The last buffer in the list will be seen as an inference result.
# 5.1.13.1 Example Using gst-launch
The following pipeline translates the onnxruntime inference result using classification model from Microsoft Custom Vision into a human-readable format.
```txt
gst-launch-1.0 videotestsrc ! adonnx model=classification.onnx mean="0,0,0" std="1,1,1" rgbconv=False nchw=True device=gpu:0 ! adtrans_classifier_AZ_py ! admetadrawer ! videoconvert ! ximagesink
```
Note: The element ‘ximagesink’ is only supported on Linux. It is recommended to use the ‘glimagesink’ or ‘d3dvideosink’ elements to display the window on Windows.
# 5.1.13.2 Hierarchy
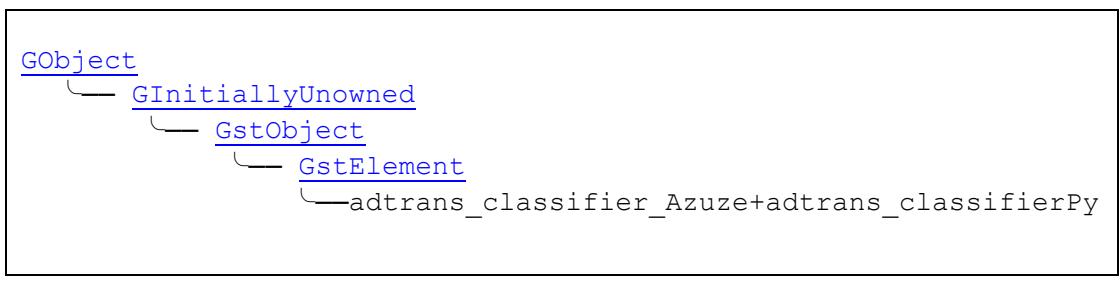
# 5.1.13.3 Pad Templates
sink
ANY
Presence – always
Direction – sink
src
ANY
Presence – always
Direction – src
# 5.1.13.4 Properties
# batch-num
“batch-num” gint
The number of the deep learning model batch. Range: 1 to 256
Flags: Read, Write
Default value: 1
# 6 Connector Plugins
The following table lists the element of the supported connector plugins.
| Parameter | Description |
| --calib=<file> | Read INT8 calibration cache file, required if --int8 |
| --explicitBatch | Use explicit batch sizes when building the engine (default = implicit) |
| --fp16 | Enable fp16 mode (default = disabled) |
| --int8 | Run in int8 mode. (default = disabled) |
| --maxBatch=<int> | Set max batch size and build an implicit batch engine. (default = 1) |
| --plugins=<file> | Plugin library (.so) to load (can be specified multiple times).This is a customized plugin which contains unsupported layers.Needs to be in CUDA code. |
| --saveEngine=<file> | Save the TensorRT engine as |
| --workspace=N | Set workspace size to N megabytes. (default = 16)Set as big as possible for maximum converting speed. |
# 8.2 Convert Tensorflow models
TensorRT does not support the Tensorflow model. The Tensorflow models must be converted to a UFF model or an ONNX model.
# 8.2.1 Convert Tensorflow to UFF
For more details on converting a TensorFlow model stream to a UFF mode, refer to the official documentation at: https://docs.nvidia.com/deeplearning/tensorrt/api/python\_api/uff/uff.html
# 8.2.2 Convert Tensorflow to ONNX
For more details on converting a TensorFlow model stream to an ONNX mode, refer to the official documentation at: https://github.com/onnx/tensorflow-onnx
# 8.3 Samples
# 8.3.1 Convert Yolov3.onnx to FP32 or FP16 engine file
Follow this link to convert yolo to onnx: https://github.com/jkjungavt/tensorrt\_demos/blob/master/yolo/yolo\_to\_onnx.py
More information can be found at: https://github.com/jkjung-avt/tensorrt\_demos/tree/master/yolo
# 8.3.1.1 FP32
```makefile
Linux:
/usr/src/tensorrt/bin/trtexec --onnx=yolov3.onnx --workspace=3000 --maxBatch=4 --verbose --saveEngine=yolov3.engine
Windows:
trtexec.exe --onnx=yolov3.onnx --workspace=3000 --maxBatch=4 --verbose --saveEngine=yolov3.engine
```
# 8.3.1.1 FP16
```makefile
Linux:
/usr/src/tensorrt/bin/trtexec --onnx=yolov3.onnx --workspace=3000 --maxBatch=4 --fp16 --verbose --saveEngine=yolov3_fp16.engine
Windows:
trtexec.exe --onnx=yolov3.onnx --workspace=3000 --maxBatch=4 --fp16 --verbose --saveEngine=yolov3_fp16.engine
```
# 8.3.1.2 Parameters
| Parameter | Description |
| --uff | Load uff file path |
| --uffInput=Input,3,300,300 | Set input layer name and input layer dimension |
| --output=NMS | Set output layer name |
| --workspace=3000 | Set GPU memory in MB to allow TensorRT to use to build engine. Optimal setting is around 80% of all memory. |
| --maxBatch=4 | Build engine will allow maximum input batch size = 4 |
| --saveEngine=mobilenet_ssdv2.engine | Save the final engine to ssdv2.engine file |
| --fp16 | Set model to fp16 precision |
| --verbose | Display more information |
| --buildOnly | Reduce 10s for testing model, and only build and save engine. (Optional) |
# Safety Instructions
Read and follow all instructions marked on the product and in the documentation before you operate your system. Retain all safety and operating instructions for future use.
Please read these safety instructions carefully.
• Please keep this User‘s Manual for later reference.
• Read the specifications section of this manual for detailed information on the operating environment of this equipment.
• When installing/mounting or uninstalling/removing equipment, turn off the power and unplug any power cords/cables.
• To avoid electrical shock and/or damage to equipment:
Keep equipment away from water or liquid sources.
Keep equipment away from high heat or high humidity.
Keep equipment properly ventilated (do not block or cover ventilation openings).
Make sure to use recommended voltage and power source settings.
Always install and operate equipment near an easily accessible electrical socket-outlet.
Secure the power cord (do not place any object on/over the power cord).
Only install/attach and operate equipment on stable surfaces and/or recommended mountings.
If the equipment will not be used for long periods of time, turn off and unplug the equipment from its power source.
• Never attempt to fix the equipment. Equipment should only be serviced by qualified personnel.
# Getting Service
Ask an Expert: http://askanexpert.adlinktech.com
# ADLINK Technology, Inc.