![Abstract composition of orange triangles and scattered points on white background (no text or symbols)](.vortex-opensplice-test-tool-user-guide/ceb3abebcfcd6ec2cb751ae5327ae043cc6bd0f4bd24666ef403e9214c6b463a.jpg)

# VORTEX

# OPENSPLICE

# Test Tool User Guide

# Release 6.x

# Contents

# 1 Preface 1

1.1 About The Vortex OpenSplice Tester User Guide
1.2 Intended Audience
1.3 Organisation
1.4 Conventions

# 2 Introduction 3

2.1 Features . 3
2.2 Location of Tester in the OpenSplice architecture . 3
2.3 Things to Know 3
2.4 Prerequisites 4

# 3 Getting Started 5

3.1 Starting and Stopping Tester . 5
3.2 Starting - Local Connection 5
3.3 Starting - Remote Connection 6
3.4 Stopping 6
3.5 Remotely Controlling Tester . 6
3.6 Trying out Tester 7
3.7 Tester Windows 7

# 4 Familiarization Exercises 17

4.1 Starting the Tester 17
4.2 Connection management 17
4.3 Topics and Readers . 19
4.4 Samples . 22
4.5 Filtering 25
4.6 Working with Samples 28
4.7 Groups 30
4.8 System Browser (Browser window) 34
4.9 Scripting 40
4.10 Execute and Debug 42
4.11 Adding virtual fields 44
4.12 Plugins 45
4.13 More on Virtual fields 47

# 5 Command Reference 49

5.1 Introduction 49
5.2 Menus 49
5.3 Lists 54
5.4 Windows 56

# 6 Scripting 60

6.1 The Script Language 60
6.2 The Instructions 64
6.3 Instructions for Graphs 67
6.4 Instructions for Flow Control 68
6.5 Instructions for the Message Interface 69
6.6 Installing Script Engines 70

# 7 Message Interfaces 71

7.1 Message interfaces 71
7.2 Getting Started with a Message Interface 71

7.3 Types of interfaces 73

# 8 Google Protocol Buffers 76

8.1 About Google Protocol Buffers in Tester 76
8.2 Viewing type evolutions 76
8.3 Reading protocol buffer topics . 78
8.4 Reading protocol buffer topics via script . . 79
8.5 Editing protocol buffer topic samples 79

# 9 Python Scripting Engine 81

9.1 About Python Scripting 81
9.2 Configuration 81
9.3 A Quick Tour of OSPL Scripting 84
9.4 Using Eclipse and PyDev to create and run OsplScript files . . . 91
9.5 Using PyCharm to create and run Tester Scripting 93

# 10 Appendix A 96

10.1 Scripting BNF 96

# 11 Contacts & Notices 101

11.1 Contacts 101
11.2 Notices 101

# 1

# Preface

# 1.1 About The Vortex OpenSplice Tester User Guide

The OpenSplice Automated Testing and Debugging Tool User Guide is intended to provide a complete reference on how to configure the tool and use it to test applications generated with the Vortex OpenSplice software.

This User Guide is intended to be used after the Vortex OpenSplice software has been installed and configured according to the instructions in the OpenSplice Getting Started Guide.

# 1.2 Intended Audience

This OpenSplice Automated Testing and Debugging Tool User Guide is for everyone using the tool (which is usually referred to as the Tester) to assist in developing and debugging their DDS applications with Vortex OpenSplice software.

# 1.3 Organisation

The Introduction provides general information about the Automated Testing and Debugging Tool.

Getting Started describes how to use the Tester’s main features.

Next, some familiarization exercises show how to perform some typical tasks with step-by-step instructions.

The Command Reference section has a complete list of all of the commands available, with fully-detailed descriptions of their use.

The section on Scripting describes how to automate repetitive testing procedures with scripts and macros, provides a list of all of the built-in script instructions, and shows how different scripting languages can be installed and used with the Tester.

Message Interfaces has information about testing applications with non-DDS interfaces.

Google Protocol Buffers describes the Tester’s support for Google Protocol Buffers.

An Appendix contains the complete formal description of the Tester Scripting language for reference.

# 1.4 Conventions

The icons shown below are used in the Vortex product documentation to help readers to quickly identify information relevant to their specific use of Vortex OpenSplice.

<table><tr><td>Icon</td><td>Meaning</td></tr><tr><td>&lt;img src="images/2a05f87a4292bfecb242bff603249f384f86fc8d046326ed5c2af664e82a5224.jpg"/&gt;</td><td>Item of special significance or where caution needs to be taken.</td></tr><tr><td>[YKBX]</td><td>Item contains helpful hint or special information.</td></tr><tr><td>[SYDX]</td><td>Information applies to Windows (e.g. XP, 2003, Windows 7) only.</td></tr><tr><td>&lt;img src="images/55135cc7581523fce7ddd1eb66b08f8e6fd95ab167383231a59a4998a53ee470.jpg"/&gt;</td><td>Information applies to Unix-based systems (e.g. Solaris) only.</td></tr><tr><td>&lt;img src="images/9eae80ba39b971221a39b756acb5003851dffcba4553f7c89fcc83909adcdaea.jpg"/&gt;</td><td>Information applies to Linux-based systems (e.g. Ubuntu) only.</td></tr><tr><td>&lt;img src="images/91471bff6143cec77d9971f90dd0183064b07925feb0bfc5b70d3ca70049d5d0.jpg"/&gt;</td><td>C language specific.</td></tr><tr><td>&lt;img src="images/8fe49bbc4d91c23f63d75b43394c20f1cdf8f4f6a4c730c1d71c4c74c43e09b2.jpg"/&gt;</td><td>C++ language specific.</td></tr><tr><td>&lt;img src="images/6bf857ca65d7ac5e55a881309598e8cd180b5d95dfbdd7bfdf13b4acccb9ab5f.jpg"/&gt;</td><td>C# language specific.</td></tr><tr><td>&lt;img src="images/caf1c16636805907234a94893aca2e9f2dff6f072bd8e1138785df6cbcfa7879.jpg"/&gt;</td><td>Java language specific.</td></tr></table>

# 2

# Introduction

This section provides a brief introduction to the Vortex OpenSplice Tester.

# 2.1 Features

The Vortex OpenSplice Automated Testing and Debugging Tool provides an easy way of displaying messages produced in Vortex OpenSplice and also provides means to publish messages manually or with a script.

(The OpenSplice Automated Testing and Debugging Tool is usually referred to as Tester; the name ospltest is used when referring to the executable program.)

This tool is made with the software tester, and the way he performs his job, in mind. A pre-defined list of topics of interest can be provided. For all topics a reader is created in the correct partition. Once started, the tool receives all instances of the topics of interest and will display them in the sample list in the order they were produced (using the source time stamp). This makes it very easy to see when topics are produced and in what order. It also provides feedback about unexpected updates.

Other features of Tester include the ability to:

• dump a selection of topic(s) to a file
• dump all logged topic instances to a file
• filter the sample list based on key
• filter the sample list based on key and topic name
• filter the sample list based on key
• create a script with a selection of previously sent or received topics
• compare topic samples
• edit topic samples and then write them or dispose the topic instance
• create new topic samples and write them or dispose the topic instances

# 2.2 Location of Tester in the OpenSplice architecture

Tester is complementary to OpenSplice Tuner (ospltun). Tuner supports ‘white box’ application monitoring and tuning, and Tester supports ‘black box’ system testing, debugging, data capture, analysis, and visualization.

# 2.3 Things to Know

![The image displays a triangular warning sign with a thick red border and a white background. Centered within the triangle is a large black exclamation point.](.vortex-opensplice-test-tool-user-guide/a5ca7a9d6bdc24e7353c5fff575d87c5990210a2d284bf0d4bf33a85fc3be75e.jpg)

NOTE: Tester uses the internal Control & Monitoring (C&M) API for access to OpenSplice. At this time Tester only supports Vortex OpenSplice systems.

Tester can be used both locally (via shared memory or single process) and/or remotely (via a SOAP connection to the SOAP service).

Tester uses a periodic poll to read data (the default poll period is 250 ms). The normal restrictions for storage scope apply (only keys defined with the topic separate topics for reading, if topics with the same key are produced within a polling period, then only the last topic is read).

Tester uses the default QoS for writing (as provided by the first application which registers the topic) and the weakest QoS for reading. However when specifying the topic in add topic (or add topics) or in the topic file the QoS can be given, this QoS must be compatible with the topic QoS as defined when the topic was registered.

![The image displays a standard warning symbol featuring a red equilateral triangle with a thick red border and a white interior. Centered within the triangle is a single black exclamation point (!).](.vortex-opensplice-test-tool-user-guide/0785cd0ce1b8a0fb65e6211c73b8127a50a199b15d50600e3e26e41d054e0e2e.jpg)

NOTE: In order for the Tester system browser to correctly show the complete system, OpenSplice Durability services have to be properly configured so that the transient ‘built-in-topics’ are properly aligned when new nodes join the system. Monitoring the built-in topic sample set on different nodes will quickly reveal any failure in correct lining-up of transient data (in which case there will be different sets visible on different nodes). Monitoring the DCPSHeartbeat built-in topic will reveal fundamental connectivity issues in your system (you should see as many unique heartbeats as there are interconnected nodes in the system).

# 2.4 Prerequisites

Tester is included in the standard OpenSplice installation.

Tester’s minimum system requirements are the same as for OpenSplice itself; please refer to the Release Notes for both Tester and OpenSplice for details. The Vortex OpenSplice Getting Started Guide contains additional information about installation and configuration on various systems.

Note that to compile plugins you will also need to have ant and JDK1.6 installed (see Getting Started with a Message Interface). Tester has been implemented in the Java Language, and it uses the Vortex OpenSplice Command and Management (C&M) API.

Although Tester uses the C&M API, it doesn’t depend on a locally installed or running instantiation of OpenSplice. It can operate either ‘co-located’ with a running DDS target system, or it can operate in ‘remote-connection’ mode (like the Tuner).

When Tester is run on the same platform as Vortex OpenSplice, it uses the OSPL\_HOME environment variable to find the necessary OpenSplice library files. It also uses OSPL\_URI as its default OpenSplice configuration.

When Tester connects to a remote ‘target’ platform using SOAP it doesn’t use any local environment variables, it just needs to be installed on the machine where you run it.

(Note that the Vortex OpenSplice Tuner can be started with a -uri command-line parameter (see how to start a remote connection ). This is a new feature that is actually used by the Tester in the system browser, where you can spawn a Tuner (see how to spawn a tuner from the system browser) that then connects to the node/application that the browser is pointing to.)

# 3

# Getting Started

This section describes how to use the Tester’s main features.

# 3.1 Starting and Stopping Tester

Tester may be started by running the OpenSplice Tester application or from a command prompt and oslptest with the following command line arguments:

-? or -help Display the command line options

-ns No splash screen

-uri &lt;uri&gt; URI to connect

-nac No auto-connect upon application start

-s &lt;path to script&gt; Script to run

-b &lt;path to batch file&gt; Batch script to run

-noplugins Do not process plugins

-plugindir &lt;dir&gt; Extra plugin directory to search

-headless Run script or batch script without the GUI

-rc &lt;port&gt; Enable remote control (via &lt;port&gt;)

-dsl &lt;language&gt; Default script language

-l &lt;path to topic file&gt; Load topics from file

(These preferences can also be set from the menu File > Preferences.)

# 3.2 Starting - Local Connection

On Windows, use either of the shortcuts created by the installer (on the desktop and in Start > Programs) to start Tester.

Linux On Linux go to the installation directory and execute the command:

% ospltest

This will start Tester with separate windows.

# 3.3 Starting - Remote Connection

To connect to a remote platform, execute the command:

```batch
% ospltest -uri http://perf1.perfnet.ptnl:50000
```

(Port number 50000 is the default port in a standard DDS shared-memory deployment.)

# 3.4 Stopping

Stop Tester either by using the menu option File > Exit or by clicking on the main window ‘close’ button .

# 3.5 Remotely Controlling Tester

Starting Tester in remote control mode e.g. "ospltest -rc &lt;port&gt; -headless" allows Tester to be controlled from another application, shell script, etc..

Use cases for remote control include:

• Using Tester in combination with a commercial or proprietary test system;
• Within a continuous build and test environment this would provide more options to control DDS testing in combination with other application-specific testing;
• In an integrated development environment like Eclipse using Junit for testing.

A Tester instance is controlled via a TCP/IP connection. Text-based commands are sent over this connection.

The remote control application can be used by executing the command:

```txt
ospltestrc [-p &lt;port&gt;] [-h &lt;host&gt;] &lt;command&gt;
```

where

```txt
&lt;host&gt; is the host name of the machine that the Tester you wish to control is running on
&lt;port&gt; is the port that Tester is listening on (specified by the -rc option when Tester was started)
&lt;command&gt; is the command to send to Tester.
```

The remote control commands are:

stop Terminate the Tester instance

```html
batch &lt;batch name&gt; Execute the batch with &lt;batch name&gt;
```

```txt
script &lt;script name&gt; Execute the script with &lt;script name&gt;
```

scenario &lt;scenario&gt; Execute a scenario which is provided in full text on a single line (new lines "\n" are replaced by "&nbsp")

connect &lt;optional uri&gt; Connect to a specified or the default Domain uri

# disconnect

When a command is completed the following is reported on a single line:

Done

When a batch is executed, for each scenario two lines are returned to the test controller:

```txt
Scenario: &lt;index&gt; of &lt;count&gt; execute: &lt;scenario name&gt; Scenario: &lt;index&gt; result: &lt;result&gt;
```

# 3.3. Starting - Remote Connection

# 3.6 Trying out Tester

Once you have started Tester, you can get a feeling for how to use it with a few simple exercises:

• Create a default reader for some of the registered topics.
• Double-click one of the samples and see all the fields of the topic.
• Browse through the list of samples using the arrow keys.
• Select a topic in the sample list and press [F9], then select a field for display in the sample list.
• Select another topic (it need not be of the same type as the one displayed in the topic instance window) and press [F2] for a comparison between the two topics.
• Select a topic in the sample list or in the topic list and press [F4], then in the Write topic window set the fields to the desired value and write or dispose the topic.
• Choose File > Dump on the sample list and save the information of the topic samples in the sample list to a file.
• Have a try with the scripting, it can make your life a lot easier (especially with recurring tasks).

The rest of this section describes the features that you will use when you try these exercises.

# 3.7 Tester Windows

# 3.7.1 Main Window

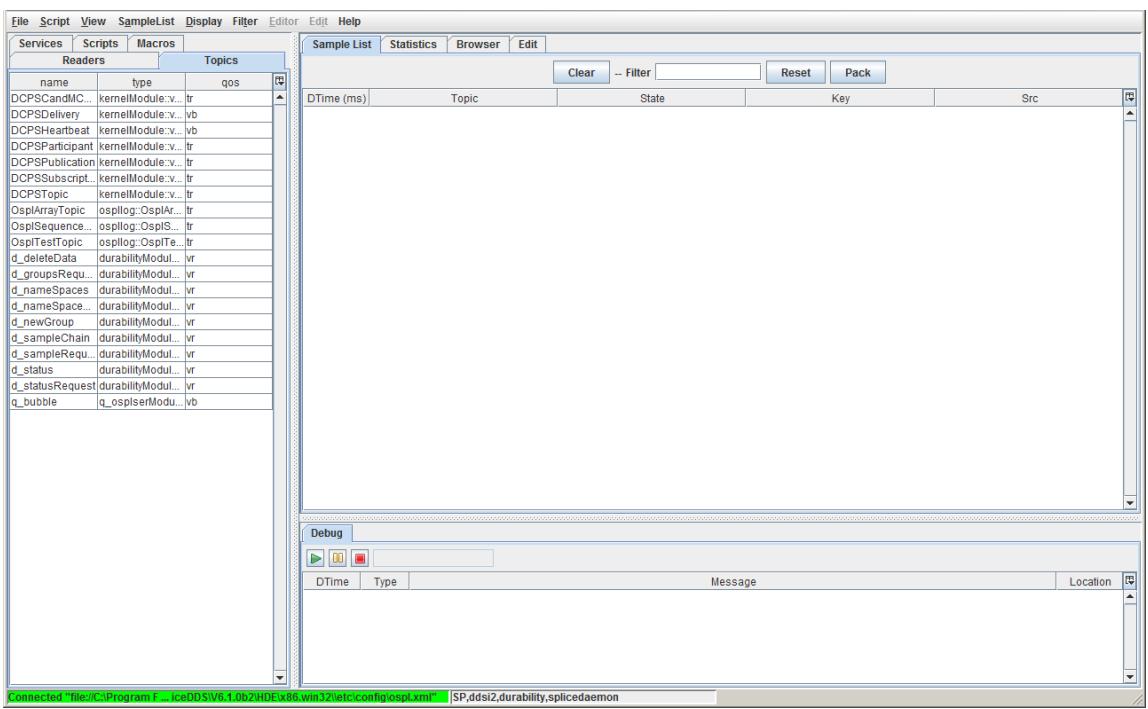
Once started, Tester presents the user with the following main window.

Tester main window
![File Script View SampleList Display Filter Editor Edit Help\nServices	Scripts	Macros\nReaders	Topics\nname Implicator	type(qos)\nDCPSCandMC...kernelModule:v...tr\nDCPSDelivery kernelModule:v...vb\nDCPSHeartbeat kernelModule:v...vb\nDCPSParticipant kernelModule:v...tr\nDCPSPublication kernelModule:v...tr\nDCPSSubscript kernelModule:v...tr\nDCPSTopic kernelModule:v...tr\nOsplArrayTopic ospilog:OsplAr...tr\nOsplSequence ospllog:OsplS...tr\nOsplTestTopic ospllog:OsptTe...tr\nd_deleteData durabilityModul...vr\nd_groupsRequ durabilityModul...vr\nd_nameSpaces durabilityModul...vr\nd_nameSpace durabilityModul...vr\nd_newGroup durabilityModul...vr\nd_sampleChain durabilityModul...vr\nd_sampleRequ durabilityModul...vr\nd_status durabilityModul...vr\nd_statusRequest durabilityModul...vr\nq_bubble q_osplserModu...vb\nSample List	Statistics	Browser	Edit\nClear	-- Filter	Reset	Pack\nDTime (ms) Topic State Key Src\nDebug\nDTime Type Message Location\nConnected 'file:/C:\Program F._iceDDS\V6.1.0b2\HDE.x88.win32/etc/config\ospl.xml' SP,ddsi2,durability,spliceddaemon](.vortex-opensplice-test-tool-user-guide/bbf909d56eab3e50efaeaef8006d56d07d03e0728c79e433cf217a33c6bcef9d.jpg)

The Command Menu (below) provides direct access to most of the Tester capabilities.

Tester command menu

![File Script View SampleList Display Filter Editor Edit Help](.vortex-opensplice-test-tool-user-guide/f91acf3f1fe83c69e3c0f941a20588c581968397914a67054c56a0da794c0ece.jpg)

The Tester main window has three sub-frames:

# 3.6. Trying out Tester

1. Main tabbed frame for selecting items from a list, such as topics, scenarios, and readers or writers.
2. Working area frame where you will do most of your work such as editing scenarios, investigate samples, and capturing statistics
3. Debug frame used to debug scripts and macros.

# 3.7.2 Overview Windows

The user can select the type of resource to work with by selecting tabs. These can be the Services and Topics in the system, the Scripts and Macros they have installed, or the Readers for the current Tester timeline.

Tester resource tabs

![Services	Scripts	Macros\nReaders	Topics](.vortex-opensplice-test-tool-user-guide/507cb79baf48fb3049cc80194ebc9823df4888346935d26688638b1a03f1fc98.jpg)

# Services

Lists the installed services. This is a read-only list.

Tester Services list

<table><tr><td>Service</td></tr><tr><td>ddsi2</td></tr><tr><td>durability</td></tr><tr><td>splicedaemon</td></tr></table>

# Scripts

The script list provides a convenient way of selecting an existing script for editing or execution. The list is filled at startup or when clicking the Refresh button. All files in the specified script directory are added to the list. The script directory (or directories) are specified in the preference page.

A script can be selected in the script editor by single-clicking the entry in the table. When the entry is doubleclicked the script is loaded in the script editor and executed.

Tester scripts tab

![Services	Scripts	Macros\nReaders	Topics\nResize	Refresh	1^_\nScript\nbatch.bd\nclear_instruction.sd\nconditional.sd\ncontrol_function.bd\ndispose.sd\ndispose_fail.sd\ndispose_fail_timeout.sd\nexec_instruction.sd\nexit_instruction.sd\nfail_instruction.sd\nfail_instruction_with_var.sd\nfirst_scenario.sd\ngraph_test.sd\njs_function.sd\nlean_instruction sd](.vortex-opensplice-test-tool-user-guide/ce77e391a357c250219e56b99fa04653836e71fa44a2e9e20510e1169b72e19e.jpg)

# Macros

The Macros List is similar to the Scripts List.

Tester macros tab
![This image depicts a software interface panel organized in a vertical hierarchy.\n\n**Top Navigation Tabs:**\n*   Services\n*   Scripts\n*   Macros\n\n**Sub-Navigation Tabs:**\n*   Readers\n*   Topics\n\n**Control Strip:**\n*   Button: Resize\n*   Button: Refresh\n*   Input field: 1\n*   Label: Scen\n*   Checkbox (unchecked)\n\n**Bottom Panel:**\n*   Label: Script\n*   Text: send_and_check_test.md](.vortex-opensplice-test-tool-user-guide/c892abcd79a809671d072bc6e4a7f829d5bf5d913171502f9f1828d848f75253.jpg)

# Topics

The topics list displays the list of registered topics.

Tester topics tab

<table><tr><td>Services</td><td>Scripts</td><td>Macros</td><td></td></tr><tr><td colspan="3">Readers</td><td>Topics</td></tr><tr><td>name</td><td colspan="2">type</td><td>qos</td></tr><tr><td>DCPSCandMC...</td><td colspan="2">kernelModule::v...</td><td>tr</td></tr><tr><td>DCPSDelivery</td><td colspan="2">kernelModule::v...</td><td>vb</td></tr><tr><td>DCPSHeartbeat</td><td colspan="2">kernelModule::v...</td><td>vb</td></tr><tr><td>DCPSParticipant</td><td colspan="2">kernelModule::v...</td><td>tr</td></tr><tr><td>DCPSPublication</td><td colspan="2">kernelModule::v...</td><td>tr</td></tr><tr><td>DCPSSubscript...</td><td colspan="2">kernelModule::v...</td><td>tr</td></tr><tr><td>DCPSTopic</td><td colspan="2">kernelModule::v...</td><td>tr</td></tr><tr><td>OsplArrayTopic</td><td colspan="2">osplllog::OspIAr...</td><td>tr</td></tr><tr><td>OsplSequence...</td><td colspan="2">osplllog::OspIS...</td><td>tr</td></tr><tr><td>OsplTestTopic</td><td colspan="2">osplllog::OspITe...</td><td>tr</td></tr><tr><td>d_deleteData</td><td colspan="2">durabilityModul...</td><td>vr</td></tr><tr><td>d_groupsRequ...</td><td colspan="2">durabilityModul...</td><td>vr</td></tr></table>

# Readers

The readers list displays the readers (and implicit topic writers) for the current Tester timeline. The default name for a reader is the same as the name of the topic it is subscribed to. For each reader the count of received samples (as available in the sample list) is displayed. A check box is provided for changing the read state or the show state. When Read is unchecked the reader stops reading topics. When Show is unchecked the topic of that topic will not be displayed in the sample list.

Tester readers tab
![Services	Scripts	Macros\nReaders	Topics\nSelect all	Deselect all\nRead	Show	Topic	Count	qos	partition\n✓	✓	OspITe...	1	-(trDS)	*	▲](.vortex-opensplice-test-tool-user-guide/eaf174abda848d820c3090ef243285c0f997103df4232e2daf3c982385f5fa58.jpg)

# 3.7.3 Working Windows

These windows support testing activities.

# Sample List Window

Used to view and generate samples for the current timeline (Readers).

Sample list window

# 3.7. Tester Windows

![Sample List Statistics Browser Edit\nClear Delta: -- sec Filter Reset Pack\nDTime (ms) Topic State Key Src\n3 OsplTestTopic SEND_AND_ALIVE 1 OpenSplice Tester (MikeW-Laptop)](.vortex-opensplice-test-tool-user-guide/8d708dce5c8bc0b0da888c49e2966c8b0022fd304ed6002a863c3491df75e221.jpg)

# Statistics Window

The statistics window provides statistics for the topics in use, like write count, number of alive topics, etc.. Statistics are gathered from the local copy of OpenSplice. To gather statistics from remote nodes, use OpenSplice Tuner.

Statistics window
![File Script View SampleList Display Filter Editor Edit Help\nServices Scripts Macros\nReaders Topics\nSelect all Deselect all\nR... Sh... Topic Count qos partiti...\n✓ ✓ Ospl... 5-(trDS) boo\n✓ ✓ Ospl... 5-(trDS) foo\n✓ ✓ Ospl... 5-(trDS) boo,f...\nSample List Statistics Browser Edit\nRefresh Add readers Add writers\nTopics Stats\nParticipants\nOpenSplice Tester\nReaders\nName Alive New Arriv... Rea...\nOsp... 0 0 12 948\nOsp... 0 0 6 1121\nOsp... 0 0 6 970\nDC... 12 0 34 86\nDC... 40 0 95 111\nDC... 36 0 88 105\nDC... 19 0 214 180\nWriters\nName Alive Writes\nOspITes... 0 5\nOspITes... 0 0\nOspITes... 0 0](.vortex-opensplice-test-tool-user-guide/54c0004258e6adecdfe17803652946463864b4835fa3c4b1bf236b7f7d506c76.jpg)

# Browser Window

The browser window provides information about nodes, executables, participants (applications), readers, writers and topics. Information can be browsed by selecting a node/executable participant or a topic. When an executable or participant is selected the reader and writer lists (subscribed and published topics) for that executable/participant are shown. Together with the topic name concise information about the QoS and partition is shown. When the mouse cursor is hovered over the QoS value the hint will show detailed information about the QoS.

When a topic is selected the list of participant readers (subscribe) and writers (publish) are shown, together with concise information about the QoS and partition. By selecting a row in either the reader of writer list the compatible readers/writers will be shown in green and non-compatible (by QoS/partition) readers/writers will be shown in red.

Tester browser window

# 3.7. Tester Windows

![File Script View SampleList Display Filter Editor Edit Help\nServices Scripts Macros\nReaders Topics\nSelect all Deselect all\nR... Sh... Topic Count qos partiti...\n✓ ✓ Ospl... 5-(trDS) boo\n✓ ✓ Ospl... 5-(trDS) foo\n✓ ✓ Ospl... 5-(trDS) boo,f...\nRefresh Add readers Add writers\nShow disposed participants\nTopic: OspITestTopic\nReaders\nsource qos parti...\nOpenSplice Tes... vb... *\nOpenSplice Tes... vb... boo\nOpenSplice Tes... vb... foo\nOpenSplice Tes... vb... boo...\nWriters\nsource qos parti...\nOpenSplice Te... tr... *\nOpenSplice Te... tr... boo\nOpenSplice Te... tr... foo\nOpenSplice Te ... tr... boo...\nRefresh Debug](.vortex-opensplice-test-tool-user-guide/0f8f9a2381898adf9e9a3499401a965a0279d14488ab8278c24bec38dd8b8a9f.jpg)

# 3.7.4 Scripting Windows

# Edit Window

The script window is used for editing scripts. The editor supports syntax highlighting, auto-completion, and more.

Script editing window
![File Script View SampleList Display Filter Editor Edit Help\nServices Scripts Macros\nReaders Topics\nResize Refresh 1\nScript\nbatch.bd\nclear_instruction.sd\nconditional.sd\ncontrol_function.bd\ndispose.sd\ndispose_fail.sd\ndispose_fail_timeout.sd\nexec_instruction.sd\nexit_instruction.sd\nfail_instruction.sd\nfail_instruction_with_var.sd\nfirst_scenario.sd\ngraph_test.sd\njs_function.sd\nloop_instruction.sd\nmacro_call.sd\nmark.sd\nmark_fail.sd\nmessage.sd\nmiss.sd\nmiss_fail.sd\nmiss_fail_timeout.sd\nread.sd\nread_fail.sd\nread_fail_disposed.sd\nread_fail_timeout.sd\nread_fail_timeout_query.sd\nread_last_fail_disposed.sd\nScenario clear_instruction\n// the clear instruction empties the current receive list\n// i.e. no more topic instances are available (also not with check_any)\nsend OsplTestTopic (id =) 111);\nwait(0.1);\nclear;\nwait (0.1);\nmiss OsplTestTopic();\n// the miss should not fail, so exit when it did\nif (isFailed == true) then\nexit;\nendif;\n5:34\nDebug\nOK 21 --\nDTime Type Message Location\n0.000 Scen clear_instruction.sd*\n0.100 SOK Send: OsplTestTopic 6 (17)\n0.100 Log Wait: 0.1s 7\n0.330 Log Cleared instance list 9\nConnected file:///C:\Program Fi ... pliceDDS\V6.1.0b5\HDE\x86.win32\etc\config\ospl.xml networking,durability,cmsoap,spliceddaemon](.vortex-opensplice-test-tool-user-guide/43daff40b2ded706d1b5936f238d4b5d9794723136cce625d2443a9dcfb68296.jpg)

# Debug Window

The debug window displays compile and execution results. Details can be filtered. Positive results are highlighted with green, negative results are highlighted with red.

# Debug window

# 3.7. Tester Windows

<table><tr><td colspan="4">Debug</td></tr><tr><td colspan="4">OK 21 ---</td></tr><tr><td>DTime</td><td>Type</td><td>Message</td><td>Location</td></tr><tr><td>0.430</td><td>Log</td><td>Evaluate false == true = false</td><td></td></tr><tr><td>0.430</td><td>Log</td><td>If is false: false</td><td>14</td></tr><tr><td>0.430</td><td>CFNK</td><td>Expected message not received: OsplTestTopic with key 111</td><td>19</td></tr><tr><td>0.430</td><td>Log</td><td>Fail reversed</td><td>16</td></tr><tr><td>0.430</td><td>EOK</td><td>Execution finished</td><td></td></tr></table>

# 3.7.5 Other Windows

The following dialog windows will be used.

# Add Reader Window

Used to create/define a new Reader.

The dialog provides a drop-down list of existing partitions to choose to create the new Reader in.

Add Reader dialog
![Add Reader\nDCPSTopic\nReaderName:\nPartition:\nKeep 10\nAuto dispose ur\n*RecordAndReplay\nBUILT-IN PARTITION_\nNODE06bfdf63 BUILT-IN PARTITION_\nNODE395a3243 BUILT-IN PARTITION_\ndurabilityPartition\nDurability:\nReliability:\nDestinationOrder: Destination\nOwnership: Shared\nCancel Add](.vortex-opensplice-test-tool-user-guide/bae963cb3cb07a5ae268aea953b6676d97afa199e44a406a136921253a535304.jpg)

# Batch Window

Used to Start a batch scenario and display the test results.

Batch Execute Scenarios window
![Batch Execute Scenarios\nFile\nStart Runtime --:--\nStatus idle\nScenario Result](.vortex-opensplice-test-tool-user-guide/5ffbb918608819163b9ddac3f49b3ec8c12800417084a6f7a3249a5a62a09070.jpg)

# 3.7. Tester Windows

# Batch Results Window

Displays the detailed results of a batch of scripts. Detailed individual test result can be viewed by double-clicking on a test result.

Batch results window

<table><tr><td>Script name</td><td>batch_2011...</td><td>batch_2011...</td><td>batch_2011...</td><td>batch_2011...</td><td>batch_2011...</td><td>batch_2011...</td><td>batch_2011...</td></tr><tr><td>first_scenario</td><td>OK</td><td>OK</td><td>OK</td><td>OK</td><td>OK</td><td>OK</td><td>OK</td></tr><tr><td>clear_instruction</td><td>OK</td><td>OK</td><td>OK</td><td>OK</td><td>OK</td><td>OK</td><td>OK</td></tr><tr><td>read</td><td>OK</td><td>OK</td><td></td><td>OK</td><td>OK</td><td>OK</td><td>OK</td></tr><tr><td>read_query</td><td>OK</td><td>OK</td><td></td><td></td><td>OK</td><td>OK</td><td>OK</td></tr><tr><td>miss</td><td>OK</td><td>OK</td><td></td><td></td><td>OK</td><td>OK</td><td>OK</td></tr><tr><td>mark</td><td>OK</td><td>OK</td><td></td><td></td><td></td><td>OK</td><td>OK</td></tr><tr><td>mark_fail</td><td>OK</td><td>OK</td><td></td><td></td><td></td><td></td><td>OK</td></tr><tr><td>dispose</td><td>OK</td><td>OK</td><td></td><td></td><td></td><td></td><td>OK</td></tr><tr><td>variables</td><td>OK</td><td>OK</td><td></td><td></td><td></td><td></td><td>OK</td></tr><tr><td>loop_instruction</td><td>OK</td><td>OK</td><td></td><td></td><td></td><td></td><td>OK</td></tr><tr><td>conditional</td><td>OK</td><td>OK</td><td></td><td></td><td></td><td></td><td>OK</td></tr><tr><td>repeat</td><td>OK</td><td>OK</td><td></td><td></td><td></td><td></td><td>OK</td></tr><tr><td>repeat_multiple</td><td>OK</td><td>OK</td><td></td><td></td><td></td><td></td><td>OK</td></tr><tr><td>repeat_until_disp...</td><td>OK</td><td>OK</td><td></td><td></td><td></td><td></td><td>OK</td></tr><tr><td>message</td><td>OK</td><td>OK</td><td></td><td></td><td></td><td></td><td>OK</td></tr><tr><td>macro_call</td><td>OK</td><td>OK</td><td></td><td></td><td></td><td></td><td>OK</td></tr><tr><td>scenario_call</td><td>OK</td><td>OK</td><td></td><td></td><td></td><td></td><td>OK</td></tr><tr><td>graph_test</td><td>OK</td><td>OK</td><td></td><td></td><td></td><td></td><td>NOK</td></tr><tr><td>js_function</td><td>OK</td><td>OK</td><td></td><td></td><td></td><td></td><td>OK</td></tr></table>

Detailed Batch results log
![Results log\nFile\n10:59:13.090 0.031 Scen read_query.sd -.-1\n10:59:13.371 0.312 ExecOK Execution finished -.-1\nDetails:\n10:59:13.090 0.031 Scen read_query.sd -.-1\n10:59:13.137 0.078 SendOK Send: OsplTestTopic read_\n10:59:13.137 0.078 SendOK Send: OsplTestTopic read_\n10:59:13.137 0.078 SendOK Send: OsplTestTopic read_\n10:59:13.153 0.094 SendOK Send: OsplTestTopic read_\n10:59:13.153 0.094 Log Wait: 0.2s read_\n10:59:13.371 0.312 Chk OK Check OK: 20 OsplTestTopic read_\n10:59:13.371 0.312 CF OK id = 3 read_\n10:59:13.371 0.312 CF OK index = 5 read_\n10:59:13.371 0.312 Chk OK Check OK: 20 OsplTestTopic read_\n10:59:13.371 0.312 CF OK id = 1 read_\n10:59:13.371 0.312 CF OK state = init read_\n10:59:13.371 0.312 Chk OK Check OK: 16 OsplTestTopic read_\n10:59:13.371 0.312 ExecOK Execution finished -.-1\nTopics summary:\n0.078 16 write OsplTestTopic 1\n0.079 18 write OsplTestTopic 2\n0.080 20 write OsplTestTopic 3\n0.089 22 write OsplTestTopic 4\nTopics:\nTopic: OsplTestTopic\nSource_timestamp: 1312297153.136591707\nDTime: 2011/08/02 10:59:13.136\nDTime (sec) : 0.078\nId: 16\nSample: checked\nId: 16\nView state: not_new\nSample state: not_read\nInstance state: alive\nSource: OpenSplice Tester (ysroh-lt)\nReliability: r\nid 1\nindex 3](.vortex-opensplice-test-tool-user-guide/af6622e0f3308c769953fc408060b3d7fa4cef105b3c22491ed69ce40821f866.jpg)

# Chart Window

Used to plot topic field values.

# 3.7. Tester Windows

Topic field values graph
![| x    | y (Red Line) | y (Green Line) |\n| ---- | ------------ | -------------- |\n| 21.6 | 19.8         | 0              |\n| 26.1 | 16.5         | 9.9            |\n| 29.7 | 15.4         | 17.6           |](.vortex-opensplice-test-tool-user-guide/695c1d68e3437f57f0cf861fce082a9c83289238db74409c0b3559677cc98a9b.jpg)

# Edit Sample Window

Used to create samples for a selected topic.

Edit sample window
![Edit sample: OsplSequenceTopic\nField	Default	Value\nid	0	\nfVector(0)	0	\niVector(0)	0	\npVector(0).state Coal\npVector(0).vector(0)	0	\npVector(0).x	0	\npVector(0).y	0	\ntext																																																																																																							C\nwrite Homelide\nwriteDispose\ndispose\nscript\ncheck](.vortex-opensplice-test-tool-user-guide/891763c7965566db86ac780b521a7f82419b0968fceb908a899bd4adb9dd4d13.jpg)

# Topic Instance Window

The topic sample window is used for displaying field values of a topic. It can be opened by double-clicking a sample in the sample list or by pressing [F3] (additional) or [F2] (additional with compare) in the sample list while a sample is selected. Special fields are highlighted with colors:

Key field (Green)

Foreign key (Yellow)

# 3.7. Tester Windows

Different (compare only) (Red)

Not existing (compare only) (Orange)

When a field is selected, [Ctrl+H] will toggle between normal and hexadecimal representation, and [Ctrl+D] will toggle between normal and degrees/radians representation.

# 4

# Familiarization Exercises

This section gives step-by-step instructions for using the Vortex OpenSplice Tester to perform many typical tasks to help you become familiar with the way it operates.

The exercises in this section assume that OpenSplice and the Tester have been succesfully installed. These illustrations make use of the example data supplied with the product.

# 4.1 Starting the Tester

OpenSplice must already be running before you start the Tester.

Step 1: Start Vortex OpenSplice

Step 2: Start the Tester:

• On Linux, run ospltest.
• On Windows, choose Launcher from the Start menu. In the Launcher Tools tab, click on the Tester button. Or run ospltest from a command prompt.

Starting Tester
![VortexOpenSplice 6.8.2 HDE x...\nLauncher\nUninstall Vortex OpenSplice 6.8...](.vortex-opensplice-test-tool-user-guide/13cfbc81a89fd13baf153f60aa87fcbd3fb08828e572c8943dea1cf5a6302920.jpg)

# 4.2 Connection management

When it starts, the Tester will automatically try to establish a connection to a running instance of OpenSplice using the default URI. You can also make or break connections from the main window by following the steps given below.

The command line option -nac stops Tester from making a connection at startup, and with the -uri command line option a connection to an alternative URI can be made at startup.

# 4.2.1 To Connect to a local OpenSplice instance

Step 1: Choose File > Connect.

Step 2: Set the path or Browse to the configuration file (e.g., file://&lt;OpenSplice install dir&gt;/etc/config/ospl.xml).

Step 3: Click the OK button.

Connecting to a local OpenSplice instance
![File Script View SampleList Display Filter Editor Edit Help\nServices Scripts Macros\nReaders Topics\nSelect All Deselect all\nRe... Sh... Topic Count qos partition\nSample List Statistics Browser Edit\nClear -- Filter Reset Pack\nDTime (ms) Topic State Key Src\n1. Click File/Connect\n2. Click Browse\n3. Select a configuration file\nOpen connection\nDomain URI openSpliceDDS\6.1.0b2\HDEx86.win32\etc\config\osp1.xml' Browse\nOk Cancel\nDebug\nDTime Type Message\nOpen\nLook Inc: config\nospl.xml ospl_sp_native.xml\nospl_shmem_ddsi.xml ospl_sp_no_network.xml\nospl_shmem_native.xml\nospl_shmem_no_network.xml\nospl_sp_ddsi_native_cohabitation.xml\nospl_sp_ddsi_statistics.xml\nFile Name: ospl.xml\nFiles of Type: OpenSplice configuration file\nOpen Cancel\nConnected 'file:C:\Program F...\iceDDS\6.1.0b2\HDEx86.win32\etc\config\osp1.xml' networking.exe,durability.exe,...exe,splicedaemon](.vortex-opensplice-test-tool-user-guide/d3d70c5b89cf9bb246e157467358efc73567e3c47058ea7d8b83de63dc02c84f.jpg)

# 4.2.2 To Connect to a remote OpenSplice instance

Step 1: Choose File > Connect.

Step 2: Enter the URI for the remote OpenSplice system (e.g., http://127.0.0.1:8000).

Note: The port number must be set to the port number as configured for the SOAP service of the remote OpenSplice instance.

Step 3: Click the OK button.

Connecting to a remote OpenSplice instance
![File Script View SampleList Display Filter Editor Edit Help\nServices Scripts Macros\nReaders Topics\nSelect all Deselect all\nRe... Sh... Topic Count qos partition\nSample List Statistics Browser Edit\nClear -- Filter Reset Pack\nDTime (ms) Topic State Key Src\n2. Input remote URI\nOpen connection\nDomain URI http://127.0.0.1:8000 Browse\nOk Cancel\nDebug\nDTime Type Message Location\nConnected 'file://C:\Program F...\iceDDS\6.1.0b2 HDE\x86.win32\etc\config\ospl.xml' networking.exe,durability.exe, ... exe,splicedaemon](.vortex-opensplice-test-tool-user-guide/fbffc3e51c450f1897edbbf1edc7b972b27a0eb8f2909419331311dc502dab06.jpg)

# 4.2.3 To Disconnect

Step 1: Choose File > Disconnect.

# 4.2. Connection management

# 4.2.4 To Exit Tester

Step 1: Choose File > Exit or click the Close button on the Tester main window.

# 4.3 Topics and Readers

Tester can subscribe to multiple topics. These Readers will comprise a timeline for testing. Samples of those topics are automatically read and displayed in the Sample List. Tester readers can also be used to write or edit samples.

# 4.3.1 The Topic list

Check the Topic list. Make sure that the Tester is connected to the default URI.

# 4.3.2 To View a Topic’s Type definition

Step 1: Select the Topics tab.

Step 2: Right-click OsplTestTopic.

Step 3: Choose View Topic Type from the pop-up menu. The View Topic Type window will appear, displaying the type name and type description for the chosen topic.

Viewing a topic’s type
![Topic Data Type - OsplTestTopic\nType Name: osplog::OsplTestTopic\nDDS Typedef\nstruct OsplTestTopic {\n    c_longlong id;\n    c_long index;\n    c_double x;\n    c_double y;\n    c_double z;\n    c_double t;\n    enum Tstate {\n        init,\n        boost,\n        steady,\n        attack,\n        hit,\n        mis\n    } state;\n    C_STRING(32)(32) description;\n} OsplTestTopic;](.vortex-opensplice-test-tool-user-guide/52799f70f5bce5513d0bfa5a55034b9c5bd2f85aacffa6c8b261626bfda11a0e.jpg)

# 4.3.3 To Add a Reader from the Topic list

Step 1: Select the Topics tab.

Step 2: Right-click OsplTestTopic.

Create Readers from the Topics list

# 4.3. Topics and Readers

![File Script View SampleList Display Filter Editor Edit Help\nServices Scripts Macros\nReaders Topics\nname type qos\nDCPSCand... kernelModul... tr\nDCPSDelivery kernelModul... vb\nDCPSHeart... kernelModul... vb\nDCPSPartici... kernelModul... tr\nDCPSPublic... kernelModul... tr\nDCPSSubs... kernelModul... tr\nDCPSTopic kernelModul... tr\nOsplArrayTo... ospilog::Os... tr\nOsplSeque... ospilog::Os... tr\nOsplTestTo... ospilog::Os... tr\nd_delete Create Reader\nd_groups Create Default Reader\nd_nameView Topic Type\nd_nameSpa... durabilityMo... vr\nd_newGroup durabilityMo... vr\nd_sampleC... durabilityMo... vr\nd_sampleR durabilityMn vr\nSample List Statistics Browse\nClear -- 1\nDTime (ms) Topic\n1. Click Topic tab\n2. Right click on OsplTestTopic](.vortex-opensplice-test-tool-user-guide/0e54d55b9d18978f8ac088deb48580516f355429121cda3a1d278af2de558581.jpg)

Step 3: Choose Create Default Reader from the pop-up menu. The reader will automatically be named the same as the topic.

Step 4: Choose Create Reader and modify the (writer) QoS or reader name if desired.

Step 5: Click Add.

Create myReader
![Add Reader\nOsplTestTopic\nReaderName: myReader\nPartition:\nKeep 10 Wait for historical\nAuto dispose unregistered instances\nDurability: transient\nReliability: reliable\nDestinationOrder: Destination\nOwnership: Shared\nCancel Add](.vortex-opensplice-test-tool-user-guide/2822c6c68cc275c067edc8f9a68465bb88fc89a5b5afd81f9690acb80ccdecf9.jpg)

Step 6: Open the Readers tab and you will see the readers you just created.

# 4.3.4 To Add a Reader from the File menu

Step 1: Select the Readers tab.

Step 2: Choose File > Add Reader.

Step 3: Select OsplTestTopic from the drop-down list.

Step 4: Click Add.

Adding a Reader from the File menu

# 4.3. Topics and Readers

![File Script View SampleList Display Filter Editor Edit Help\nServices Scripts Macros\nReaders\n1: Choose File ) Add Reader\nSelect all Deselect all\nRead Show Topic Count qos partition\nAdd Reader\nOsplTestTopic\nFull topic list\nReaderName:\nPartition:\nKeep 10 Wait for historical\nAuto dispose unregistered instances\nDurability: transient\nReliability: reliable\nDestinationOrder: Destination\nOwnership: Shared\nCancel Add](.vortex-opensplice-test-tool-user-guide/05fca48439e20bafb5ccccafa4f60a5fac374c2be20388af31c33ebf94485647.jpg)

# 4.3.5 To Add multiple Readers to the Tester timeline

Step 1: Choose File > Add Readers.

Step 2: Type ospl in the filter field to limit the list of topics. Select OsplArrayTopic and OsplSequenceTopic.

Step 3: Click Add.

Adding multiple Readers
![OpenSplice Tester: file://C:\Program Files\nFile  Script  View  SampleList  Display  Filter  Editor  End\nServices  Scripts  Macros\nReaders  Topics\nSelect all  Deselect all\nRead  Show  Topic  Count  qos  partition\n1: Choose File ) Add Readers\n2: Select topic\n3: Click Add\nAdd Readers\nKeep 10  Wait for historical\nAuto dispose unregistered instances\nDurability:\nReliability:\nDestinationOrder:\nOwnership:\nFilter\nReset filter\nRead  Topic\nCMParticipant\nDCPSCandMCommand\nDCPSDelivery\nDCPSHeartbeat\nDCPSParticipant\nDCPSPublication\nDCPSSubscription\nDCPSTopic\nOsplArrayTopic\nOsplSequenceTopic\nOsplTestTopic\nd_deleteData\nd_groupsRequest\nd_nameSpaces\nd_nameSpacesRequest\nd_newGroup\nd_sampleChain\nd_sampleRequest\nd_status\nd_statusRequest\ng_bubble\nSelect all  Cancel  Add](.vortex-opensplice-test-tool-user-guide/bd2f62c44424dc7ed61f611723e4947ce3733543a18b290fb53cbf7e68b40d72.jpg)

# 4.3.6 To Save the current Readers to a file

If you need to preserve the Readers for a timeline, you can save the current Readers list.

Step 1: Choose File > Save Readers List.

Step 2: Enter a name for the new file.

# 4.3. Topics and Readers

Step 3: Click Save.

# 4.3.7 To Remove all Readers

Step 1: Choose File > Remove all Readers.

# 4.3.8 To Load Readers from a saved file

Step 1: Choose File > Load Readers List.

Step 2: Select the name of the saved file.

Step 3: Click Load.

# 4.3.9 To Delete a Reader

Step 1: Select OsplTestTopic reader from the list.

Step 2: Press the [Delete] key or right-click on OsplTestTopic and choose Delete Reader from the pop-up menu.

# 4.4 Samples

# 4.4.1 Writing and Editing Samples

# To Write Sample Topic data

Step 1: Select OsplTestTopic reader from the list.

Step 2: Press [F4] or choose Edit Sample from the pop-up menu.

Step 3: Enter following values for the fields in the list:

id: 0, t: 1, x: 1, y: 1, z: 1

Entering sample topic data
![Edit sample: OsplTestTopic\nField	Default	Value\nid	0	0\ndescription\nindex	0\nstate_init\nt	0	1\nx	0	1\ny	0	1\nz	0	1\nwrite-writeDispose dispose script check](.vortex-opensplice-test-tool-user-guide/e651d24446839c8b0271c669fa078b3ba0ae150410724d29842ff5ae1c37efc4.jpg)

Step 4: Click the write button.

Step 5: Close the Edit Sample window.

# 4.4. Samples

# To display detailed information on sample data

Step 1: Double-click on the first OsplTestTopic sample in the Sample List window.

Display detailed sample data information
![Sample: OspITestTopic\nsource_timestamp	1315320828s.810113666ns\ndaytime	10:53:48.810 (53 06)\ninsert_latency	18249806ns\nrelative_time	-51.138\nview_stateuren\nsample_state—not_read\ninstance_state-alive\nvalid_data-valid_data\nstate	NEW, NOT_READ\npartition*\nsource	OpenSplice Tester (simon-3b1569dcf)\nqos	2ba1636a.0000012b\nField	Value\nid	0\nindex	0\nx	1\ny	1\nz	1\nt	1\nstate_init\ndescription	\nSample	((	))	Same topic\n((	))	Same instance	((	))](.vortex-opensplice-test-tool-user-guide/2c524b1fb724f08ad4607b50f72716bec6354ae68110924882329c32a3a18ad0.jpg)

# More information on sample info

The detailed sample data table displays sample info data of a given sample. Some fields are derived from middleware sample info data, while others are not. What follows is a description of some of those fields.

• The insert\_latency is a calculated value representing the difference between the sample’s insert timestamp, and its write timestamp, as it is received in the sample info.
• The relative\_time is a Tester specific time measurement, in seconds. It does not represent any actual timestamps from the middleware. Its main use is determining the time elapsed between a Tester scenario script execution start and the sample receipt. It’s mainly meant as a loose measurement of time tracking since start of sample reading or start of a script scenario, and not as a strict real-time middleware timing.

# To Display extra fields

By default the Sample List displays topic-independent fields. You can add topic-specific fields as follows:

Step 1: Select any sample.

Step 2: Press [F9] or right-click and choose Select Extra Fields from the pop-up menu.

Step 3: Click to select (‘check’) x, y, z and t.

# Selecting extra fields to display

# 4.4. Samples

![Field select\nSel	Field\n□ id\n□ index\n✓ x\n✓ y\n✓ z\n✓ t\n□ state\n□ description\nOk](.vortex-opensplice-test-tool-user-guide/22dbc95a611b52b26605cd0480dc2485c606f03d0ebe0cbd92c28cc4bae09a38.jpg)

Step 4: Click OK.

The selected fields will be added to the Sample List.

New fields added
![File Script View SampleList Display Filter Editor Edit Help\nServices Scripts Macros\nReaders Topics\nSelect all Deselect all\nRe... Sh... Topic Count qos parti...\n✓ OspITestTopic 1 -(trD... *\nSample List Statistics Browser Edit\nClear Delta: -- sec Filter Reset Pack\nDTime (ms) Topic State Key Src x y z t\n-28 OspITestTopic send 0 OpenSplice Tester (simon-3b1569dcf) 1 1 1 1\n461300 OspITestTopic send 0 OpenSplice Tester (simon-3b1569dcf) 1 2 1 1\n485529 OspITestTopic send 0 OpenSplice Tester (simon-3b1569dcf) 1 4 2 1\n495675 OspITestTopic send 0 OpenSplice Tester (simon-3b1569dcf) 1 8 3 1\n503530 OspITestTopic send 0 OpenSplice Tester (simon-3b1569dcf) 1 8 4 1\n517000 OspITestTopic write_dispose 0 OpenSplice Tester (simon-3b1569dcf) 1 8 4 1\nNew fields added\nDebug\nDTime Type Message Location\nConnected 'Tile:/C::Program F ... iceDDS\V6.1.0b2HDE\x86.win32\etc/config\ospl.xml' networking.exe,durability.exe, ... exe,splicedaemon](.vortex-opensplice-test-tool-user-guide/d3b5da11e8eb3b4bfd5bfbe915576a9e7d7b88f0d0bd4f3cc26557e6d80453c0.jpg)

# To Edit a sample

Step 1: Select the first sample.

Step 2: Press [F4] or choose Edit Sample from the pop-up menu.

Step 3: Enter following values in the fields:

id: 0, x: 1, y: 2, z: 1, t: 1

Step 4: Click Write.

Step 5: Enter following values in the fields:

# 4.4. Samples

```txt
id: 0, x: 1, y: 4, z: 2, t: 1
```

Step 6: Click Write.

Step 7: Enter following values in the fields:

```txt
id: 0, x: 1, y: 8, z: 3, t: 1
```

Step 8: Click Write.

Step 9: Enter following values in the fields: id: 1, x: 1, y: 8, z: 4, t: 1

Step 10: Click WriteDispose.

# To Compare two samples

Step 1: Double-click the sample with the values id: 0, x: 1, y: 4, z: 2, t: 1.

Step 2: Select the sample with the values id: 0, x: 1, y: 8, z: 3, t: 1.

Step 3: Press [F2] or choose Compare Samples from the pop-up menu.

Comparing samples
![Sample: OspTestTopic\nsource_timestamp 1315321324s.513815952ns\ndaytime 11:02:04.513 (02.06)\ninsert_latency 19835ns\nrelative_time -226.418\nview_state not_new\nsample_state not_read\ninstance_state alive\nvalid_data valid_data\nstate NOT_NEW, NOT_READ\npartition *\nsource OpenSplice Tester (simon-3b1569dcf)\nqos 2ba1636a.0000012b\nField value\nid 0\nindex 0\nx 1\ny 8\nz 3\nt 1\nstate init\ndescription\n\nSample ()( ))\nSame topic ()( ))\nSame instance ()( ))\n\nSample: OspTestTopic\nsource_timestamp 131532134s.367808289ns\ndaytime 11:01:54.367 (01.06)\ninsert_latency 19277ns\nrelative_time 434.420\nview_state not_new\nsample_state not_read\ninstance_state alive\nvalid_data valid_data\nstate NOT_NEW, NOT_READ\npartition *\nsource OpenSplice Tester (simon-3b1569dcf)\nqos 2ba1636a.0000012b\nField value\nid 0\nindex 0\nx 1\ny 4\nz 2\nt 1\nstate init\ndescription\n\nSample ()( ))\nSame topic ()( ))\nSame instance ()( ))\n\nConnected 'file:' C:\Program F._iceDDS\V6.1.0b2HDE x86.win32\etc\config ospl.xml' networking.exe,durability.exe, ... exe,spliceddaemon](.vortex-opensplice-test-tool-user-guide/31f95d7e99e46918478d37930b5b68fa2752c5f867c39d23b02b119e2af19fbc.jpg)

# 4.5 Filtering

Filtering: un-filtered Topic list
![File Script View SampleList Display Filter Editor Edit Help\nServices Scripts Macros\nReaders Topics\nSelect all Deselect all\nSample List Statistics Browser Edit\nClear Delta: -- sec Filter Reset Pack\nDTime (.. ▲ Topic State Key Src x y z t\n1448747 OspITestTopic send 0 OpenSplice Tester (simon-3b1569dcf) 1 1 1 1\n1497176 OspITestTopic send 0 OpenSplice Tester (simon-3b1569dcf) 1 2 1 1\n1507320 OspITestTopic send 0 OpenSplice Tester (simon-3b1569dcf) 1 4 2 1\n1546297 OspITestTopic write_dispose 0 OpenSplice Tester (simon-3b1569dcf) 1 8 4 1\n1583899 DCPSParticipant SEND_AND_ALIVE 1,0 OpenSplice Tester (simon-3b1569dcf)\n1603938 OspIArrayTopic SEND_AND_ALIVE 0 OpenSplice Tester (simon-3b1569dcf) 0 0\n2085053 OspITestTopic send 1 OpenSplice Tester (simon-3b1569dcf) 1 8 4 1\n2088403 OspITestTopic send 1 OpenSplice Tester (simon-3b1569dcf) 1 8 4 1\n2095649 OspITestTopic SEND_AND_ALIVE 1 OpenSplice Tester (simon-3b1569dcf) 1 8 4 1](.vortex-opensplice-test-tool-user-guide/4a9a3edd1a66ad1567cd6c24ab3390f56a350bec020340937d2cf7ecd28341bc.jpg)

# 4.5. Filtering

# 4.5.1 To Filter the Sample List on a Topic

Step 1: Select the OsplTestTopic sample.

Step 2: Press [F5] or choose Filter on Topic from the pop-up menu.

Sample List filtered by Topic
![File Script View SampleList Display Filter Editor Edit Help\nServices Scripts Macros\nReaders Topics\nSelect all Deselect all\nSample List Statistics Browser Edit\nClear Delta: -- sec Filter Reset Pack\nDTime (ms) Topic State Key Src x y z t\n1448747 OsplTestTopic send 0 OpenSplice Tester (simon-3b1569dcf) 1 1 1 1\n1497176 OsplTestTopic send 0 OpenSplice Tester (simon-3b1569dcf) 1 2 1 1\n1507320 OsplTestTopic send 0 OpenSplice Tester (simon-3b1569dcf) 1 4 2 1\n1546297 OsplTestTopic write_dispose 0 OpenSplice Tester (simon-3b1569dcf) 1 8 4 1\n2085053 OsplTestTopic send 1 OpenSplice Tester (simon-3b1569dcf) 1 8 4 1\n2088403 OsplTestTopic send 1 OpenSplice Tester (simon-3b1569dcf) 1 8 4 1\n2095649 OsplTestTopic SEND_AND_ALIVE 1 OpenSplice Tester (simon-3b1569dcf) 1 8 4 1](.vortex-opensplice-test-tool-user-guide/166172ed4909858baefed9773a186b9f41bc340759f218524abed2f43cade80b.jpg)

# 4.5.2 To Reset Filters and display all samples

Step 1: Press [F7] or choose Reset filter from the pop-up menu or click the Reset button on the Sample List window.

# 4.5.3 To Filter on both Topic and Key

Step 1: Select OsplTestTopic with id(key): 1.

Step 2: Press [F5] or choose Filter on topic and key from the pop-up menu.

Sample List filtered by Topic and Key
![File Script View SampleList Display Filter Editor Edit Help\nServices Scripts Macros\nReaders Topics\nSelect all Deselect all\nSample List Statistics Browser Edit\nClear Delta: -- sec Filter - 1 Reset Pack\nDTime (ms) Topic State Key Src x y z t\n2085053 OsplTestTopic Bend 1 OpenSplice Tester (simon-3b1569dcf) 1 8 4 1\n2088403 OsplTestTopic Bend 1 OpenSplice Tester (simon-3b1569dcf) 1 8 4 1\n2095649 OsplTestTopic BEND_AND_ALIVE 1 OpenSplice Tester (simon-3b1569dcf) 1 8 4 1\nRead Sh... Topic Count qos parti...\n✓ DCPSParticip... 1 -(trD... _B...\n✓ OsplArrayTopic 1 -(trD... *\n✓ OsplTestTopic 4 -(trD... *](.vortex-opensplice-test-tool-user-guide/5a4f6c33d767d0ea1ef539320b8ceabe97d7f035cb8038420667db47cb8dbf3d.jpg)

# 4.5.4 Filter samples on State

Step 1: Select a sample with a State of SEND\_AND\_ALIVE.

Step 2: Choose Filter on State from the pop-up menu.

Sample List filtered by State
![File Script View SampleList Display Filter Editor Edit Help\nServices Scripts Macros\nReaders Topics\nSelect all Deselect all\nRead Sh... Topic Count qos partl...\n✓ ✓ DCPSParticip... 1 -(trD... B...\n✓ ✓ OsplArrayTopic 1 -(trD... *\n✓ ✓ OsplTestTopic 4 -(trD... * \nSample List Statistics Browser Edit\nClear Delta: -- sec Filter SEND_AND_ALIVE Reset Pack\nDTime (ms) Topic State Key Src x y z t\n1448747 OsplTestTopic send 0 OpenSplice Tester (simon-3b1569dcf) 1 1 1 1\n1497176 OsplTestTopic send 0 OpenSplice Tester (simon-3b1569dcf) 1 2 1 1\n1507320 OsplTestTopic send 0 OpenSplice Tester (simon-3b1569dcf) 1 4 2 1\n1546297 OsplTestTopic write_dispose 0 OpenSplice Tester (simon-3b1569dcf) 1 8 4 1\n2085053 OsplTestTopic send 1 OpenSplice Tester (simon-3b1569dcf) 1 8 4 1\n2088403 OsplTestTopic send 1 OpenSplice Tester (simon-3b1569dcf) 1 8 4 1](.vortex-opensplice-test-tool-user-guide/f1eefef7d553f15b3239d4c25564cc39eca8dd688e7962264154bb7402748dbe.jpg)

# 4.5. Filtering

# 4.5.5 To Filter Samples on Key value

Step 1: Select OsplTestTopic with id(key): 0.

Step 2: Choose Filter on key from the pop-up menu.

Sample List filtered by Key value
![File Script View SampleList Display Filter Editor Edit Help\nServices Scripts Macros\nReaders Topics\nSelect all Deselect all\nSample List Statistics Browser Edit\nClear Delta: -- sec Filter + 0 Reset Pack\nDTime (ms) Topic State Key Src x y z t\n1448747 OsplTestTopic send 0 OpenSplice Tester (simon-3b1569dcf) 1 1 1 1\n1497176 OsplTestTopic send 0 OpenSplice Tester (simon-3b1569dcf) 1 2 1 1\n1507320 OsplTestTopic send 0 OpenSplice Tester (simon-3b1569dcf) 1 4 2 1\n1546297 OsplTestTopic write_dispose 0 OpenSplice Tester (simon-3b1569dcf) 1 8 4 1\n1603938 OsplArrayTopic SEND_AND_ALIVE 0 OpenSplice Tester (simon-3b1569dcf) 0 0](.vortex-opensplice-test-tool-user-guide/cc7d33f06341a89e9910fc482011900380347d0b4fc072aed67db18e11800490.jpg)

# 4.5.6 Filter on column text

Step 1: Select the State column of any sample.

Step 2: Choose Filter on column text from the pop-up menu.

Step 3: Type in send.

Step 4: Press the [Enter] key.

Sample List filtered by column text
![File Script View SampleList Display Filter Editor Edit Help\nServices Scripts Macros\nReaders Topics\nSelect all Deselect all\nRead Sh... Topic Count qos part...\n✓ DCPSParticip... 1-(trD... B...\n✓ OsplArrayTopic 1-(trD... *\n✓ OsplTestTopic 4-(trD... *\nSample List Statistics Browser Edit\nClear Delta: -- sec Filter (2) send Reset Pack\nDTime (ms) Topic State Key Src x y z t\n1448747 OsplTestTopic send 0 OpenSplice Tester (simon-3b1569dcf) 1 1 1\n1497176 OsplTestTopic send 0 OpenSplice Tester (simon-3b1569dcf) 1 2 1\n1507320 OsplTestTopic send 0 OpenSplice Tester (simon-3b1569dcf) 1 4 2 1\n2085053 OsplTestTopic send 1 OpenSplice Tester (simon-3b1569dcf) 1 8 4 1\n2088403 OsplTestTopic send 1 OpenSplice Tester (simon-3b1569dcf) 1 8 4 1](.vortex-opensplice-test-tool-user-guide/0dd587683e9a1b8820e2a05f41cbd72e1d864753267585fc47308de89e2a2de8.jpg)

# 4.5.7 Find specific text

Step 1: Press [Ctrl+F] to open the Find dialog.

The Find dialog
![Find:\nFind: text\nCase sensitive\nWrap Search\nBackward\nFind Close](.vortex-opensplice-test-tool-user-guide/5ebc831e361a9778343994d1bc1995603dc7e0b07c26120211a1f7e9b7bf90ce.jpg)

Step 2: Type in the text to search for, and select any of the options if required.

Step 3: Click Find. The first occurrence of the search text is highlighted.

Step 4: Click Find again to find the next occurrence of the search text.

# 4.5. Filtering

# 4.5.8 Global Topic filters

Topic filters
![Edit preferences\nScripts	Settings	Topic Filters\nHide Builtin (DCPS*, CM*)	true\nHide Builtin (d_*)	true\nHide Builtin (rr_*)	true\nOk	Cancel\nPlease provide input.](.vortex-opensplice-test-tool-user-guide/d00a61d79f1aab8c98b29ff643c1568cb74f598cd2f88129114dda6dce8cbdd7.jpg)

It is possible to completely hide certain topics from all views in the tool. These are global topic filter preferences, which can be enabled (true) or disabled (false). They are accessed from the preferences window in File > Preferences > Topic Filters. Enabling a given filter will hide the matching topics from the Topics table and from the system browser view.

# 4.6 Working with Samples

# 4.6.1 To Delete a column from the Sample List table

Step 1: Select the x column of any sample.

Step 2: Press the [Delete] key.

Column deleted from Sample List display
![File Script View SampleList Display Filter Editor Edit Help\nServices Scripts Macros\nReaders Topics\nSelect all Deselect all\nRead Sh... Topic Count qos part...\n✓ ✓ DCPSParticip... 1-(trD... B...\n✓ ✓ OspiArrayTopic 1-(trD... *\n✓ ✓ OspiTestTopic 4-(trD... *\nSample List Statistics Browser Edit\nClear Delta: -- sec Filter Reset Pack\nDTime (ms) Topic State Key Src y z t\n1448747 OspiTestTopic send 0 OpenSplice Tester (simon-3b1569dcf) 1 1\n1497176 OspiTestTopic send 0 OpenSplice Tester (simon-3b1569dcf) 2 1\n1507320 OspiTestTopic send 0 OpenSplice Tester (simon-3b1569dcf) 4 2\n1546297 OspiTestTopic write_dispose 0 OpenSplice Tester (simon-3b1569dcf) 8 4 1\n1583899 DCPSParticipant SEND_AND_ALIVE 1,0 OpenSplice Tester (simon-3b1569dcf) 0\n1603938 OspiArrayTopic SEND_AND_ALIVE 0 OpenSplice Tester (simon-3b1569dcf) 0\n2085053 OspiTestTopic send 1 OpenSplice Tester (simon-3b1569dcf) 8 4 1\n2088403 OspiTestTopic send 1 OpenSplice Tester (simon-3b1569dcf) 8 4 1\n2095649 OspiTestTopic SEND_AND_ALIVE 1 OpenSplice Tester (simon-3b1569dcf) 8 4 1\nx field deleted](.vortex-opensplice-test-tool-user-guide/c26846e7b9e1106583c93a7c6af0e0e84755cfd8860daba4f4f6847fea5366d1.jpg)

# 4.6.2 To Chart Sample Data

Using any list of samples:

Step 1: Select the z column of any sample and press the [X] key.

Step 2: Select the y column of any sample and press the [Y] key.

Step 3: Choose SampleList > Show Chart or press [Alt+Shift+C] to display the chart.

Chart of Sample data

![| x   | y   |\n| --- | --- |\n| 1.0 | 2.1 |\n| 3.9 | 7.7 |](.vortex-opensplice-test-tool-user-guide/d9a3c6939c2ce77e1c5e6c0945930f03c687a2542e1eb00b23b9cebeda0e6530.jpg)

# 4.6.3 To Dump a sample list to a file

Step 1: Choose SampleList > Dump.

Step 2: Enter a name for the file to save.

Step 3: Click Save.

# 4.6.4 To Dump selected Samples only

Step 1: Select OsplTestTopic with key: 1.

Step 2: Choose SampleList > Dump Selection.

Step 3: Enter a name for the file to save.

Step 4: Click Save.

# 4.6.5 To Dump to a CSV format file

Step 1: Choose SampleList > Dump to CSV.

Step 2: Enter a name for the file to save.

Step 3: Click Save.

# 4.6.6 To Dispose data with Alive state

Step 1: Choose SampleList > Dispose Alive.

Disposing data with ‘Alive’ state
![File Script View SampleList Display Filter Editor Edit Help\nServices Scripts Macros\nReaders Topics\nSelect all Deselect all\nSample List Statistics Browser Edit\nClear Delta: -- sec Filter Reset Pack\nDTime (ms) Topic State Key Src y z t\n1448747 OsplTestTopic send 0 OpenSplice Tester (simon-3b1569dcf) 1 1 1\n1497176 OsplTestTopic send 0 OpenSplice Tester (simon-3b1569dcf) 2 1 1\n1507320 OsplTestTopic send 0 OpenSplice Tester (simon-3b1569dcf) 4 2 1\n1546297 OsplTestTopic write_dispose 0 OpenSplice Tester (simon-3b1569dcf) 8 4 1\n1583899 DCPSParticipant send 1,0 OpenSplice Tester (simon-3b1569dcf)\n1603938 OsplArrayTopic send 0 OpenSplice Tester (simon-3b1569dcf) 0\n2085053 OsplTestTopic send 1 OpenSplice Tester (simon-3b1569dcf) 8 4 1\n2088403 OsplTestTopic send 1 OpenSplice Tester (simon-3b1569dcf) 8 4 1\n2095649 OsplTestTopic send 1 OpenSplice Tester (simon-3b1569dcf) 8 4 1\n6807813 OsplTestTopic write_dispose 1 OpenSplice Tester (simon-3b1569dcf) 8 4 1\n6807813 OsplArrayTopic write_dispose 0 OpenSplice Tester (simon-3b1569dcf) 0\n6807813 DCPSParticipant write_dispose 1,0 OpenSplice Tester (simon-3b1569dcf)](.vortex-opensplice-test-tool-user-guide/fffa73c52acd523bb3d6292df795f4f77e27766aabbe3c679f1f821e58d29057.jpg)

# 4.6.7 To Translate Sample data to test script

Step 1: Choose SampleList > Diff Script.

The Scripting commands to replicate all of the sample data will be inserted into the current scenario in the Edit window.

# 4.6.8 Translate selected sample to test script

Step 1: Select a set of samples.

Step 2: Choose SampleList > DiffScript Selection.

The Scripting commands to replicate this subset of the sample data will be inserted into the current scenario in the Edit window.

# 4.6.9 To display samples with not\_alive\_no\_writers state

There is a setting to control whether Tester’s active data readers ignore samples whose state is NOT\_ALIVE\_NO\_WRITERS.

If an application data writer has a QoS of autodispose\_unregistered\_instances set to false and then unregister\_instance is called on a data writer for some instance, a sample reaches matching data readers with the no\_writers state.

The default setting is true, which means that these samples are ignored and not displayed.

‘Max samples’ and ‘not\_alive’ options
![Edit preferences\nScripts	Settings	Topic Filters\nUse tabs Hydro\nUse IDE Hydro\nPlugins dir /plugins	Browse\nLog properties file 36.linux/examples/tools/ospitest/log4j.properties	Browse\nMax Samples Kept Per Reader 164 0 for infinite size.\nIgnore not_alive_no_writers samples true\nOk	Cancel\nPlease provide input.](.vortex-opensplice-test-tool-user-guide/0054dcef40009eae37c2235da74fc37e7efb8758a2e4c05df0912bb41398a04b.jpg)

# 4.6.10 To control the number of samples kept per reader

It is possible to limit the number of samples kept per reader. This setting, Max Samples kept per reader, is accessed by choosing File > Preferences > Settings.

This setting accepts integer values. The default value is 0, which means that there is no limit imposed on the number of samples that will be stored.

# 4.7 Groups

# 4.7.1 Definition of a Group in Tester

Vortex OpenSplice supports setting of the Presentation policy of publishers and subscribers. As a result, Tester can set these policies on its own created publishers and subscribers and be able to write/read coherent sets of data into/from the system.

Just as in Tester where data reader and data writer are aggregated into a Reader and listed in the Readers list, a custom created publisher and subscriber pair are aggregated into a Group and are listed in the Groups list. A Group

# 4.7. Groups

has a defined Partition and Presentation QoS policy that is set on creation and is set to its contained publisher and subscriber.

# 4.7.2 To Add a Reader under a Group

Step 1: Choose File > Add Reader.

Step 2: Select OsplTestTopic from the drop-down topics list.

Step 3: Check the box labeled Create as group.

Step 4a: Choose a name for the Group (Group name must be unique and non empty).

Step 4b: Fill in desired Partition, and Presentation policy settings (Access scope, Coherent access and Ordered access).

OR

Step 4c: Select an already existing Group from the drop-down Groups list. Partition and Presentation form elements will populate to existing values for the selected Group and become disabled.

Step 5: Click Add.

Create a Reader under a Group
![Add Reader\nOsplTestTopic\nFull topic list\nReaderName:\nPartition: myPartition\nKeep 10 ✓ Wait for historical\nAuto dispose unregistered instances\nDurability: transient\nReliability: reliable\nDestinationOrder: Destination\nOwnership: Shared\n✓ Create as group\nGroup name: myGroup\nAccess scope: Group\n✓ Coherent access ✓ Ordered access\nCancel Add](.vortex-opensplice-test-tool-user-guide/c27888fbad6d86b2042c50d1225a640b986ba8949416a6ce2c006a20bcf48296.jpg)

Completing this action will create the Groups tab on the main panel if this is the first Group that has been created in the current session.

If there is already a reader existing on the selected topic, then the new reader must have a unique name assigned to it, else the new reader will not be created and assigned to the Group.

# 4.7.3 To Add multiple Readers under a Group

Step 1: Choose File > Add Readers.

Step 2: Select OsplTestTopic, OsplArrayTopic, and OsplSequenceTopic from table.

Step 3: Check the box labeled Create as group.

Step 4a: Choose a name for the Group (Group name must be unique and non empty).

# 4.7. Groups

Step 4b: Fill in desired Partition, and Presentation policy settings (Access scope, Coherent access and Ordered access).

OR

Step 4c: Select an already existing Group from the drop-down Groups list. Partition and Presentation form elements will populate to existing values for the selected Group and become disabled.

Step 5: Click Add.

Create multiple Readers under a Group
![Add Readers\nKeep 10\nWait for historical\nAuto dispose unregistered instances\nDurability:\nReliability:\nDestinationOrder:\nOwnership:\nCreate as group\nGroup name: myGroup\nPartition: myPartition\nAccess scope: Group\nCoherent access Ordered access\nFilter\nReset filter\nRead Topic\nOsplArrayTopic\nOsplSequenceTopic\nOsplTestTopic\nSelect all Cancel Add](.vortex-opensplice-test-tool-user-guide/f79208c7731d4143c343dccee91ecaf67a2c071ae66950de85519e7efa6cf5ff.jpg)

Completing this action will create the Groups tab on the main panel if this is the first Group that has been created in the current session.

If there is already a reader existing on a selected topic, then the new reader must have a unique name assigned to it, else the new reader will not be created and assigned to the Group. In this case, one should use the method in To Add a Reader under a Group.

# 4.7.4 To Publish coherent sets

Once at least one Group has been created, the Groups tab will become visible. It contains a list of currently active groups, their QoS policies, and current number of Tester readers (readers under the subscriber, writers under the publisher).

There are two actions available to rows of this table: Delete Group, and Publish Coherent Data.

Deleting a Group will also delete the readers that it owns.

If Publish Coherent Data is selected, then a new window will appear.

# Publish coherent sets menu

# 4.7. Groups

![Readers\nTopics\nGroups\nServices\nScripts\nMacros\nSample List\nStatic\nName\nReaders\nPartition\nScope\nCoherent\nOrdered\nmyGroup\n3\nmyPartition\nGROUP\ntrue\ntrue\nDelete Group (del)\nPublish Coherent Sets (F4)](.vortex-opensplice-test-tool-user-guide/1aaa6631a0b14ae68e76a849c33bd1663e89d04916c33c678ada0d6aa64aa417.jpg)

Coherent Publisher Window

<table><tr><td colspan="4">File Edit</td></tr><tr><td>Instance</td><td>Write State</td><td>Source Writer</td><td>Writer List</td></tr><tr><td>id : 1</td><td>WRITE</td><td>OsplTestTopic</td><td>OsplTestTopic</td></tr><tr><td>id : 2</td><td>WRITE</td><td>OsplSequenceTopic</td><td>OsplSequenceTopic</td></tr><tr><td>id : 123</td><td>WRITE</td><td>OsplArrayTopic</td><td>OsplArrayTopic</td></tr><tr><td>id : 1</td><td>DISPOSED</td><td>OsplTestTopic</td><td></td></tr><tr><td></td><td></td><td></td><td></td></tr><tr><td></td><td></td><td></td><td></td></tr><tr><td></td><td></td><td></td><td></td></tr><tr><td></td><td></td><td></td><td></td></tr><tr><td></td><td></td><td></td><td></td></tr><tr><td></td><td></td><td></td><td></td></tr><tr><td></td><td></td><td></td><td></td></tr><tr><td></td><td></td><td></td><td></td></tr><tr><td></td><td></td><td></td><td></td></tr><tr><td></td><td></td><td></td><td></td></tr><tr><td></td><td></td><td></td><td></td></tr><tr><td></td><td></td><td></td><td></td></tr><tr><td></td><td></td><td></td><td></td></tr><tr><td></td><td></td><td></td><td></td></tr><tr><td></td><td></td><td></td><td></td></tr><tr><td></td><td></td><td></td><td></td></tr><tr><td></td><td></td><td></td><td></td></tr><tr><td></td><td></td><td></td><td></td></tr><tr><td></td><td></td><td></td><td></td></tr><tr><td></td><td></td><td></td><td></td></tr><tr><td></td><td colspan="3"></td></tr><tr><td colspan="4">Begin coherent changes End coherent changes</td></tr><tr><td colspan="4">Ready</td></tr></table>

This new view contains two parts: the list of writers currently under this Publisher, and the user data table containing data about the outgoing samples in a coherent set.

The actions available to the user in this view are:

• Begin coherent changes
• End coherent changes
• Refresh writer list

Begin coherent changes will set the publisher in coherent mode. In this state, samples written by this publisher’s writers will not be made visible to remote readers (under a subscriber with matching Presentation policy) until the End coherent changes action is made. Otherwise, samples written while the publisher is not in coherent mode are published normally.

Samples can be constructed and written from this view by either double clicking or right clicking on a writer in the writers list and selecting Write data. This brings up a writer window identical to the one in Writing and Editing Samples, only this one will update the Coherent publish window with written data.

When a sample is constructed in the writer window and then written, disposed, or any other writer action made, and if the publisher is in coherent mode, then the sample will appear in the Coherent publish window’s data table.

The data table displays the written sample’s instance key, the outgoing instance state, and the originating writer’s name. Samples in the data table can be double clicked to bring up a view of the sample edit window populated with the selected sample’s fields and field values.

A Once a sample has been written from the writer window, regardless if the publisher is in coherent mode or not, it is live in the system and cannot be edited.

# 4.7. Groups

Once editing a set of coherent data is complete, clicking End coherent changes button will notify the publisher that the set is complete, and remote coherent subscribers will allow access to the published data.

The Refresh writer list action (accessible from the Edit menu or F5 keystroke) refreshes the current list writers that the publisher owns, if any writers were created or deleted since the creation of the window.

# 4.7.5 To Subscribe coherent sets

The Group’s readers behave in the same way that normal Tester readers behave. All readers are periodically polled for available data and added to the Sample list. A Group’s reader is polled in such a way that it maintains coherent and ordered access.

# 4.8 System Browser (Browser window)

# 4.8.1 Browse tree

The System Browser is used to examine the Nodes, Participants, and Topics in your system using a tree paradigm.

Step 1: Choose View > Browser or click the Browser tab of the main window.

Step 2: Expand the all tree.

Step 3: Select Tester participant from the Browser tree. Note that your own Tester is highlighted in yellow in the tree.

```txt
All participants
- OpenSplice Tester
```

Step 4: Select Built-in participant from

```diff
Nodes
+ &lt;your machine name&gt;
+ java.exe
- Built-in participant
```

Step 5: Select Build-in participant from

```txt
Nodes
+ &lt;your machine name&gt;
+ java.exe
- ddsi2
```

Step 6: View readers and writers of durability service. Select Build-in participant from

```diff
Nodes
+ &lt;your machine name&gt;
+ java.exe
- durability
```

Step 7: View readers and writers of splicedaemon. Select Build-in participant from

```txt
Nodes
+ &lt;your machine name&gt;
+ java.exe
- spliceddaemon
```

# Browser window

![OpenSplice Tester: file://C:\Program File\nHDE\x86.win32\etc\config\ospl_sp_ddsi_statistics.xml\nFile  Script  View  SampleList  Display  Filter  Editor  Edit  Help\nServices  Scripts  Macros\nReaders  Topics\nSelect all  Deselect all\nRe... Sh... Topic  Count  qos  partiti...\nSample List  Statistics  Browser  Edit\nRefresh  Add readers  Add writers\nShow disposed participants\nNodes\nsimon-3b1569dcf\njava.exe (1952)\nOpenSplice Tester (simon-\nBuilt-in participant (simon-\ncmsoap (simon-3b1569dc\nddsi2 (simon-3b1569dcf)\ndurability (simon-3b1569dc\nsplicedaemon (simon-3b1\nAll participants\nOpenSplice Tester (simon-3b1569\nTopics\nReaders\ntopic   qos   partition\nDCPSParticip...vbDS__BUILT-IN PARTI...\nDCPSSubscri...vbDS__BUILT-IN PARTI...\nDCPSPublica...vbDS__BUILT-IN PARTI...\nDCPSTopic    vbDS__BUILT-IN PARTI...\nWriters\ntopic   qos   partition\nDebug\nDTime  Type  Message  Location\nConnected file://C:\Program FI__HDE\x86.win32\etc\config\ospl_sp_ddsi_statistics.xml  SP,ddsi2,durability,cmsoap,splicedaemon](.vortex-opensplice-test-tool-user-guide/33e914eb10a08f40f5d123392850509e1a99bf50f74975d2902847ca3d01e949.jpg)

(The red boxes in the illustration indicate the current Open Connection.)

# 4.8.2 Readers and Writers tables are updated when a new Reader is created

Step 1: Open the Browser window.

Step 2: Select OpenSplice Tester participant from the All participants tree.

Step 3: Create a new OsplTestTopic reader (see To Add a Reader from the Topic list for instructions).

Step 4: The Readers and Writers table will be updated.

Readers and Writers table updated

![File Script View SampleList Display Filter Editor Edit Help\nServices Scripts Macros\nReaders Topics\nSelect all Deselect all\nBe Sh Topic Count qos partiti\n✓ OspIT... 0-(trDS) *\nShow disposed participants\nNodes\nsimon-3b1569dcf\njava.exe (1952)\nOpenSplice Tester (simon-\nBuilt-in participant (simon-\ncmsoap (simon-3b1569dc\nddsi2 (simon-3b1569dcf)\ndurability (simon-3b1569dc\nsplicidaemon (simon-3b1\nAll participants\nOpenSplice Tester (simon-3b1569\nTopics\nRefresh\nDebug\nDTime Type Message Location\nRefresh Add readers Add writers\nOpenSplice Tester (simon-3b1569dcf)\nReaders\ntopic qos partition\nDCPSParticip...wbDS BUILT-IN PARTI...\nDCPSSubscri...wbDS BUILT-IN PARTI...\nDCPSPublica...wbDS BUILT-IN PARTI...\nDCPSTopic wbDS BUILT-IN PARTI...\nOspITestTopic wbDS *\nWriters\ntopic qos partition\nOspITestT...\nSP,ddsi2,durability,cmsoap,splicidaemon](.vortex-opensplice-test-tool-user-guide/acf00ef2cf1bc61f7e9e50828844fe27a0a846d2b2328ae3069e7a015894f56f.jpg)

# 4.8.3 Readers and Writers tables are updated when a new Reader is deleted

Step 1: Open the Browser window.
Step 2: Select the OpenSplice Tester participant from the All participants tree.
Step 3: Delete the existing OsplTestTopic reader.
Step 4: The deleted reader will be highlighted with orange to indicate that the reader is disposed.

Reader deleted

![File Script View SampleList Display Filter Editor Edit Help\nServices Scripts Macros\nReaders Topics\nSelect all Deselect all\nRe... Sh... Topic Count qos partiti...\nShow disposed participants\nNodes\nsimon-3b1569dcf\nSHMEM\njava.exe (1952)\nOpenSplice Tester (simon-\nBuilt-in participant (simon-\ncmsoap (simon-3b1569dc\nddsi2 (simon-3b1569dcf)\ndurability (simon-3b1569dc\nsplicedaemon (simon-3b1\nAll participants\nOpenSplice Tester (simon-3b156\nOpenSplice Tester (simon-3b156\nOpenSplice Tester (simon-3b156\nTopics\nRefresh\nDebug\nDTime Type Message Location\nRefresh Add readers Add writers\nOpenSplice Tester (simon-3b1569dcf)\nReaders\ntopic qos partition\nDCPSParticip... vbDS BUILT-IN PARTI...\nDCPSSubscri... vbDS BUILT-IN PARTI...\nDCPSPublica... vbDS BUILT-IN PARTI...\nDCPSTopic wbDS BUILT-IN PARTI...\nOspITestTopic wbDS *\nWriters\ntopic qos partition\nOspITestT... hDS *\nConnected file::C:\Program Fi... HDE x86.win32 etc\config\ospl_sp_ddsi_statistics.xml SP,ddsi2,durability,cmsoap,splicedaemon](.vortex-opensplice-test-tool-user-guide/e084746b655957c708dd76f162cc92faa5e521e8837532eed300f9a9aba4df78.jpg)

# 4.8.4 To Check Reader and Writer compatibility

Step 1: Choose Create Reader from the pop-up menu from OsplTestTopic.

Step 2: Enter boo for the name and boo\_partition for the partition.

Step 3: Create another reader with hoo for the name and hoo\_partition for the partition.

Step 4: Choose Create Default Reader to create a default reader.

Step 5: Open the Browser window and select Topics/OsplTestTopic from the browser tree.

Step 6: Select a Reader with \* partition from the Readers table.

Reader with ‘\*’ partition selected
![File Script View SampleList Display Filter Editor Edit Help\nServices Scripts Macros\nReaders Topics\nSelect all Deselect all\nRe... Sh... Topic Count qos partition\n✓ OspiTe... 0-(trDS) *\n✓ OspiTe... 0-(trDS) boo_p...\n✓ OspiTe... 0-(trDS) hoo_p...\nShow disposed participants\nNodes\nAll participants\nTopics\nDCPSCandMCommand\nDCPSDelivery\nDCPSHeartbeat\nTopic: OspITestTopic\nReaders\nsource qos partition\nOpenSplice Tester (sim... vb... *\nOpenSplice Tester (sim... vb... boo_par...\nOpenSplice Tester (sim... vb... hoo_par...\nWriters\nsource qos partition\nOpenSplice Tester (si... trDS*\nOpenSplice Tester (si... trDS_boo_pa...\nOpenSplice Tester (si... trDS_hoo_pa](.vortex-opensplice-test-tool-user-guide/8b57a9cdf0e1d2828688921e9faa0e72bf72df49d6854cb9360f07d534cbfcc4.jpg)

Step 7: Select a Reader with boo partition from the Readers table.

Reader with ‘boo’ partition selected
![File Script View SampleList Display Filter Editor Edit Help\nServices Scripts Macros\nReaders Topics\nSelect all Deselect all\nRe... Sh... Topic Count qos partition\n✓ OspITe... 0-(trDS) *\n✓ OspITe... 0-(trDS) boo_p...\n✓ OspITe... 0-(trDS) hoo_p...\nShow disposed participants\nNodes\nAll participants\nTopics\nDCPSCandMCommand\nDCPSDelivery\nDCPSHeartbeat\nDCPSParticipant\nSample List Statistics Browser Edit\nRefresh Add readers Add writers\nTopic: OspITestTopic\nReaders\nsource qos partition\nOpenSplice Tester (sim... vb... *\nOpenSplice Tester (sim... vb... boo_par...\nOpenSplice Tester (sim... vb... hoo_par...\nWriters\nsource qos partition\nOpenSplice Tester (si... trDS*\nOpenSplice Tester (si... trDS hoo_pa...\nOpenSplice Tester (si... hDS hoo_pa...](.vortex-opensplice-test-tool-user-guide/20fdf4ae3f35475fa4a17bfa6ebe845d0a07c257b458cdb799bede04b38ad5c8.jpg)

# 4.8. System Browser (Browser window)

Step 8: Select a Reader with hoo partition from the Readers table.

Reader with ‘hoo’ partition selected
![File Script View SampleList Display Filter Editor Edit Help\nServices Scripts Macros\nReaders Topics\nSelect all Deselect all\nRe... Sh... Topic Count qos partition\n✓ ✓ OsplTe... 0 -(trDS) *\n✓ ✓ OsplTe... 0 -(trDS) boo_p...\n✓ ✓ OsplTe... 0 -(trDS) hoo_p...\nShow disposed participants\nNodes\nAll participants\nTopics\nDCPSCandMCommand\nDCPSDelivery\nDCPSHeartbeat\nDCPSParticipant\nSample List Statistics Browser Edit\nRefresh Add readers Add writers\nTopic: OsplTestTopic\nReaders\nsource qos partition\nOpenSplice Tester (sim... vb... *\nOpenSplice Tester (sim... vb... boo_par...\nOpenSplice Tester (sim... vb... hoo_par...\nWriters\nsource qos partition\nOpenSplice Tester (si... trDS * \nOpenSplice Tester (si... hDS hoo_pa .\nOpenSplice Tester (si... trDS hoo_pa .](.vortex-opensplice-test-tool-user-guide/06ef2dae6102f6d423e32dbc7a26cfd84fc19ac4f21a1a1d4311f7a947d87ed9.jpg)

In the Browser window, Readers/Writers are highlighted with red to indicate incompatibility with the selected Writer/Reader (yellow).

# 4.8.5 To Show Disposed Participants from the Browser tree

Step 1: Open the Browser window.

Step 2: Select (check) Show disposed participants.

Step 3: Expand the Nodes tree.

Step 4: Expand the All participants tree.

Step 5: De-select (un-check) Show disposed participants.

Disposed participants
![File\nScript\nView\nSampleList\nDisplay\nFilter\nEditor\nEdit\nHelp\nServices\nScripts\nMacros\nReaders\nTopics\nSelect all\nDeselect all\nRe...\nSh...\nTopic\nCount\nqos\npartition\n✓\nOspITe...\n0-(trDS)\n*\n✓\nOspITe...\n0-(trDS)\nboo_p...\n✓\nOspITe...\n0-(trDS)\nhoo_p...\nShow disposed participants\nNodes\nsimon-3b1569dct\nSHMEM\nservices\nnetworking (simon-\ndurability (simon-3\nsplicedaemon (sim-\ncmsoap (simon-3b\nBuilt-in participant\njava.exe(3068)\nOpenSplice Tester\njava.exe(1952)\nOpenSplice Tester\njava.exe(3500)\nOpenSplice Tester\njava.exe (3500)\nAll participants\nTopics\nDCPSCandMCommand\nRefresh\nTopic: OsplTestTopic\nReaders\nsource\nqos\npartition\nOpenSplice Tester (sim...\nvb...\n*\nOpenSplice Tester (sim...\nvb...\nboo_par...\nOpenSplice Tester (sim...\nvb...\nhoo_par...\nWriters\nsource\nqos\npartition\nOpenSplice Tester (si...\ntrDS\nOpenSplice Tester (si...\nhDS hoo_pa...\nOpenSplice Tester (si...\ntrDS hoo_pa...\nDebug\nDTime\nType\nMessage\nLocation\nConnected file/C:\Program F...\HDE\x86.win32/etc config ospl_sp_ddsi_statistics.xml SP,ddsi2,durability,cmsoap,splicedaemon](.vortex-opensplice-test-tool-user-guide/23c9b12ab754588f201bd582ab2c3f5201f7901a0e9f01df5012d2578961f268.jpg)

# 4.8.6 To Spawn a Tuner from the System Browser

Any domain participant that is part of a configuration that includes a SOAP service should have the Start Tuner pop-up menu.

Step 1: Connect Tester using the ospl\_sp\_ddsi\_statistics.xml configuration file in the etc/config directory.

Step 2: Open the Browser window.

# 4.8. System Browser (Browser window)

Step 3: Expand the Nodes tree.

Step 4: Right-click on the OpenSplice Tester participant.

Step 5: Choose Start Tuner from the pop-up menu.

# 4.8.7 Statistics

First, connect Tester using the ospl\_sp\_ddsi\_statistics.xml configuration file in the etc/config directory.

Note that statistics can only be gathered from the Tester process.

The Statistics window
![File Script View SampleList Display Filter Editor Edit Help\nServices Scripts Macros\nReaders Topics\nName type qos\nDCPS Cand... kernelModul... tr\nDCPS Delivery kernelModul... vb\nDCPS Heart ... kernelModul... vb\nDCPS Partici... kernelModul... tr\nDCPS Public... kernelModul... tr\nDCPS Subsc... kernelModul... tr\nDCPSTopic kernelModul... tr\nOspl ArrayTo ospllog:Os... tr\nOspl Sequen ospllog:Os... tr\nOspl TestTo ospllog:Os... tr\nd _deleteData durabilityMo... vr\nd _groupsRe durabilityMo... vr\nd _nameSpa durabilityMo... vr\nd _nameSpa durabilityMo... vr\nd _newGroup durabilityMo... vr\nd _sampleC durabilityMo... vr\nd _sampleR durabilityMo... vr\nd _status durabilityMo... vr\nd _statusRe durabilityMo... vr\nq _bubble q _osplserM... vb\n169\n103\n112\n109\n106\nConnected file:///C:\Program Fi ... HDE\x86.win32 etc\config ospl_sp_ddsi_statistics.xml | SP,ddsi2,durability,cmsoap,spliceddaemon\nRefresh Add readers Add writers\nTopics Stats\nParticipants\nOpenSplice Tester\nReaders\nName Alive New Arrived Rea...\nDCP... 1 0 14 251\nOspl... 0 0 0 454\nDCP... 20 0 40 69\nDCP... 19 0 38 68\nDCP... 23 0 47 74\nDCP... 6 0 13 57\nDebug\nOK 25 ---\nDTime Type Message Location\n0.078 Scen graph_test.sd\n0.359 SOK Send: OsplTestTopic 7 (3)\n0.359 Log New repeat: 1000 20 OsplTestTopic.1\n0.354 SOK Send: OsplTestTopic 0 (5)](.vortex-opensplice-test-tool-user-guide/aa60db6f6f518eb58824bbc2329b092332c861edfe1c4836380af1e269448e00.jpg)

# Statistics - participants

# Write sample topics and check statistics window content

Step 1: Create a default reader for OsplTestTopic.

Step 2: Write four samples.

Step 3: Open the Participant tab of the Statistics window.

Step 4: Select the OpenSplice Tester participant from the list.

# Statistics - topics

# Write sample topics and check statistics window content

Step 1: Create a default reader for OsplTestTopic.

Step 2: Write four samples.

Step 3: Open the Topics tab of the Statistics window.

Step 4: Select OsplTestTopic from the list.

# 4.8. System Browser (Browser window)

# 4.9 Scripting

# 4.9.1 To Create a New Scenario

Note that you can only have one scenario open at a time. To avoid losing changes in the current scenario you must save it before creating a new scenario or selecting a different one from the drop-down list of recently-used scenarios (next to the Clear and Execute button).

Step 1: Choose Editor > New Scenario to create a new scenario and open it in the editor, or if the Editor window is already open, press [Ctrl+N] to create and open a new scenario. A warning is displayed if there are unsaved changes in the current scenario.

Step 2: In the File Save dialog that appears, specify the location of the new scenario and give it a name.

# 4.9.2 To Create a New Macro

Step 1: Choose Editor > New Macro to create a new macro and open it in the editor, or if the Editor window is already open, press [Ctrl+M] to create and open a new macro.

You can have multiple macros open at the same time. Use the drop-down list next to the Clear and Execute button to see or select them.

Step 2: In the File Save dialog that appears, specify the location of the new macro and give it a name.

# 4.9.3 To Edit an Existing Scenario or Macro

Step 1: Choose Editor > Open from the top menu.

Step 2: In the dialog that appears, type in or browse to the location of the macro or scenario you wish to open, then click Open.

# 4.9.4 To Save an open Scenario or Macro

Save the current scenario or macro.

Step 1: Choose File > Save from the top menu or press [Ctrl+S].

Step 2: If the scenario or macro has been saved before, then it is immediately saved, over-writing the previous version.

Step 3: If the scenario or macro has not been saved before, a Save As... dialog appears; type in or browse to an appropriate location and enter a name for the scenario or macro, then click Save.

# 4.9.5 To Complete and Compile a Scenario

This function ‘wraps’ the current text in the Edit window with "scenario" and "end scenario".

Complete is only used when a new scenario is created without a template, from DiffScript or the Write button in a sample editor. Compile is only needed when you do not want to execute, but just check the syntax.

Step 1: Choose Edit > Complete from the top menu.

Step 2: Click the Compile button.

Step 3: Click the Execute button.

Step 4: Click the Clear and Execute button.

# 4.9.6 Script selection

Step 1: Expand the Script Selection drop-down list of recently-used scripts near the Clear and Execute button.

# 4.9.7 Code completion

The Tester has a ‘code completion’ function which reduces the amount of typing that you have to do and reduces the chances of errors. For example, you can press the [Ctrl+Space] keys after you have typed the first few characters of a reader name and the Tester will display a list of the names of the readers which start with the same characters and you can choose the one you want.

Assuming that the OsplTestTopic reader already exists, and that a new script is open in the Edit tab:

Step 1: Complete the current scenario by choosing Editor > Complete from the top menu. (Note that it is generally preferable to start from a template.)

Step 2: Type send Ospl then press [Ctrl+Space].

Step 3: ‘OsplTestTopic’ appears; press [Enter] to accept it, and the instruction is completed.

This also pops up the sample editor, enabling you to set the arguments. The sample editor can also be activated by [Ctrl+Space] when the cursor is in the instruction, or [Ctrl+left-click] on the instruction.

Code completion (send)
![File\nScript\nView\nSampleList\nDisplay\nFilter\nEditor\nEdit\nHelp\nReaders\nTopics\nServices\nScripts\nMacros\nSelect all\nDeselect all\nRead\nShow\nTopic\nCount\nqos\npartition\nOspITestT...\n1-(trDS)\n1:5\nDebug\nOK 54 ...\nDTime\nType\nMessage\nLocation\n0.000 Scen wewe.sd*\n0.109 EOK Execution finished\nConnected file: C:\Program F\...\HDE\v86.win32/etc\config ospl_sp_ddsi_statistics.xml SP,ddsi2,durability,cmsoap,splicedaemon](.vortex-opensplice-test-tool-user-guide/358f4b0d1c4693ed9e580c4483483670d26b85680ca08471b6279b229e3ae79f.jpg)

Step 4: Type check Ospl then press [Ctrl+Space].
Step 5: ‘OsplTestTopic’ appears; press [Enter] to accept it, and the instruction is completed.

Code completion (check)

![File Script View SampleList Display Filter Editor Edit Help\nReads Topics Services Scripts Macros\nSelect all Deselect all\nRead Show Topic Count qos partition\n✓ ✓ Osp1TestT... 1-(trDS) *\nSample List Statistics Browser Edit\nCompile Execute Clear and Execute wewe.sd\n1 scenario wewe\n2 send OsplTestTopic( );\n3 check OsplTestTopic\n4 end scenario\n5\n2:5\nDebug\nOK 54 ...\nDTime Type Message Location\n191.672 COK Compile succeeded\nConnected file:\Program Files\HDF\x86\win32\etc\confine\osnl.snd.ddsi_statistics.xml.SP.ddsi2.durability.cmsoan.snlicedaemon](.vortex-opensplice-test-tool-user-guide/886e3dfc113d7d37a8713c05841066978e53e74e9daa50c024bf067c4966c0ab.jpg)

# 4.10 Execute and Debug

# 4.10.1 To Run the Current Script

Step 1: Click the Execute (‘Play’ ) button in the Debug window to run the current script.

Step 2: While the script is still executing, click the ‘Pause’ button in the Debug window.

Step 3: While the script is still executing, click the ‘Stop’ button in the Debug window.

Step 4: In the Debug window, double-click the entry where the column Location has a value of 6. Double-clicking on an entry in the Debug window highlights the relevant line in the Editor window.

Debugging a script
![Sample List Statistics Browser Edit\nCompile Execute Clear and Execute mark.sd\nsend Osp1TestTopic(id =) 3, index =) 5);\nsend Osp1TestTopic(id =) 4, index =) 6);\nwait (0.2);\n// topic are normally read in the order that they are received\ncheck Osp1TestTopic(\nid =) 3,\nindex =) 5,\n);\ncheck Osp1TestTopic(\nid =) 4,\nindex =) 6,\n);\n// with query it is also possible to find an already read or marked topic\ncheck any Osp1TestTopic(\nid =) !1,\nindex =) 3,\n);\nDouble click entry\nSP,dsi2,darability.cmsoap_splicedaemon\nLine number is highlighted\nSource: Osp1TestTopic\n1315339383s.620617783ns\ndaytime 15:46:23.620 (46 06)\ninsert_latency 79819ns\nrelative_time 0.517\nview_state not_new\nsample_state not_read\ninstance_state alive\nvalid_data valid_data\nstate NOT_NEW_NOT_READ\npartition *\nsource OpenSplice Tester (simon-3b1589dcf)\nqos 29e8ae6c.0000016d\nField value\nid\nIndex 5\nx 0\ny 0\nz 0\nx 0\ny 0\nz 0\nstate init\ndescription\nDebug\n25 ...\nDTime Type Message Location\n0.734 CFOK index = 3 17 (45)\n0.734 ChOK Check OK: 45 0sp1TestTopic 15 (45)\n0.734 CFOK id = 4 20 (47)\n0.734 CFOK index = 6 21 (47)\nSample (( ))\nSame topic (( ))\nSame instance (( ))\nConnected file: C:\Program Files\HDL\svk.wm2\v3.config\sp_spe_site.efacts\amom SP,dsi2,darability.cmsoap_splicedaemon](.vortex-opensplice-test-tool-user-guide/cbf84ec4d7c3d4c05696fbfa5983562e31386773f7a27a4658fa38d1e5e59330.jpg)

# 4.10.2 Batch execution (Batch window)

Load and run batch scenario.

# 4.10. Execute and Debug

Step 1: Choose Script > Batch from the top menu.

Step 2: In the Batch window, choose File > Load batch.

Step 3: Select batch.bd in the example script directory.

Step 4: Click the Start button.

Batch execution
![Batch Execute Scenarios batch.bd\nFile\nStop\nRuntime 00:07 4 OK 0 Failed\nStatus Executing\nScenario	Result\nfirst_scenario.sd	OK\nclear_instruction.sd	OK\nread.sd	OK\nread_query.sd	OK\nmiss.sd	Executing\nmark.sd	Not run\nmark_fail.sd	Not run\ndispose.sd	Not run\nvariables.sd	Not run\nloop_instruction.sd	Not run\nconditional.sd	Not run\nrepeat.sd	Not run\nrepeat_multiple.sd	Not run\nrepeat_until_dispose.sd	Not run\nmessage.sd	Not run\nmacro_call.sd	Not run\nscenario_call.sd	Not run\ngraph_test.sd	Not run\njs_function.sd	Not run\nset_instruction.sd	Not run\nfail_instruction.sd	Not run\nexit_instruction.sd	Not run\nexec_instruction.sd	Not run\nfail_instruction_with_var.sd	Not run\nread_fail.sd	Not run\nread_fail_timeout.sd	Not run\nread_fail_timeout_query.sd	Not run\nread_last_fail_disposed.sd	Not run\nread_fail_disposed.sd	Not run\nmiss_fail.sd	Not run\nmiss_fail_timeout.sd	Not run\ndispose_fail.sd	Not run\ndispose_fail_timeout.sd	Not run\ntimeout_fail.sd	Not run\ntimeout_var_fail.sd	Not run\ncontrol_function.bd	Not run](.vortex-opensplice-test-tool-user-guide/0bb4e86a2fff148ce86330023b7ab271cc2eaabec1022be32bbc7cab89ed8611.jpg)

# 4.10.3 To Run a Batch Script from the Command Line

Step 1: Change directory to the example scripts directory where the batch.bd is found (&lt;OSPL\_HOME&gt;/examples/ ...).

Step 2: Run ospltest -e -b batch.bd.

# 4.10.4 Batch results

# Load batch result

Step 1: Choose Scripts > Batch results from the top menu.

Step 2: With the Batch results window open, choose File > Load result from the top menu.

Step 3: Select the batch result file from the batch run.

Batch results

<table><tr><td>Script name</td><td>batch_20110907</td><td>batch_20110907</td><td>batch_20110906</td><td>batch_20110902</td><td>batch_20110902</td></tr><tr><td>dispose</td><td>OK</td><td>OK</td><td>OK</td><td>OK</td><td>OK</td></tr><tr><td>variables</td><td>OK</td><td>OK</td><td>OK</td><td>OK</td><td>OK</td></tr><tr><td>loop_instruction</td><td>OK</td><td>OK</td><td>OK</td><td>OK</td><td>OK</td></tr><tr><td>conditional</td><td>OK</td><td>OK</td><td>OK</td><td>OK</td><td>OK</td></tr><tr><td>repeat</td><td>OK</td><td>OK</td><td>OK</td><td>OK</td><td>OK</td></tr><tr><td>repeat_multiple</td><td>OK</td><td>OK</td><td>OK</td><td>OK</td><td>OK</td></tr><tr><td>repeat_until_dispose</td><td>OK</td><td>OK</td><td>OK</td><td>OK</td><td>OK</td></tr><tr><td>message</td><td>OK</td><td>OK</td><td>OK</td><td>OK</td><td>OK</td></tr><tr><td>macro_call</td><td>NOK</td><td>NOK</td><td>NOK</td><td>OK</td><td>OK</td></tr><tr><td>scenario_call</td><td>OK</td><td>OK</td><td>OK</td><td>OK</td><td>OK</td></tr><tr><td>graph_test</td><td>NOK</td><td>OK</td><td>NOK</td><td>NOK</td><td>OK</td></tr><tr><td>js_function</td><td>OK</td><td>OK</td><td></td><td>OK</td><td>NOK</td></tr><tr><td>set_instruction</td><td>NOK</td><td>NOK</td><td></td><td>OK</td><td>OK</td></tr><tr><td>fail_instruction</td><td>OK</td><td>OK</td><td></td><td>OK</td><td>OK</td></tr><tr><td>exec_instruction</td><td>OK</td><td>OK</td><td></td><td>OK</td><td>OK</td></tr><tr><td>fail_instruction_with_var</td><td>OK</td><td>OK</td><td></td><td>OK</td><td>OK</td></tr><tr><td>read_fail</td><td>OK</td><td>OK</td><td></td><td>OK</td><td>OK</td></tr><tr><td>read_fail_timeout</td><td>OK</td><td>OK</td><td></td><td>OK</td><td>OK</td></tr></table>

# Scan regression folder for batch results

Step 1: Choose File > Scan Regression from the top menu.

Step 2: Double-click the test result column of any test.

The results displayed will appear similar to the example in Figure 56.

# Scan regression for specified directory

Step 1: Choose File > Scan Regression dir from the top menu.

Step 2: Select the directory (folder) that contains batch results.

The results displayed will appear similar to the example in Figure 56.

# 4.11 Adding virtual fields

‘Virtual fields’ are fields with calculated values. For example, a translation from radians to degrees, or from cartesian to polar coordinates. The virtual field can be provided in Java (inside a plugin, see Plugins later in this section) or a script language (see the section on scripting, as well as the following example).

# 4.11.1 Add virtual fields to the topic

Step 1: Choose File > Add fields from the top menu.

Step 2: Browse to the example directory and select fields.txt.

Step 3: Open the SampleList window.

Step 4: Select the OsplTestTopic sample.

Step 5: Add extra fields from the pop-up menu.

Adding extra fields to a sample

![Field select\nSel	Field\n id\n index\n x\n y\n z\n t\n state\n description\n x*y\n polar\n date\n newfield\n New fields\n Ok](.vortex-opensplice-test-tool-user-guide/c54cbcd3eb6e9b945b82542e20df7fca086258e76a584b793a7d67c60a2a1887.jpg)

# 4.12 Plugins

Plugins can extend the functionality of Tester by providing virtual fields (see Adding virtual fields), or additional interfaces. Plugins are automatically loaded upon startup from the specified plugin directory. Two sample plugins are provided with Tester: SimplePlugin adds virtual fields, and TestInterface adds a UDP/IP message interface (see Message Interfaces).

# 4.12.1 Install / Uninstall plugins

Step 1: Go to the examples/tools/ospltest/SimplePlugin directory.

Step 2: Run ant from the command console to build the SimplePlugin example.

Step 3: Run Tester and choose File > Preference from the top menu.

Step 4: In the Settings tab, set the correct value for Plugins dir and click OK.

Setting the path to the Plugins directory
![Edit preferences\nScripts	Settings	Topic Filters\nUse tabs Hydro\nUse IDE True\nUse tabs Hydro\nUse IDE True\nPlugins dir ./plugins	Browse\nLog properties file 36.linux/examples/tools/ospltest/log4j.properties	Browse\nMax Samples Kept Per Reader 164 0 for infinite size.\nIgnore not_alive_no_writers samples true\nOK	Cancel\nPlease provide input.](.vortex-opensplice-test-tool-user-guide/07c6a957eac8be3fd596784daa5eeff35390047ee40c15a32b18ade606467859.jpg)

Step 5: Choose File > Plugins from the top menu.

Step 6: Click SimplePlugin to select it.

# The SimplePlugin example

![Plugins\nName	Status	Error\nSimplePlugin	Installed	\nSimplePlugin\nExample implementation for a plugin\nVersion: 1.0beta44\nBuild: Administrator\nCompile: 2011-09-09_09:30\nInstall	Deinstall](.vortex-opensplice-test-tool-user-guide/3c011f2485f421403dd3548f36429ee7302389479489604cee7b9136d1f60adb.jpg)

Step 7: Double-click any OsplTestTopic data in the SampleList window. New fields are added.

Fields added to OsplTestTopic sample
![File\nScript\nView\nSampleList\nDisplay\nFilter\nEditor\nEdit\nHelp\nServices\nScripts\nMacros\nReaders\nTopics\nSelect all\nDeselect all\nRe... Sh... Topic Count qos partition\n112 OsplTest\nSample List\nStatus\nSource: OsplTestTopic\nsource_timestamp 1315575753s.520976432ns\ndaytime 09:42:33.520 (42 09)\ninsert_latency 39670ns\nrelative_time -3.074\nview_state new\nsample_state not_read\ninstance_state alive\nvalid_data valid_data\nstate NEW, NOT_READ\npartition *\nsource OpenSplice Tester (simon-3b1569dcf)\nqos 15c58a50.00000133\nField value\nid\nindex 0\nx 1\ny 1\nz 1\nt 1\nstate init\ndescription\nx_plus_y 2.0\ny_plus_z 2.0\nx_plus_z 2.0\nx (Deg) 57.3\nDebug\nDTime Type\nSample (( ))\nSame topic (( ))\nSame instance (( ))\nConnected 'file::C:\Program F ...iceDDS\V6.1.0b2\HDE\x86.win32\etc\config\ospL.xml' networking.exe,durability.exe, ... exe,splicedaemon](.vortex-opensplice-test-tool-user-guide/6e98cd2afc03affdb6a58a54c37c885a02886321a61259379c375ff006be9d8a.jpg)

Step 8: In the Select extra field dialog ([F9]), one more field is added.

# Extra field added

# 4.12. Plugins

![Field select\nSel	Field\n id\n index\n x\n y\n z\n t\n state\n description\n x_gt_y\n Ok](.vortex-opensplice-test-tool-user-guide/c978dd26c41e89df1a27b07ff1093e1a44c0694b7c339cfb2a8bb7584172e4bf.jpg)

# 4.13 More on Virtual fields

Additional virtual fields can be provided via a plugin or via a script.

# 4.13.1 Adding Virtual Fields via plugin

Override the class:

ExtraTopicField

Compile this class in a plugin and in the ‘install’ function register the extra fields with:

connection.registerExtraField(&lt;instance of extra topic field class&gt;);

An example of a plugin with an extra field is provided in examples:

&lt;OSPL\_HOME&gt;/examples/tools/ospltest/plugins/SimplePlugin

# 4.13.2 Adding Virtual Fields via script

A script file can be loaded using the top menu: File > Add Fields.

The script file has the following syntax:

```txt
[#!&lt;language&gt;]
&lt;name of the field&gt;
&lt;name of the applicable topic&gt;
&lt;script which returns a value and can have multiple lines&gt;
next_field
&lt;name of the field&gt;
&lt;name of the applicable topic&gt;
&lt;script which returns a value and can have multiple lines&gt;
```

The language description is optional. 1 to n fields can be described in a single file.

The data of the sample is available in an object variable which is pushed to the script engine before the execution of the script. The object sample provides the following functions:

```java
String getDayTime();
long getTime();
long getId();
```

# 4.13. More on Virtual fields

```java
String getMsgName();
String getKey();
String getInstanceState();
boolean isALive();
String getSource();
String getFieldValue(String fieldname);
```

These functions can be used to retrieve data from the current sample and determine the value for the extra field. An example of a script file is provided in examples/tools/ospltest/fields.txt.

# 5

# Command Reference

This section lists all of the Tester’s commands and describes their operation.

# 5.1 Introduction

The commands are described below in the order in which they appear in the menus (starting at the top left).

Where a menu option also has a keyboard shortcut, it is shown in [italics in square brackets] (for example, [Ctrl+C]).

Some menu options can also be invoked by clicking on buttons in appropriate tabs or windows.

# 5.2 Menus

Tester main menu
![File Script View SampleList Display Filter Editor Edit Help](.vortex-opensplice-test-tool-user-guide/fec8a2fab4dfd4dcb1accca7176aef19fd8cb62ef1cf18c827936e6287a0ce85.jpg)

# 5.2.1 File

File > Connect, [Ctrl+Shift+C] Open a connection to a Domain.

File > Disconnect, [Ctrl+Shift+D] Disconnect from a Domain.

File > Remove All Readers Remove all previously-added Readers.

File > Add Reader Add a single topic Reader.

Add Reader dialog
![Add Reader\nDCPSCandMCommand\nFull topic list\nReaderName:\nPartition:\nKeep 10 Wait for historical\nDurability:\nReliability:\nOwnership:\nCancel Add](.vortex-opensplice-test-tool-user-guide/3d2b59214bb1efe2bde756ff445b7d87e0bb246a95495c8efc91581872467992.jpg)

File > Add Readers Add multiple Readers by selecting from the Topic List.

Add Readers from Topic list
![Add Readers\nKeep 10 Wait for historical\nDurability:\nReliability:\nOwnership:\nFilter Reset filter\nRead Topic\nDCPSCandMCommand\nDCPSDelivery\nDCPSHeartbeat\nDCPSParticipant\nDCPSPublication\nDCPSSubscription\nDCPSTopic\nOsplArrayTopic\nOsplSequenceTopic\nOsplTestTopic\nd_deleteData\nd_groupsRequest\nd_nameSpaces\nd_nameSpacesRequest\nd_newGroup\nd_sampleChain\nd_sampleRequest\nd_status\nd_statusRequest\nq_bubble\nSelect all Cancel Add](.vortex-opensplice-test-tool-user-guide/8e640b438f71454c5ac514f2351f04d256088e351d9bcb91855ff5529abca39f.jpg)

File > Save Readers List

Save the current list of topics to a file. The keys, QoS, wait for historical info will be preserved.

The format of the readers list file (and the add reader specification) is:

```erb
&lt;!&gt;[#QOS#]topic_name[|readername][\partitionname\]] &lt;optional_key&gt;
&lt;optional_foreign_key1&gt; &lt;optional_foreign_key2&gt; &lt;optional_foreign_key3&gt;
```

File > Load Readers List Load a topics file. Topics already in the list will not be recreated.

File > Add Fields Load new fields. Example field.txt is located in the example directory.

Load Extra Fields dialog
![Load Extra Fields\nLook In: ospitest\nmacros\nplugins\nscripts\nSimplePlugin\nTestInterface\nfields.txt\nlog4j.properties\nmacro_template.txt\nscenario_template.txt\nFile Name: fields.txt\nFiles of Type: All Files\nOpen    Cancel](.vortex-opensplice-test-tool-user-guide/94dc39367f05a7d8146da6e0a2745ac427ad360bab8ca0be94bb523cafc80b64.jpg)

File > Plugins Install/Uninstall Plugins. The example SimplePlugin plugin is located in the example directory. It must be compiled and put in to the plugins directory specified in Preference page.

# Plugins dialog

# 5.2. Menus

![Plugins\nName	Status	Error\nSimplePlugin	Installed\n\nSimplePlugin\nExample implementation for a plugin\nVersion: 1.0beta33\nBuild: ysroh\nCompile: 2011-10-21_03:20\n\nInstall	Deinstall](.vortex-opensplice-test-tool-user-guide/a184579b328445f1a395495b47e508aade1a12565621eb9367188957d6b7b53c.jpg)

File > Save Layout Save the current layout of the windows in a file; this can later be used to organize the windows in the same way. Save Layout is only applicable to non-IDE mode.

File > Load Layout Load a specific layout of the windows as previously saved (select by file on the disk) with Save Layout. Load Layout is only applicable to non-IDE mode.

File > Preferences Can be used to change the locations of the macros and scripts directories. (See also the instructions for starting and stopping Tester).

File > Exit Quit the application.

# 5.2.2 Script

Script > Script Editor, [Alt+Shift+S] Open the script Edit window.

Script > Debug Window Open the script Debug window.

Script > Scripts Open the scripts window which allows for quick access to scripts found on the script path (as defined in the ospltest.properties). (See also File > Preferences and Starting and Stopping Tester.)

Script > Macros Open the macros window which allows for quick access to the macros found in the macro path (as defined in the ospltest.properties). (See also File > Preferences and Starting and Stopping Tester.)

Script > Batch, [Alt+Shift+B] Open the Batch Execute window for the batch execution of several scripts.

Script > Batch Results Display the results of the batch run.

# 5.2.3 View

View > Samples, [Alt+1] Open the Sample List window.

View > Statistics, [Alt+2] Open the Statistics window.

View > Browser, [Alt+3] Open the Browser window.

# 5.2.4 SampleList

The Sample List displays the current list of read samples. The list is sorted on source time (timestamp) of the topic samples. Topics Samples are only displayed when the Show checkbox in the Reader list is checked (note that un-checking Show does not delete the topics Samples). A double-click in the list results in the topic being displayed in the Sample window.

The state displayed with the topic is the Sample state of the sample. When the state of the topic is alive then if this is the last Sample with that key it is displayed as ALIVE\_AND\_KICKING for received samples and ALIVE\_AND\_SEND for samples sent by Tester. This makes it very easy to spot topics which are not disposed.

When exactly two topics are selected, the difference between the source timestamps is displayed.

# 5.2. Menus

The following menus are only active when the Sample List tab is selected showing samples. (If you are in the Browser tab, for example, then the menus will not be active (they will be ‘greyed out’)).

SampleList > Clear, Clear button Clear the Sample List.

SampleList > Dump Dump the contents of the current (filtered) Sample List to a file.

SampleList > Dump Selection, [P] (also [Ctrl+P] and [Alt+P]) Write the current selection content to a file.

SampleList > Dump to CSV Write the contents in CSV format.

SampleList > Dispose Alive Dispose all topics in the Sample list with a state alive and kicking (i.e. all last Samples of a topic with a given key which are still alive), this function can be used to clean up (dispose left alive samples) a list after a test.

SampleList > Diff Script Create a list of instructions in the current scenario which reproduces the list of samples in the Sample list. The diff means that only fields which do not have the default value or are a key/switch field are used in the script.

SampleList > Diff Script Selection Create a diff script for the current selection of samples.

SampleList > Show Chart, [Alt+Shift+C] Display the chart window. To fill the chart with data select a column with numeric values and press [Y]. This will add a trace with the values of the column, using the time received on the X axis. Multiple traces can be added. Select a filter to limit to the appropriate values. To display a scatter plot, clear the traces and select the column to use on the x-axis, then press [X]. After this select the column with values for the Y axis and press [Y]. It is also possible to automatically create multiple traces based on a key value. First select the column to be used as key and press [K] before the Y column is selected.

[F2] Compare two topic Samples. Select the first topic Sample in the Sample window (by double-clicking), then select the second topic Sample and press [F2]. The samples will be displayed side by side with the differences marked in the window of the second topic (normally the left window). A field marked in red is different, a field marked in orange was not found in the first topic Sample. If not different then (foreign) key fields will be marked in green and yellow. (See also Topic Instance Window.)

[F3] Display a topic Sample in a separate Sample window.

[F4] Open the topic edit window with the values of the selected topic.

[F9] Fields of the current selected topic sample can be added for display in the Sample list. Fields are displayed based on name. Any topic Sample with a field of that name will provide the value of the field. A field column can be deleted by selecting a cell in the column and then pressing [Delete].

# 5.2.5 Display

When the Sample List is open these commands allow the user to adjust the window display attributes to their needs.

Display > Font Smaller, [Ctrl+minus] Decreases the font size of the Sample List window.

Display > Font Larger, [Ctrl+plus] Increases the font size of the Sample List window.

Display > Day Time Toggles the Dtime column format between number of milliseconds (ms) and time-of-day (hh:mm:ss.ms).

Display > Colors Toggles the display of colors (on or off).

Display > Refresh Refreshes the Sample List window.

Display > Only Show Alive Filters the samples to display samples in the ‘alive’ state.

# 5.2.6 Filter

When the Sample List is open these commands enable you to filter the displayed samples based on the Topic and Key attributes of the current sample.

# 5.2. Menus

The filter can also be applied by typing the key directly in the filter window. Add a + (plus) sign in front of the key value to filter including foreign key relations (it is not possible to filter on key and topic name when entering the key manually). The filter can also be reset by clicking the Reset button.

Filter > Topic, [Ctrl+F5] Filter on topic name.

Filter > Topic and Key, [F5] Filter on key and topic name.

Filter > Key, [F6] Filter on key only (so all topics with the same value for key are displayed).

Filter > Resets, [F7] Clears the filter.

[F8] Filter on the key value and also allow forward foreign key relations (i.e. find topics which have a key which matches a foreign key of an already-displayed topic.

[F12] Filter all messages with the same sample state.

[F] Filter based on text in a column, the column is listed in the filter box (i.e. [&lt;column&gt;]) add the text on which to filter and then press [Enter].

# 5.2.7 Editor

When the Edit window is open these commands allow the user to create and manage Scenarios and Macros.

Editor > New Scenario, [Ctrl+N] Create a new scenario. A File Save dialog will be displayed to provide the filename of the scenario. The initial scenario will be created using the template scenario\_template.txt which is found in the installation directory.

Editor > New Macro, [Ctrl+M] Create a new macro. A File Save dialog will be displayed to provide the filename of the macro. The initial macro will be created using the template macro\_template.txt which is found in the installation directory.

Editor > Open, [Ctrl+O] Opens the File Open dialog, the selected Script or Macro file will be loaded in the editor.

Editor > Save, [Ctrl+S] Save the current script to disk (to the same file as it was loaded/created).

Editor > Save As, [Ctrl+Shift+S] Opens the Save dialog for entering a filename to which the current script will be saved.

Editor > Complete, [Ctrl+Shift+C], [Ctrl+T] Completes the Scenario by inserting "start scenario" and "end scenario" text at the beginning and end of the current file.

# 5.2.8 Edit

When the Edit window is open these commands provide basic text editing capabilities.

Edit > Cut, Edit > Copy, Edit > Paste, Edit > Find/Replace Traditional text editing commands. The standard key combinations (such as [Ctrl+X] and [Ctrl+C]) are also recognized.

Edit > Format, [Ctrl+Shift+F], [Ctrl+I] Automatically formats the text in the current edit window. Formatting removes extra blank lines and normalizes the indentation.

# Keyboard-only commands

Some functions are not accessible from the menu bar; these are mostly common editing commands that are invoked with standard (‘traditional’) key combinations (‘shortcuts’).

[Crl+A] Select all text in the current field or editor window.

[Ctrl+E] Execute the current scenario.

[Ctrl+Space] Complete the scenario at the current location. If the cursor is on an empty line, the list of possible commands is shown; on a complete command, the appropriate editor for that command is opened (if available).

# 5.2. Menus

[Ctrl+Z] Undo the last command.

# Macro Recorder

The Tester has a simple macro recorder, intended for ad hoc use, controlled by keyboard commands only. It can record and store a single un-named macro which is only retained for the current session (until the Tester is closed).

[Ctrl+Shift+R] Start recording a new macro. Any previously-recorded macro is deleted.

[Ctrl+Shift+S] Stop recording.

[Ctrl+Shift+M] Play the recorded macro.

# 5.3 Lists

# 5.3.1 Services

Displays a list of the Services running on this node. A display-only window.

# 5.3.2 Scripts

Displays a list of the installed Scripts (.sd files) and Batch Scripts (.bd files).

Refresh Refreshes the list.

&lt;select&gt; a Script Displays the Script in the Edit window

# 5.3.3 Macros

Displays a list of the installed Macros (.md files).

Refresh Refreshes the list.

Scen Checking this option displays Scripts as well as Macros.

&lt;select&gt; a Macro Displays the Macro in the Edit window

# 5.3.4 Readers

For each reader the count of received samples is displayed as well as the QoS and partition. A check box is provided for changing the read state or the show state. When Read is unchecked the reader stops reading samples. When Show is unchecked the topic samples of that topic will not be displayed in the sample list.

Select all Checks the show state for all topic samples.

Deselect all Unchecks the show state for all topic samples.

&lt;select&gt; a Topic Instance Enables you to check/uncheck the Read and Show state.

&lt;right-click&gt; Delete Reader, [Delete] Deletes the selected reader.

&lt;right-click&gt; Recreate Reader, [Ctrl+R] Recreates the selected reader and as such re-reads any persistent/transient data available.

&lt;right-click&gt; Show First Sample, [F3], or double-click on the reader Shows the first sample for the selected reader.

&lt;right-click&gt; Edit Sample, [F4] Opens an Edit Sample window for the selected topic.

[F9] Opens the field selection window for the display of fields of the selected topic.

# 5.3. Lists

# Edit Sample Window

The Edit Sample window is used for editing field values of a topic and then writing the sample or dispose the instance. It is also used to insert the topic values as a ‘send’ or ‘check’ entry in the current script (at the cursor position in the script window).

The Edit Sample window can be filled with a topic from both the Topics window and the Sample List window with the [F4] key. If the topic write window is filled with a topic from the topics list window then the values are all empty (except for union discriminators, which get a default value). If the window is filled from the sample list window then the fields get the values of the selected topic sample in the sample list. The key fields are marked in green and the foreign keys are marked in yellow.

Fields can be edited by selecting the edit field (right-most column). If the field is of an enumerated type then a combo box is displayed which provides all possible values. The topmost value is empty for reset to the default value (not set).

The keyboard can be used to navigate the edit fields. The cursor [Up] and [Down] (arrow) keys move between fields; any other key starts editing the value in the current field.

Edit sample window
![Edit sample: OsplTestTopic\nField	Default	Value\nid	0\ndescription\nindex	0\nstate_init\nt	0\nx	0\ny	0\nz	0\nwrite-writeDispose SGD dispose script check](.vortex-opensplice-test-tool-user-guide/85e6bb1718c60360f7e4c82ba491f98fc7f20fa6d249c9c32f1c26cf6f26dd66.jpg)

(There is a second form of this window, used when opened from the script with [Ctrl+Space], [Ctrl+Left-click], or as part of completion. It only has two buttons: OK and Cancel. Pressing [Ctrl+Enter] or [Ctrl+Return] is the same as clicking OK.)

write Write the sample.

writeDispose Write the sample and Dispose the instance.

dispose Dispose the instance.

script Instead of writing the sample this creates the script commands to write the sample. These commands are inserted into the scenario currently being edited and the user will be taken to this text.

check Similar to script but creates the script command to check the sample values.

[F4] Copy the current selected field from the topic in the instance window.

[F5] Copy all fields based on an equal name from the topic in the instance window.

[F6] Fill all fields with .sec in the name with the current time seconds and fields with .nanosec in the name with the current time in nanoseconds.

[Ctrl+T] Fills a field of type int with the seconds part of the current time.

[Ctrl+U] Fills a field of type long with a unique key.

[Ctrl+V] Paste a value.

[Alt+Down] Opens the enum editor.

[Enter], [Return] Commits the current edited value.

[Esc] Discards the current edited value.

Once the desired values have been entered the topic can be written by clicking the Write button, disposed by clicking the Dispose button, or write disposed by clicking the WriteDispose button.

# 5.3.5 Topics

The topics list displays the list of topics as known in the system.

&lt;select&gt; a Topic Selects a Topic.

&lt;right-click&gt; Create Reader Create a Reader for the selected Topic.

&lt;right-click&gt; Create Default Reader Makes the selected Reader the default reader to be displayed in the Samples List.

[F2] The key list definition window will open which allows to change the (foreign) keys. The syntax is the same as in the add topic window or topic file. To support the selection of the keys the primary fields of the topic are displayed and will be inserted at the cursor position in the edit field when clicked.

# 5.3.6 Groups

The Groups list displays the list of groups created Tester and currently active. The Groups tab is only visible in the main window when at least one Group has been created in the current Tester session.

&lt;select&gt; a Group Selects a Group.

&lt;right-click&gt; Delete Group, [Delete] Delete the selected Group.

&lt;right-click&gt; Publish Coherent Sets, [F4] Create a Coherent publisher window from which coherent sets of data can be created and written.

# 5.4 Windows

# 5.4.1 Sample List Window

The Sample List window is used to display samples. By default the delta time, topic name, state, key, and source are displayed. Additional columns can be added and filters defined.

Sample List window

<table><tr><td>Sample List</td><td>Statistics</td><td>Browser</td><td>Edit</td><td colspan="3"></td></tr><tr><td rowspan="2" colspan="4"></td><td rowspan="2">Clear</td><td rowspan="2">Delta: -- sec</td><td rowspan="2">Filter</td></tr><tr></tr><tr><td>DTime (ms)</td><td colspan="2">Topic</td><td colspan="2">State</td><td>Key</td><td>Src</td></tr><tr><td>17:42:08.233</td><td colspan="2">DCPSParticipant</td><td colspan="2">ALIVE_AND_KICKING</td><td>10,230708309</td><td>Built-in participant (MikeW-Laptop)</td></tr><tr><td>17:42:08.241</td><td colspan="2">DCPSParticipant</td><td colspan="2">ALIVE_AND_KICKING</td><td>42,230708309</td><td>Built-in participant (MikeW-Laptop)</td></tr><tr><td>17:42:08.285</td><td colspan="2">DCPSParticipant</td><td colspan="2">ALIVE_AND_KICKING</td><td>79,230708309</td><td>Built-in participant (MikeW-Laptop)</td></tr><tr><td>17:42:08.285</td><td colspan="2">DCPSParticipant</td><td colspan="2">ALIVE_AND_KICKING</td><td>80,230708309</td><td>Built-in participant (MikeW-Laptop)</td></tr><tr><td>17:42:08.315</td><td colspan="2">DCPSParticipant</td><td colspan="2">ALIVE_AND_KICKING</td><td>112,230708309</td><td>Built-in participant (MikeW-Laptop)</td></tr></table>

Clear Clears the list.

Filter &lt;value&gt; The current filter value.

Reset Resets the filter value.

Pack Adjusts the displayed column widths.

&lt;select&gt; a Sample Selects a sample to use with &lt;right-click&gt; commands. [Ctrl+Left-click] selects another sample. If exactly two samples are selected, the difference in source time will be displayed in the top bar of the Sample List window.

&lt;right-click&gt;Select Extra Fields, [F9] Opens a dialog box allowing selection of extra fields to display.

&lt;right-click&gt; Display Sample, &lt;double-click&gt; Displays sample details.

&lt;right-click&gt; Display Sample New Window, [F3] Displays sample details in new window.

&lt;right-click&gt; Compare Sample, [F2] Compares two samples with each other and shows differences in red color.

# 5.4. Windows

&lt;right-click&gt; Edit Sample, [F4] Allows Tester to edit the selected sample values.

&lt;right-click&gt; Filter on topic, [Ctrl+F5] Filters on the selected topic value.

&lt;right-click&gt; Filter on topic and key, [F5] Filters on both the selected topic and key values.

&lt;right-click&gt; Filter on State, [F12] Filters on the State of the selected sample.

&lt;right-click&gt; Filter of Key, [F6] Filters on the Key value of the selected sample.

&lt;right-click&gt; Filter on Column Text, [F] Sets the filter to be the value of the current column.

&lt;right-click&gt; Filter Reset, [F7] Resets the filter value.

&lt;right-click&gt; Delete extra column, [Del] Removes the selected extra column from the list.

&lt;right-click&gt; Add Column as Key to Chart, [K] Assigns the selected column as the key field for the chart.

&lt;right-click&gt; Add Column as X to Chart, [X] Assigns the selected column as the x-axis for the chart.

&lt;right-click&gt; Add Column as Y to Chart, [Y] Assigns the selected column as the y-axis for the chart.

[Ctrl+F] Finds the next sample containing the search text in any column.

# 5.4.2 Statistics Window

The Statistics window provides statistics for the topics in use, such as write count, number of alive topics, etc.. The following values are displayed for each topic:

Count The number of samples currently in the OpenSplice database

Arrived The number of arrived samples

Takes The number of takes by the reader

Reads The number of reads by the reader

Alive The number of alive topics (instances not disposed)

Writes The number of written samples

The left table shows either the participants, the topics, or the statistics of the currently-selected reader/writer as indicated by the selected tab.

When the list of participants is shown, a participant can be selected. The second table shows the list of readers with their statistics, the third table show the list of writers with their statistics.

When the list of topics is shown, a topic can be selected. The second table shows the list of participants reading the topics with their statistics, the third table shows the list of participants writing the topic with their statistics.

If a value of -1 or -2 is shown then an error occurred during the retrieval of the statistics for the reader/writer.

By selecting a row in the reader or writer list all statistics for that reader or writer will be shown in Stats tab of the left window.

Refresh Will refresh the content.

Add readers Will add the topics in the reader list to the list of monitored topics.

Add writers Will add the topics in the writer list to the list of monitored topics.

[CTRL+F] Finds the next reader/writer containing the search text in any column.

# 5.4.3 Browser Window

The Browser window enables you to view the Readers and Writers in the system. You may browse by Node, Participant, or Topic.

# Browser window

# 5.4. Windows

![Sample List	Statistics	Browser	Edit\nRefresh	Add readers	Add writers\nShow disposed participants\nNodes\nAll participants\nTopics\nOpenSplice Tester (MikeW-Laptop)\nReaders\ntopic	qos	partition\nDCPSParticipant exactly BUILT-IN PARTITION_\nDCPSSubscription exactly BUILT-IN PARTITION_\nDCPSPublication exactly BUILT-IN PARTITION_\nDCPSTopic exactly BUILT-IN PARTITION_\nOsplArrayTopic exactly *\nOsplTestTopic exactly *\nOsplSequenceTopic exactly *\nDCPSParticipant exactly BUILT-IN PARTITION_\nDCPSParticipant exactly BUILT-IN PARTITION_\nOsplSequenceTopic exactly *\nOsplTestTopic exactly *\nOsplArrayTopic exactly *\nDCPSTopic exactly BUILT-IN PARTITION_\nDCPSPublication exactly BUILT-IN PARTITION_\nDCPSSubscription exactly BUILT-IN PARTITION_\nDCPSParticipant exactly BUILT-IN PARTITION_\nWriters\ntopic	qos	partition\nOsplArrayTopic exactly trDS*\nOsplTestTopic exactly trDS*\nOsplSequenceTopic exactly trDS*\nDCPSParticipant exactly trDS__BUILT-IN PARTITION_\nDCPSParticipant exactly trDS__BUILT-IN PARTITION__\nOsplSequenceTopic exactly trDS*\nOsplTestTopic exactly trDS*\nOsplArrayTopic exactly trDS*](.vortex-opensplice-test-tool-user-guide/cd215092a910b3c14a3988bb7d208356d15a107ebec50c7b9a3bd99b4eb0ed11.jpg)

Refresh Will refresh the browser content.

Add readers Will create a Tester reader from the list of readers for the selected read-topic. The QoS of the discovered reader will be used to ensure that data read by that reader will be captured in the timeline.

Add writers Will create a Tester reader from the list of writers for the selected written-topic. The QoS of the discovered writer will be used to ensure that data written by that writer will be captured in the timeline.

Show disposed participants Used to toggle the display of disposed participants.

[CTRL+F] Finds the next reader/writer containing the search text in any column.

# 5.4.4 Edit Window

The Edit window is used to create and modify Scripts and Macros. Please refer to Chapter 5, Scripting, on page 73, for more details.

Edit window
![Sample List Statistics Browser Edit\nCompile Execute Clear and Execute test1.sd\n1 scenario example\n2\n3 end scenario](.vortex-opensplice-test-tool-user-guide/ca50e52b4472a15db832b7bfc8de32663befe00f6a7de887f5648c6cae440a4e.jpg)

Traditional text editing commands and standard key combinations (such as [Ctrl+X] and [Ctrl+C]) are recognized. Menu commands and keyboard shortcuts for editing scripts and macros are described in sections 4.2.7, Editor, 4.2.8, Edit, 4.3.2, Scripts, and 4.3.3, Macros.

When editing macros, instruction-specific editing dialogs may open; for example, the send, check and execute macro instructions have their own editing dialogs which help to make your entries conform to their syntax.

Editor for execute instruction
![Edit execute instruction\nWait\nLog\nCommand echo hello\nOk Cancel](.vortex-opensplice-test-tool-user-guide/1d31677753674036bc023cb9dcd2c6bd48881f5f364d23f4063c9fa1fab4111b.jpg)

Compile Compile the current content.

Execute Run the current script or macro without clearing the sample list.

Clear and Execute Clears the sample list and then runs the current script/macro and returns the user to the Sample List window.

&lt;drop down&gt; Allows for quick selection of recently-edited scripts/macros.

# 5.4.5 Debug Window

The Debug window is used for tracing/debugging Script compilation and execution. For each step, the day/time, type of message, and message text is displayed along with the location (line number) in the scenario.

Debug window

<table><tr><td colspan="4">Debug</td></tr><tr><td colspan="4">DK 9 ---</td></tr><tr><td>DTime</td><td>Type</td><td>Message</td><td>Location</td></tr><tr><td>0.000</td><td>Scen exit_instruction.sd</td><td></td><td></td></tr><tr><td>0.107</td><td>SOK Send: OsplTestTopic</td><td></td><td>6 (30)</td></tr><tr><td>0.107</td><td>Log Wait: 0.1s</td><td></td><td>7</td></tr><tr><td>0.208</td><td>EOK Execution stopped</td><td></td><td></td></tr><tr><td>0.208</td><td>EOK Execution terminated</td><td></td><td></td></tr></table>

Control execution of the scenario with the buttons at the top left of the window:

![Start (Play) Start or resume execution\nPause Pause execution\nStop Stop (halt) execution](.vortex-opensplice-test-tool-user-guide/1132172bdafd726d45f25340fde0edb465625fa5a3a6fac0d87a830508e3ed92.jpg)

[CTRL+F] Finds the next message containing the search text in any column.

# 6

# Scripting

The Vortex OpenSplice Tester provides automatic testing capabilities by means of scripting. This section describes the features of Tester’s built-in scripting instructions, and how to install additional script engines.

# 6.1 The Script Language

The script language as used by the Tester is specifically designed to create readable and easily maintainable scripts.

Instructions are simple, with named parameters which enable the Tester to limit the testing to the fields applicable to the test. For example, the send instruction is an instruction which sends a topic. The basic syntax is the keyword send followed by the topicname and a list of named parameters between parentheses (‘round brackets’), terminated with a semicolon.

Illustrating send keyword syntax
```txt
send OsplTestTopic(
    id => 1,
    x => 2,
    y => 3,
    z => 4,
    t => 1,
    state => boost,
    description => "hello",
);
```

The check instruction is similar to the send instruction; it has options to find a specific instance using key fields or a query.

Illustrating check keyword syntax
```txt
check OsplTestTopic(
    timeout => 0.2,
    id => 1,
    index => 0,
    x => 2,
    y => 3,
    z => 4,
    t => 1,
    state => boost,
    description => "hello", |
);
```

In this example a timeout is set, which will allow a wait of up to 0.2 seconds for the topic sample for the correct instance to arrive.

# 6.1.1 A script file

A scenario has the following format:

Illustrating scenario keyword syntax
![--Project : Project www.opensplice.org\nscenario (name)\n    (instructions)\nend scenario](.vortex-opensplice-test-tool-user-guide/7de97428558e82335c2dc82faf60de7208de16b2b864af3c453fbcdf86bfe26d.jpg)

The name is for information only, and is not used further.

# 6.1.2 Variables

The script language allows the use of variables. Variables can be used to store values that can then be used at a later time. A variable is indicated by either a &lt;&lt; or a &gt;> prefix. Variables may be declared implicitly, or explicitly using the var instruction.

Example variable
![The image displays code snippets with comments in green text and code in yellowish text. The text reads:\n\n```\n// a variable can be declared\nvar myvar =) 5;\n\n// and then used in an instruction\nsend OspITestTopic(id =) 1, index =) ((myvar);\n```](.vortex-opensplice-test-tool-user-guide/56327acddefd448b0ab15faaa63b4f844079457541f46e1344dde3dcf335f7bc.jpg)

In this example the variable myvar is declared and initialized with the value 5. Within the send instruction the variable is used to provide the value for the field index. The &lt;&lt; prefix indicates the direction of the assignment from the variable to the field.

Variable with &gt;> prefix

<table><tr><td>check OsplTestTopic(</td></tr><tr><td>id =&gt; !4,</td></tr><tr><td>index =&gt; &gt;&gt;index_of_4,</td></tr><tr><td>);</td></tr></table>

Here the variable index\_of\_4 is declared implicitly and the value of the field index is copied to the variable (the prefix >> points to the variable).

All environment variables and java virtual machine (JVM) properties are also available as variables, and they can be used as shown below:

Using environment variables

<table><tr><td>log (&quot;message: &quot; &lt;&lt;OSPL_HOME);</td></tr><tr><td>log (&quot;message: &quot; &lt;&lt;os.name);</td></tr></table>

# Special variables

There are some special variables which can be useful in scripts.

• curtime\_sec and curtime\_nsec provide the second and nanosecond parts of the current time.
• uniqid provides a unique number for every call, within the same session of the Tester.

# 6.1. The Script Language

• script\_file and script\_path provide the scenario file name and the scenario file’s path respectively. If the currently executing scenario context changes because of a call instruction to another scenario or macro file, using these variables in the called scenario or macro will reflect the respective path and file name of the called script.

Note that these special values are used without the &lt;&lt; prefix.

# 6.1.3 Embedded Scripts

Inside a scenario any script compatible with the java ScriptEngineFactory can be used to provide calculated values for fields in a send, check or var instruction, or as a stand-alone statement.

Embedded javascript
```javascript
delay = 10.0;
freq = Math.PI * 2 * 0.1;

function get_delay() {
    return delay;
}

function get_x_coordinate(t){
    return Math.sin(get_delay() + t * freq);
}

function get_y_coordinate(t){
    return Math.cos(get_delay() + t * freq);
};

var js =&gt; `get_delay(0)`;
repeat OsplTestTopic 0.2 51(
    id => 2,
    x => `get_x_coordinate(&lt;dt)',
    y =&gt; `get_y_coordinate(&lt;dt)`
);
```

Stand-alone scripts must be enclosed by left single quotes, and then followed by a semi-colon.

Variables used in the javascript are translated before the evaluation of the script. In this specific case the &lt;&lt;dt is the delta time in the repeat function. All javascript in one scenario is executed in the same scope, and functions and variables declared at the beginning of a script are available later in the script.

A specific script language can be selected by providing the name of the script language in the first line of the embedded script: #!&lt;language&gt;, for example #!js. Note that the language description must not be followed by any other text. See section 5.6, Installing Script Engines, on page 85, for instructions on installing a scripting language for use with the OpenSplice Tester. If no language descriptor is provided on the first line of a script, the default language is used as set in Preferences.

More embedded javascript

```javascript
var js => `
delay = 10.0;
freq = Math.PI * 2 * 0.1;

function get_delay() {
    return delay;
}
function get_x_coordinate(t){
    return Math.sin(get_delay() + t * freq);
}
function get_y_coordinate(t){
    return Math.cos(get_delay() + t * freq);
}
get_delay(0);
`;

repeat OsplTestTopic 0.2 51(
    id=> 2,
    x=>`get_x_coordinate(&lt;&lt;dt)`,
    y =&gt;`get_y_coordinate(&lt;&lt;dt)`
);
```

# 6.1.4 Comments

Comments can have the following formats:

Format of comments
```scss
// Comments can have the single line C style format
-- Or the single line ADA format
/*
* Or the multiline C style format
*
*/
```

Within the scenario editor, comments are displayed in green.

# 6.1.5 Macros

For repeated scenarios a repetitive part can be split off into a separate script file called a macro. Macros can have parameters.

Calling a macro with parameters
```asm
// call with default t
call send_and_check_test ( id =&gt; 1,    x => 3.1 );
call send_and_check_test ( id => 3,    x => 6.1 );
// call with specific t
call send_and_check_test ( id => 5,    x => 3.2, t => 3 );
```

Similarly to send and check instructions, values for fields can be optional. However, in a macro a default value must be provided for a parameter to be optional.

Setting a default value for a macro parameter

```txt
macro send_and_check_test (
    id : int;
    x : double;
    t : int := 5;
)
```

In this case t is optional, id and x are mandatory.

It is possible to call a scenario using the call instruction. Scenarios do not have parameters.

# 6.2 The Instructions

# 6.2.1 Send

Instruction to publish a sample of a topic.

```txt
send &lt;readername&gt; ( [fieldname => value,] *);
```

The send instruction may include an ‘update parameter’. The update parameter name is a combination of the topic name, followed by an underscore (\_) and the literal text ‘update’. Valid values for the update parameter are true and false. The update parameter allows scenario scripts to send a series of samples that evolve, each from the previous one, without having to explicitly specify all field values in each send instruction.

If the update parameter is present, then the sample data sent is retained by the topic reader, associated with the topic key field value(s). A subsequent send instruction, including the update parameter set to true with the same topic key field value(s), will have its sample initialized from the retained values, if they exist. The sent sample with then replace the retained values.

A send instruction including the update parameter set to false with the same topic key field value(s) will be initialized from the topic defaults, but the sent sample will be retained.

A send instruction without the update parameter will be initialized from the topic defaults, and any retained value for the key field value(s) will be removed.

Disposing the topic reader will remove all retained values.

# 6.2.2 Dispose

Instruction to dispose an instance of a topic.

```txt
dispose &lt;readername&gt; ( [fieldname => value,] *);
```

# 6.2.3 Writedispose

Instruction to write dispose an instance of a topic.

```txt
writedispose &lt;readername&gt; ( [fieldname => value,] * );
```

# 6.2.4 Check

Instruction to check a sample of a topic.

```txt
check[_last | _any] | recheck_last &lt;readername&gt; ([timeout => &lt;timeout in seconds&gt;,] [&lt;fieldname&gt; => [!]&lt;value&gt;[:deviation],]*);
```

# 6.2. The Instructions

A timeout value can be provided allowing the check to wait for &lt;timeout in seconds&gt; for the sample to arrive. If a sample meeting the criteria of the check is available either directly or within timeout seconds the fields as provided in the parameter list will be verified for correctness.

When the value of a field is an output variable:

```txt
>>&lt;varname&gt;
```

Then the value will not be checked but entered in the variable with the name &lt;varname&gt;.

There are two special fields, topicReceived and topicDisposed, which when used will provide a true or false value into a variable.

When no sample is found which meets the criteria of the check then topicReceived will be set to false (and the check instruction will not fail); if a sample is received the value will be set to true. When a field topicDisposed is found, then the variable will be set to true if the sample was disposed and false if the sample was not disposed. In this case no fail is reported upon a check instruction when the checked sample was disposed.

The value can be given a possible deviation in the form &lt;value&gt;:&lt;allowed deviation&gt;. In this case when the value for the field in the received sample is within the range from value minus allowed\_deviation to value plus allowed\_deviation, the value is considered correct.

The sample which matches the check can be determined in several ways:

1. The topic does not have a keyfield(s) or the topic has keyfield(s) but no value is provided for all keyfield(s). In this case the oldest not checked or marked sample is checked.
2. The topic has keyfield(s) and the check provides a value for all keyfield(s). In this case the last sample with the key is checked, so long as it was not previously checked. If no matching sample (within the possible timeout) is found then the check fails.
3. One or more fields of the check are marked as a query by prefixing the value with a ‘!’. The oldest not checked or marked sample which matches the query is checked. If no matching sample is found (within the possible timeout) the check fails.
4. Instead of check, the command check\_last is used. In this case (as for situations 1 and 3) the last not-previously-checked sample matching the criteria is checked.
5. Instead of check, the command check\_any is used. In this case also previously-checked or marked samples are considered.
6. The command recheck\_last will always check the last sample matching the criteria, regardless of whether it has previously been checked or not.

# 6.2.5 Miss

Instruction to check that no sample of a topic was received since the last checked or marked sample for the given key/query. The same rules apply as for the check instruction with respect to finding (or not) the matching topic sample.

```txt
miss &lt;topicname&gt; ([timeout => &lt;timeout_in_seconds&gt;,] [&lt;fieldname&gt; => [!]&lt;value&gt;[:&lt;deviation&gt;],] *);
```

# 6.2.6 Disposed

Instruction to check that an instance of a topic is disposed for the given key/query. The same rules apply as for the check instruction with respect to finding the disposed instance. Note that field values are only provided to find a specific instance (either by key or by query) and not verified for values as part of this instruction.

```txt
disposed &lt;topicname&gt; ([timeout => &lt;timeout_in_seconds&gt;,] [&lt;fieldname&gt; => [!]&lt;value&gt;,] *);
```

# 6.2. The Instructions

# 6.2.7 Mark

Mark all samples (with the given key/query) as read. Any regular miss/check function will not ‘see’ topic samples received before the mark instruction. If no key or query is provided all samples will be marked as read (and therefore not considered for check or check\_last instructions). If a key value or query is provided, all samples matching the key/query will be marked as read.

```javascript
mark &lt;topicname&gt; ( [fieldname => value,] *);
```

# 6.2.8 Repeat

Instruction to repeatedly send a topic for a specified count or until disposed.

```txt
repeat &lt;topicname&gt; &lt;period&gt; &lt;count&gt; ( [fieldname => value,] * );
```

If &lt;count&gt; is ‘0’ then the repeat will continue until the scenario terminates or until a dispose for the same topic and key. The variable dt is available for calculating a field value based on time since the repeat was started. The period indicates the period with which the topic will be sent. Note that a repeat command by itself does not extend the execution of a scenario and that when a scenario finishes (i.e. all following instructions are executed) the repeat instruction is terminated automatically. In such a case the wait or message instruction can be used to ensure that the repeat instruction is completed.

# 6.2.9 Set

The set instruction allows the call of a macro in a table-like fashion. The command allows a number of static parameters and variable parameters. The command has the following format:

```txt
set &lt;macroname&gt; ( [&lt;fieldname&gt;=>&lt;value&gt;]*) ((&lt;fieldname&gt;*), [ (&lt;value&gt;*), ]*);
```

For example, the following set instruction:

```txt
set send_and_check_test (
    t => 2)
(( x, id),
( 3.1, 1),
( 2.34, 2),
( 3.678, 3),
( 6.34, 4),
( 99.99, 5))
```

In this example the send\_and\_check\_test macro is called five times, all five calls will be made with t = 2 and the values for x and id as indicated by each row of values. This can be very useful for testing of translations.

# 6.2.10 Execute

The execute instruction allows the execution of an application or command line script on the native OS.

```javascript
execute [wait] [log] "&lt;instruction&gt;";
```

If wait is set then the instruction will wait for the execute to complete. If log is set then the output of the execute will be logged to the Debug window (and resulting dump file). When log is used wait should also be used, to avoid overwriting log messages.

# 6.2.11 Log

The log instruction logs a message to the Debug window. Log messages can provide information immediately (e.g. a step being made in a script, or a value of some variable) or post-execution as part of the logfile which includes the full content of the Debug window.

```txt
log ("message" [optional var]);
```

# 6.2. The Instructions

# 6.2.12 Message

The message instruction opens a dialog with the message and allows the operator to provide feedback and a OK/NOK indication. The feedback plus OK/NOK indication are logged to the Debug window.

message (“message text” [optional var]);

This instruction is useful for semi-automatic testing of user interfaces where the GUI part is done manually using message instructions.

# 6.2.13 Fail

The fail instruction fails the execution of the scenario (final result). The execution terminates.

fail (“message” [optional var]);

The fail instruction can be useful in combination with an if instruction, for instance when a complex check is executed using javascript.

# 6.2.14 Call

The call instruction calls a macro or scenario. The name of the macro/scenario is the filename without extension. Macros must be on the macropath as provided in the configuration file. The Macrolist window displays all available macros. Also note that the macro name must be unique throughout all of the available macros because the path is not part of the selection of a macro (just the filename without extension).

call &lt;macroname&gt; ([&lt;parametername&gt; => &lt;value&gt;,]\*);

# 6.2.15 Reader

The reader instruction allows the creation or deletion of a reader. When the keyword dispose is used the reader (if it exists for that topic) will be deleted. When a reader is created the topicname is mandatory.

reader [dispose] (&lt;topicname&gt; [, &lt;qos&gt; [,&lt;partition&gt; [,&lt;readername&gt;]]]);

The qos can be provided in short notation (2 or 4 characters):

&lt; v | l | t | p &gt;&lt; b | r &gt;[h][&lt;S|E&gt;&lt;D|S&gt;

where

&lt; v | l | t | p &gt; Volatile, local transient, transient or persistent

&lt; b | r &gt; Best effort or reliable

[h] History, for a “keep” of 10 which allows for the reception of 10 samples with the same key in one poll interval

&lt;S|E&gt; Shared or exclusive ownership

&lt;D|S&gt; Ordering based on Destination or Source time stamp

# 6.3 Instructions for Graphs

# 6.3.1 Graph

The graph instruction allows manipulation or save of the graph. It has the following parameters:

# 6.3. Instructions for Graphs

```ini
X
Y
Key
Color
Title
xUnits
yUnits
save => &lt;name&gt;
show => true|false
reset => true|false
```

Note that all graphs have the same X component; when omitted the X will be the sample time. If the Y parameter is set, then a new trace is created for the current graph. The X, key, color, title and units are used for this trace if provided.

If reset is true, then the graph is cleared (i.e. all existing traces are deleted) before creating any new trace. If show is true then the graph is made visible after adding the trace; when false, then the graph is hidden after adding the trace. When save is true the graph will be saved to an image file after the trace has been added.

# 6.3.2 Column

The column instruction allows the creation of an extra column from a script for use by the graph instruction.

```txt
column [clear] (&lt;fieldname&gt; [, &lt;columnName&gt;]);
```

When the optional clear is set then the column for the field with name fieldname will be removed. When columnname is omitted, the columnname will be the same as the fieldname.

# 6.4 Instructions for Flow Control

# 6.4.1 Wait

The wait instruction forces a wait in the execution of the script. The time is provided in seconds.

```javascript
wait (&lt;time in seconds&gt;);
```

Value can be a variable.

# 6.4.2 If

The if instruction allows conditional execution of instructions.

```txt
If (val1 &lt;operator&gt; val2) then
    &lt;true instruction list&gt;
    [else
    &lt;false instruction list&gt;]
endif;
e &lt;Operator&gt; is one of ‘==’, ‘!=’, ‘>’, ‘&lt;’, ‘&gt;=’, ‘&lt;=’, ‘||’, ‘&&’.
```

Expressions can be layered with brackets:

( $&lt;&lt;x&gt;0$ ) & $\&\&$ (&lt;&lt;y&gt;0))

# 6.4.3 For

The for instruction allows the execution of a list of instructions multiple times.

```txt
for ,&lt;var&gt; in 1 .. 10 loop
    &lt;instruction list which can use &lt;&lt;var&gt;
    endloop;
or
    for &lt;var&gt; in (a,b,c) loop
    &lt;instruction list which can use &lt;&lt;var&gt;
    endloop;
```

# 6.4.4 Exit

The exit instruction exits the scenario.

```txt
exit;
```

# 6.5 Instructions for the Message Interface

# 6.5.1 Write

The write instruction writes a message to the interface.

```typescript
write &lt;interface&gt;.&lt;message&gt; ( [&lt;fieldname&gt; => &lt;value&gt;,] * );
```

# 6.5.2 Read

The read instruction checks a received message from the interface.

```typescript
read &lt;interface&gt;.&lt;message&gt; ( [&lt;fieldname&gt; => &lt;value&gt;,] * );
```

# 6.5.3 Connect

The connect instruction calls the connect of the interface. The functionality depends on the implementation in the interface.

```txt
connect &lt;interface&gt;;
```

# 6.5.4 Disconnect

The disconnect instruction calls the disconnect of the interface. The functionality depends on the implementation in the interface.

```typescript
disconnect &lt;interface&gt;;
```

# 6.5.5 Control

The control instruction allows the execution of special instructions as provided by the interface.

```txt
control &lt;interface&gt;.&lt;instruction&gt;[ ( [&lt;fieldname&gt; => &lt;value&gt;,]*)];
```

# 6.6 Installing Script Engines

In order to use additional script languages the appropriate script engines must be added to the Java classpath. The Java JRE already comes with a JavaScript engine by default (i.e. no specific installation is required). More Java script engines are available and can be used to support different scripting languages for the embedded scripts inside the scenario scripts, or for the additional fields.

When Tester starts, the available script engines will be logged (default log file is /tmp/OSPLTEST.log).

# 6.6.1 Jython

Download and install Jython on the target machine. Include jython.jar, which is normally located in the Jython installation directory, in the classpath of the OpenSplice Tester. Use this language by adding the following line as the first line of each script using the Jython script language:

#!jython

# 6.6.2 Jruby

Download and install Jruby on the target machine. Include jruby.jar, which is normally located in the lib directory in the Jruby installation, in the classpath of the OpenSplice Tester. Use this language by adding the following line as the first line of each script using the Jruby script language:

#!jruby

# 6.6.3 Groovy

Download and install Groovy on the target machine. Include groovy-all-&lt;version&gt;.jar, which is normally located in the embeddable directory in the Groovy installation, in the classpath of the OpenSplice Tester. Use this language by adding the following line as the first line of each script using the Groovy script language:

#!groovy

# 7

# Message Interfaces

This section describes how to test applications with non-DDS interfaces.

# 7.1 Message interfaces

An important feature of the OpenSplice Tester is the support of additional interfaces. When an application under test only has a DDS interface it is probably easy to test automatically by stimulating it from the Vortex OpenSplice Tester with samples and verifying the samples produced by the application under test. When the application under test has a GUI component, the message instruction can be used to perform a semi-automated test where the Vortex OpenSplice Tester performs manual control of the GUI and/or performs visual inspections of the GUI (as instructed in the message instruction).

When an application under test has a non-DDS interface, then the message interface of Vortex OpenSplice Tester can be used. There are a number of constraints on the use of a message interface:

• The interface must consist of a limited number of message types which can be described by a static set of fields with static types.
• It must be possible upon reception of a message over the interface, to determine a message type, and from the message type to interpret the message and determine the value for each field of the message.

If these requirements are met, a message interface can be developed for a specific interface of an application under test. This will allow automated testing where messages are written to the test interface, the message received from the test interface will be added to the sample list and it can be checked in the same manner as DDS samples.

# 7.2 Getting Started with a Message Interface

The best way to get started with a message interface is to compile and use the TestInterface. The TestInterface is an example message interface which uses a TCP/IP connection and sends a memory-mapped message with a static structure over this interface. The source for the TestInterface is provided and it can be found here:

```txt
&lt;OSPL_HOME&gt;/examples/tools/ospltest/TestInterface
```

To compile the TestInterface, ant and a JDK1.6 must be installed. To build the TestInterface, execute ant in the TestInterface directory. This will compile the testinterface and install the resulting plugin in:

```txt
&lt;OSPL_HOME&gt;/examples/tools/ospltest/plugins
```

To run with the plugin, make sure the plugin path points to this directory. The plugin path can be set in Preferences:

# Setting the plugins path in Preferences

![Edit preferences\nScripts	Settings	Topic Filters\nUse tabs Hydro\nUse IDE Hydro\nPlugins dir /plugins\nLog properties file ceDDS\6.3.0\HDEx86.win32\vexamples/tools/osp\test/log4j.properties\nBrowse\nBrowse\nOk	Cancel\nPlease provide input.](.vortex-opensplice-test-tool-user-guide/44df11bd97bb5e04170e6ede34629673a333f5f308033e42e7ca3db935df54c2.jpg)

If the plugins directory is changed, the Tester needs to be restarted. Once restarted, make sure that OpenSplice is running (the TestInterface registers a topic which will fail is DDS is not running upon startup).

Now two instances of the testinterface should show up in the left tab pane (or in separate windows if Use Tabs is false). Similar to the Readers pane, the table will show the available messages and the number of received messages per message type. Since there is no application under test, the testinterface is instantiated twice and connected back-to-back. As a result, a message written to the instance “tst1” will be received on the instance “tst2” and vice versa. Also the testinterface has created a topic, OsplTestLogTopic, and the test interface will write a sample of this topic for each write and read with the content of the message in hexadecimal format.

Messages received on instance tst1
![Macros Msg: tst1 Msg: tst2\nReaders Topics Services Scripts\nSelect... Deselect all Deselect )5\nConn... Disconnect\n--\nShow Message Count\n✓ ConnectMessageType 0\n✓ DisconnectMessageT... 0\n✓ StatusMessageType 0\n✓ TrackMessageType 0](.vortex-opensplice-test-tool-user-guide/41de43870a830645bcc9f85a8a630faddef4253cb2ebec9cfb6200d98ba2a501.jpg)

Now select the test\_interface.sd script, which can be found in examples/tools/ospltest/scripts:

The script test\_interface.sd
![write tst1.TrackMessageType(\n    x =) 4,\n    y =) 5,\n    z =) 6,\n    vx =) 1,\n    vy =) 2,\n    vz =) 3,\n);\nwait(0.5);\nwrite tst1.ConnectMessageType( );\nread tst2.StatusMessageType(\n    header.sequenceNumber =) 2,\n    online =) bool_true,\n);\nend scenario](.vortex-opensplice-test-tool-user-guide/158079e72551231e07d49c8c65bbd1bbb39ec5322b34cc5e4309e56b0c26008d.jpg)

In the script we can see that, similar to the send and check instruction, the write and read instructions are used to write a message to the test interface, or read (check) a message received on the test interface.

Execute the script:

Script test\_interface.sd running

![| Category | Value |\n| :--- | :--- |\n| 1.292 | OspITestLogTopic |\n| 1.437 | ConnectMessage... write |\n| 1.437 | StatusMessageTy... write |\n| 1.437 | ConnectMessage... read |\n| 1.437 | TrackMessageType write |\n| 1.437 | StatusMessageTy... chkd |\n| 1.437 | TrackMessageType read |\n| 1.337 | OspITestLogTopic alive |\n| 1.338 | OspITestLogTopic alive |\n| 1.338 | OspITestLogTopic alive |\n| 1.342 | OspITestLogTopic alive |\n| 1.342 | OspITestLogTopic alive |\n| 1.953 | ConnectMessage... read |\n| 1.846 | OspITestLogTopic ALIVE_AND_KICK... tst... OpenSplice Tester (3047-laptop) |\n| 1.846 | OspITestLogTopic ALIVE_AND_KICK... tst... OpenSplice Tester (3047-laptop) |\n| 1.953 | ConnectMessage... write |\nDebug OK 33 --- DTime Type Message Location 0.094 Scen test_interface.sd 0.312 Log Wait: 1.0s 4 1.391 SOK Send: OsplTestLogTopic 8 (2) 1.406 Log Hdw socket received closed started .Connected 'file://C:\Program F ... liceDDS V6.1.0b2 HDE x86.win32 etc config ospl.xml' networking.exe,durability.exe,... exe,spliceddaemon](.vortex-opensplice-test-tool-user-guide/1734d99847c275f5cbc7a0a1a10286945169a2f79372604f6b841af1e55951dc.jpg)

Here we can see that in the sample list, both the DDS samples as well as the testinterface samples are available. As a result the interaction is clearly visible.

# 7.3 Types of interfaces

When integrating a test interface with the Vortex OpenSplice Tester, the following functionality is provided:

• Connect/Disconnect with a parameter
• Write of messages based on parameters of a write call
• Read of messages and display received messages in the sample list
• Check received messages
• Display fields of messages (double click in sample list)
• Hooks upon write/read of a message

The Vortex OpenSplice Tester provides two ways to create such a message interface:

• Basic message interface
• Buffered message interface

# 7.3.1 Basic message interface

If it is not possible to describe the content of each message in an ADA interface description (i.e. a static memorymapped definition of each message type) or when the definition of the interface exists in another format, like a MIB for an SNMP interface, then it is possible to derive from the basic message interface class:

BaseMsgInterface

Similarly for the messages a class must be derived from:

# 7.3. Types of interfaces

# MsgSample

Note that both BaseMsgInterface and MsgSample contain a considerable number of abstract function which then must be provided in order to be able to edit and display samples, as well as read and write sample on their interface.

# 7.3.2 Buffered message interface

The example test interface is a buffered message interface. The Vortex OpenSplice Tester provides support for memory-mapped messages and provides all basic functionality for this type of interface. The messages are described using the ADA language type definition for records with a representation clause. This allows to describe message with bit fields, enums, fixed length strings, integer and double values.

On top of the buffered message interface, an implementation using UDP and TCP is available.

When the buffered message interface is used the provided implementation takes care of interpreting the received messages, decode the messages for display in the sample list or display in the sample window. Upon a write instruction a memory buffer will be built using the parameters of the write call and the message definition as provided in the ADA interface description.

# ADA Syntax for message definition

For each message a record needs to be defined which describes the exact memory layout of the message. See the ADA message description of the test interface for an example of such a message definition.

# Message ID translation

By default in a buffered message interface a base record is defined with an idfield to determine the type of the message. Then a function is called to translate the value of the idfield to a name of the record type with the definition of a message of the received type.

If a message does not contain a single field which can be used to determine the message type then the method:

RecordType determineMsgType(ByteBuffer buf)

can be overwritten to perform the translation of the received buffer to a message type.

If indeed the id can be retrieved from an id field (enum value) then the function:

protected static String transformIdToType(String id)

is used to translate the enum label to the name of a record definition. The following translation is done:

• ID is changed to TYPE
• Each character following an underscore (‘\_’) is capitalized, as well as the first character and the remaining characters are made lowercase.

As a result an enum label: HEARTBEAT\_MESSAGE\_ID is translated to HeartbeatMessageType.

Of course if a different convention is used for describing enum labels and message names, then the transformId-ToString function can be overridden to perform the required translation.

# Message Hooks

It is possible to override message hooks at several stages in the send and receive process. This allows specific processing, such as:

• Automatic reply to each received message (acknowledge messages)
• Fill in automatic fields like sequence numbers, crcs, or timestamps
• Ignore messages for reception, like acknowledge messages or heartbeats

# 7.3. Types of interfaces

• Perform specific checks such as crc check

See the example test interface for an example of the hooks and a description of their function.

# Control functions

The script control function allows implementation specific control functions to be implemented. In the implementation of the derived interface, the following functions can be overridden (note that the base implementation already provides some control commands, overriding these functions must properly include or forward to the base implementation):

$\mathrm { p u b l i c ~ \mathsf { \Omega } S t r i n g ~ [ \mathsf { \Omega } l ~ \mathsf { \Omega } g e t C o n t r o 1 C o m m a n d s ~ ( \mathsf { \Omega } ) }$

Provide the list of control commands, note that super.getControlCommands should be used to include the list of control commands of the base impementation.

public void control(String command, ParameterList params, ScenarioRuntime runtime, int line, int column)

Execute the control command, with the provided parameters and runtime. In case of an error the line and column can be used as the location of the instruction which failed.

Control functions can be used for any specific function as deemed necessary (of course, all must be implemented in the derived interface class):

• Stop sending heartbeats
• Create incorrect crc
• Stop sending acknowledge
• Determine message frequency

# 8

# Google Protocol Buffers

This section describes Tester features for Google Protocol Buffers.

# 8.1 About Google Protocol Buffers in Tester

In versions of Vortex OpenSplice that support Google Protocol Buffers, Tester is able to read from protocol buffer topics and display its samples as regular field name and value pairs, just as if it were from a regular IDL-defined topic.

The Tester feature for Google Protocol Buffer topic reading is enabled only on Vortex OpenSplice middleware installs where Google Protocol Buffer support is included. For installations where it is not included, the feature is disabled in Tester.

# 8.2 Viewing type evolutions

The main feature of using Google Protocol Buffers as the type definition for a topic is the ability to change, or ‘evolve’, a topic’s type. Tester can become aware of changes to a protocol buffer topic’s type, and can display the topic type definition for each type evolution that is registered.

To view the type evolutions for a protocol buffer topic, right-click the topic in the Topics tab, and select View Topic Type from the pop-up menu.

View Topic Type from the Topics list
![File Script View SampleList Display Filter Editor Edit Help\nServices Scripts Macros\nReaders Topics\nname type qos\nCMDataReader kernelModule... trDS\nCMDataWriter kernelModule... trDS\nCMParticipant kernelModule... trDS\nCMPublisher kernelModule... trDS\nCMSubscriber kernelModule... trDS\nDCPSCandMC... kernelModule... trDS\nDCPSDelivery kernelModule... vbDS\nDCPSHeartbeat kernelModule... tbDS\nDCPSParticip... kernelModule... trDS\nDCPSPublicat... kernelModule... trDS\nDCPSSubscri... kernelModule... trDS\nDCPSTopic kernelModule... trDS\nDCPSType kernelModule... trDS\nOsplArrayTopic osplog::Ospl... trDS\nOsplSequenc... osplog::Ospl... trDS\nOsplTestTopic osplog::Ospl... trDS\nPerson address::dds... vbDS\nd_deleteData durabilityMod... vrDS\nd_groupsReq... durabilityMod... vrDS\nd_nameSpaces durabilityMod... vrDS\nd_nameSpac... durabilityMod... vrDS\nd_newGroup durabilityMod... vrDS\nd_sampleChain durabilityMod... vrDS\nd_sampleReq... durabilityMod... vrDS\nd_status durabilityMod... vrDS\na_hubble o_ospkornMod: vbDS\nSample List Statistics Browser\nDTime... Topic\nCreate Reader\nCreate Default Reader\nView Topic Type\nDebug](.vortex-opensplice-test-tool-user-guide/1d589ea3141bba5f3859d3f5f70271697fc2cc30705432739137d73d5e666c92.jpg)

# 8.2.1 View Topic Type Window

Upon selection of the menu item, the View Topic Type window will appear for the selected topic. By default, it shows the type name for the topic and the DDS type definition. If the topic is a protocol buffer topic, it will display additional information:

• The Evolutions for the type are displayed in a drop-down combo box. It lists the known evolutions for the type according to the time it was registered in the DDS system. The most recent evolution is at the top of the list and is selected by default.
• The Type Hash is an non-editable text field that displays the 128-bit hash that uniquely identifies the selected type evolution for the topic type. The field is highlightable for easy copy/pasting.
• The Proto Typedef tab is added when viewing protocol buffer topic types. It displays a description for all fields and nested types defined in the protocol buffer message for the currently-selected evolution, in a text format emulating the original .proto file format. Message type fields found in the typedef that are not defined as nested messages inside the main DDS message type are defined under a separate section, External Definitions. These messages have their fully- qualified type name to indicate where they were defined. Please note that this typedef reconstruction is only meant to give the user an idea as to what type of data is found in the topic type. It is not guaranteed to be a 100% reconstruction of the original .proto file as it was written, or to be compilable by the protoc compiler.
• The DDS Typedef tab contains the same kind of type decription as it would for a normal topic, but for protocol buffer topics, it describes the field names and field types for the currently-selected type evolution as it is understood by Tester for sample editing.

View Topic Type window for a protocol buffer topic
![type Name: address::dds::Person\nEvolutions: Wed Jul 29 11:33:27 EDT 2015\nType Hash: 1726249457813467228715635480905618011178\nDDS Typedef Proto Typedef\npackage address;\nmessage Person {\noption (.omg.dds.type) = {name: 'address.dds.Person'}\nrequired string name = 1 ((.omg.dds.member) = {key: true});\nrequired int32 age = 2 ((.omg.dds.member) = {filterable: true});\noptional string email = 3;\nrepeated PhoneNumber phone = 4;\nrepeated Person friend = 5;\nenum PhoneType {\nMOBILE = 0;\nHOME = 1;\nWORK = 2;\n}\nmessage PhoneNumber {\nrequired string number = 1;\noptional PhoneType type = 2;\n}\n}](.vortex-opensplice-test-tool-user-guide/be74367b734ffa574c8c86c8fdbda3c129f879a32ecce79c5c7d9de4be8c01bd.jpg)

Proto Typedef with external definitions

![Topic Data Type - TopicTwo\nType Name: multimessage::a::dds::TypeOne\nEvolutions: Wed Jul 29 15:42:38 EDT 2015\nType Hash: 1799377278614729251264445909036325609\nDDS Typedef Proto Typedef\npackage multimessage.a;\nmessage TypeOne {\n    option (.omg.dds.type) = {name: 'dds.TypeOne'}\n    required int32 key = 1 ((.omg.dds.member) = {key: true});\n    optional SampleMessage asample = 2;\n    optional multimessage.b.SampleMessage bsample = 3;\n}\n// External definitions\nmessage multimessage.a.SampleMessage {\n    optional int32 intx = 1;\n}\nmessage multipackage.b.SampleMessage {\n    optional int32 intx = 1;\n}](.vortex-opensplice-test-tool-user-guide/5e4efad76253dbfec30217ab291a384450c4597528354a9b165280b310342745.jpg)

# 8.3 Reading protocol buffer topics

Tester reads protocol buffer data by reading in the byte sequence data contained in the user data, and then replacing all fields with regular field name and value pairs just as if it were data from a regular topic. The process for creating readers for protocol buffer topics is almost identical to the process described in Section 3.3.3, To Add a Reader from the Topic list, on page 24.

• When creating a reader for a protocol buffer topic via the Create Default Reader right-click menu option on the Topic list, all default settings will be used as before, but with the addition that all incoming samples will be decoded as the most recently-registered type evolution.
• When creating a reader for a protocol buffer topic via the Create Reader right-click menu option on the Topic list, or via the $F i l e > A d d$ Reader main menu option, the Add Reader dialog will be presented, as normal. However, it is presented with an extra field to choose the desired type evolution to use to view user data.

Add Reader dialog with type evolution chooser

![Add Reader\nPerson\nReaderName:\nPartition:\nType Evolutions: Tue Jul 14 13:26:39 EDT 2015\nKeep 10 Wait for historical\nAuto dispose unregistered instances\nDurability: volatile\nReliability: best effort\nDestinationOrder: Destination\nOwnership: Shared\nCancel Add](.vortex-opensplice-test-tool-user-guide/7243037a200016427bc025b688e8f77243568dc95d831fb013b8f6ccc603b229.jpg)

# 8.4 Reading protocol buffer topics via script

It is possible to declare which type evolution to read protocol buffer topics as, via the Reader script command (defined in Section 5.2.15, Reader, on page 83). The topicname parameter for the reader command can be modified with a type evolution’s type hash to specify which type evolution view protocol buffer user data as. The type hash can be viewed and copied from the View Topic Type window (see Section 7.2.1 on page 96).

• To create a default reader with the most recently-registered type evolution, the command is:

```javascript
reader(Person);
```

• To create a reader with a specific type evolution, the command is the same, but with the type hash pasted in after the topic name, separated by a ‘#’:

```javascript
reader(Person#73979410269545042249851605221960719319);
```

# 8.5 Editing protocol buffer topic samples

Editing samples from protocol buffer topics is the same as samples from a regular topic. Protobuf fields can be declared as optional or required, so to reflect that in the Sample Edit window (see Section 3.4.1.1, To Write Sample Topic data, on page 28), a Cyan color highlight is added to required protocol buffer fields. In all other senses, though, editing samples in either the Sample Edit window or in scripting is precisely the same as it is for normal topics.

The Sample Edit Window for a protocol buffer sample

<table><tr><td colspan="5">Edit sample: Person</td></tr><tr><td>Field</td><td>Default</td><td colspan="3">value</td></tr><tr><td>name</td><td></td><td colspan="3">Jane Doe</td></tr><tr><td>age</td><td>0</td><td colspan="3">4</td></tr><tr><td>email</td><td></td><td colspan="3">jane.doe@somedomain.com</td></tr><tr><td>facebookname</td><td>NONE</td><td colspan="3">NONE</td></tr><tr><td>friend[0].age</td><td>0</td><td colspan="3">4</td></tr><tr><td>friend[0].email</td><td></td><td colspan="3">john.doe@somedomain.com</td></tr><tr><td>friend[0].facebookname</td><td>NONE</td><td colspan="3">faceb</td></tr><tr><td>friend[0].name</td><td></td><td colspan="3">John Doe</td></tr><tr><td>friend[0].phone[0].number</td><td></td><td colspan="3"></td></tr><tr><td>friend[0].phone[0].secret</td><td>false</td><td colspan="3"></td></tr><tr><td>friend[0].phone[0].type</td><td>UNDEFINED</td><td colspan="3"></td></tr><tr><td>friend[1].age</td><td>0</td><td colspan="3"></td></tr><tr><td>friend[1].email</td><td></td><td colspan="3"></td></tr><tr><td>friend[1].facebookname</td><td>NONE</td><td colspan="3"></td></tr><tr><td>friend[1].name</td><td></td><td colspan="3"></td></tr><tr><td>friend[1].phone[0].number</td><td></td><td colspan="3"></td></tr><tr><td>friend[1].phone[0].secret</td><td>false</td><td colspan="3"></td></tr><tr><td>friend[1].phone[0].type</td><td>UNDEFINED</td><td colspan="3"></td></tr><tr><td>phone[0].number</td><td></td><td colspan="3">0123456789</td></tr><tr><td>phone[0].secret</td><td>false</td><td colspan="3">false</td></tr><tr><td>phone[0].type</td><td>UNDEFINED</td><td colspan="3">HOME</td></tr><tr><td>phone[1].number</td><td></td><td colspan="3">0612345678</td></tr><tr><td>phone[1].secret</td><td>false</td><td colspan="3">true</td></tr><tr><td>phone[1].type</td><td>UNDEFINED</td><td colspan="3">MOBILE</td></tr><tr><td>phone[2].number</td><td></td><td colspan="3">splicer</td></tr><tr><td>phone[2].secret</td><td>false</td><td colspan="3">false</td></tr><tr><td>phone[2].type</td><td>UNDEFINED</td><td colspan="3">SKYPE</td></tr><tr><td>phone[3].number</td><td></td><td colspan="3"></td></tr><tr><td>phone[3].secret</td><td>false</td><td colspan="3"></td></tr><tr><td>phone[3].type</td><td>UNDEFINED</td><td colspan="3"></td></tr></table>

# 9

# Python Scripting Engine

This section describes writing Python scripts to test OSPL applications.

# 9.1 About Python Scripting

Python Scripting is a scripting environment for running unit tests and adhoc scripts against a Vortex OpenSplice environment. Python Scripting connects to the OpenSplice environment through the Configuration and Management API. It is based on the Python scripting language, and requires Jython 2.7.0 or later, the Java-based implementation of Python.

# 9.1.1 Design Goals

Python Scripting is an alternative to the product specific Scenario language found in Vortex Tester. Python Scripting design goals were:

• use a standard scripting language (Python)
• allow users to leverage the tooling environment build around this standard language
• allow users to leverage the testing infrastructure and libraries
• expose DDS semantics, particularly on reading and writing topic data in an easy-to-use API for Python.
• run independently of Vortex Tester
• allow execution of scripts and unit tests both directly from the command line and from an Integrated Development Environment (IDE)

# 9.2 Configuration

This section explains how to download and configure a Jython scripting engine with the Tester Scripting package. Jython is an Java-based implementation of the Python scripting language.

# 9.2.1 Prerequisites

A Java 7 or later runtime (JRE) is required. The JAVA\_HOME environment variable must be set to the JRE installation directory.

Check that the following command yields a Java version of 1.7 or later:

```batch
#Linux
$JAVA_HOME/bin/java -version
#Windows
"%JAVA_HOME%\bin\java" -version
```

Note that during the installation, it is assumed the the environment variable OSPL\_HOME refers the the fully qualified path of the Vortex OpenSplice installation.

# 9.2.2 Download and install Jython

The Tester Scripting package does not include the Jython scripting engine - it must be downloaded. Jython is an open source project licensed under the Python Software Foundation License Version 2 (http://www.jython.org/license.html). The license is OSI Approved (https://opensource.org/licenses/alphabetical).

Tester Scripting requires Jython 2.7.0 or later. Download the Jython 2.7.0 Installer from the Jython Download page (http://www.jython.org/downloads.html).

# Automated installation and configuration

Once the Jython installer has been downloaded, the osplscript command can be used to install Jython in your Vortex OpenSpice home directory. Follow the following steps:

1. Start a command prompt (Windows) or Terminal window (Linux). The Vortex OpenSplice Launcher can create a Console window that eliminates the need for the step 2.
2. Ensure that the OSPL\_HOME environment variable is set by running the release script. On Linux run:

```txt
#linux
source $OSPL_HOME/release.com
#Windows
"%OSPL_HOME%\release.bat"
```

3. Change to the directory containing the Jython 2.7.0 installer, jython-installer-2.7.0.jar

4. Enter the command:

```txt
osplscript
```

5. The command will display a message similar to the following, and then prompt you to continue:

```txt
Your OSPL installation has not been configured for osplscript; no Jython installation was found in the OSPL install directory: &lt;your-install-directory&gt;
A jython installer has been found in the current directory. Do you wish to install Jython and configure osplscript? [yes|no]:
```

6. Enter ‘yes’ (without the quotes), and press Enter; osplscript will be configured.

7. When completed, the Jython interpreter will be started. Either type ‘exit()’ or continue on to verifying the installation with the instructions in the next secion.

# Manual installation and configuration

If you do not want place a Jython interpreter in the OSPL\_HOME directory, or if you already have Jython interpreter installed in another location, you can use the following manual installation and configuration procedure.

# Install a Jython interpreter in a location of your choice

If you want to install Jython in another location, do the following steps:

1. Start a command prompt (Windows) or Terminal window (Linux).
2. Ensure that your JAVA\_HOME environment variable refers to an appropriate Java installation (Java 7 or later).

# 9.2. Configuration

3. From the directory containing the downloaded Jython installer, enter the following command:

```batch
jython-installer-2.7.0.jar -s -d &lt;desired-install-directory&gt; -t standard
```

If you prefer, you can remove the (-s) option (silent install), in which case, a graphical installation wizard will appear. Proceed through the wizard to select a ‘Standard’ installation.

# Configure the Jython interpreter with OSPLScript package

To your Jython interpreter for Python scripting, you must install the OSPLScript Python package. Follow these steps:

1. Ensure that the Jython ‘bin’ directory in the system PATH environment variable.
2. Start a command prompt (Windows) or terminal window (Linux). The Vortex OpenSplice Launcher can create a Console window that eliminates the need for the step 3.
3. Ensure the Vortex OpenSplice environment variables are set by running the ‘release’ script.
4. Start the Jython easy\_install program. The following command line will install the standard Jython distribution:

```shell
# for Linux systems
easy_install "$OSPL_HOME/tools/scripting/OSPLScript-1.0.0.tar.gz"
# for Windows systems
easy_install "%OSPL_HOME%\tools\scripting\OSPLScript-1.0.0.zip"
```

Once the package installation has completed, you may proceed with verifying the installation.

# 9.2.3 Verifying the installation

The following steps will verify that the Jython installation is correctly configured. The following steps are done from a command window:

1. Ensure that the Vortex OpenSplice environment variables are set by running the ‘release’ command script.

2. Ensure OpenSplice is running by issuing the following command:

```batch
ospl start
```

3. Start OpenSplice Tester to create some test topics used below:

```txt
ospltest
```

4. Start the Jython interpreter:

```txt
osplscript
```

5. Enter the following commands at the interpreter command prompt:

```python
>>> from osplscript import dds
>>> topic = dds.findTopic('OsplTestTopic')
>>> OsplTestTopic = dds.classForTopic(topic)
>>> data = OsplTestTopic()
>>> data.id = 1
>>> data.description = 'Smoke test'

>>> writer = dds.Writer(topic)
>>> writer.write(data)

>>> reader = dds.Reader(topic)
>>> sample = reader.take()
>>> readData = sample.getData()
```

# 9.2. Configuration

```txt
>>> assert data.id == readData.id
>>> assert data.description == readData.description
```

# 9.3 A Quick Tour of OSPL Scripting

The following is a brief tour of the scripting engine’s capabilities.

# 9.3.1 Prerequisites

This demo assumes a shell instance that has been initialized with the release.com script found in the OSPL installation directory. In particular, the quick tour relies on the following environment variables be set: OSPL\_HOME, OSPL\_URI and LD\_LIBRARY\_PATH. The easiest way to set these variables is to use the Vortex OpenSplice launcher to start a Console window. Alternatively, run the ‘release’ script in your Vortex OpenSplice installation directory. To run the script, do the following:

```txt
# linux
cd OSPL-install-directory
. release.com
# Windows
cd OSPL-install-directory
release.bat
```

# 9.3.2 Preliminaries

Start OSPL, typically with:

```batch
ospl start
```

Then, start Vortex OpenSplice Tester:

```txt
ospltest
```

Tester is used to define topics used in the scripting engine, and to observe samples. From within Tester, create a default Reader on the following topics: OsplTestTopic.

# 9.3.3 Writing and Reading samples

Start the OSPL Scripting engine:

```txt
osplscript
```

You will see a standard start up banner from the Jython engine similar to the following:

```txt
Jython 2.7.0 (default:9987c746f838, Apr 29 2015, 02:25:11)
[Java HotSpot(TM) Server VM (Oracle Corporation)] on java1.7.0_80
Type "help", "copyright", "credits" or "license" for more information.
>>>
```

The text ‘>>>’ is the interpreter prompt.

To start our script, import the DDS module from OSPL Script. Enter the following at the prompt:

```txt
>>> from osplscript import dds
```

# 9.3. A Quick Tour of OSPL Scripting

As part of the import, a connection is made to OSPL. If OSPL is not running, or if the environment variables are not correctly set, you may receive an error at this point.

The dds module provides allows you to find topics, and create readers and writers. We will start with find the OsplTestTopic created when we started Tester. Enter the following at the prompt:

```python
>>> t = dds.findTopic('OsplTestTopic')
>>> # The next statement create a Python type from the topic
>>> OsplTestTopic = dds.classForTopic(t)
>>> # You can then instantiated instances of this class
>>> d1 = OsplTestTopic()
>>> # You can then set fields in the data
>>> d1.id = 1
>>> d1.index = 100
>>> d1.description = 'Hello from osplscript'
>>> d1.state = 'boost'
>>> d1.x = 1.1
>>> d1.y = 2.2
>>> d1.z = 3.3
>>> d1.t = 4.4
```

Once some data is created, we can the create a writer for the topic, and write the data:

```txt
>>> # create a Writer from the topic object we found previously
>>> w = dds.Writer(t)
>>> w.write(d1)
```

Once the write has executed, example the Sample List in Tester. You should see a new sample in the list.

Next, we can create a reader, and read the sample we have just written:

```txt
>>> # create a Reader on the topic, and read a sample
>>> r = dds.Reader(t)
>>> s1 = r.take()
>>> # s1 is a Sample, the user data is access via getData()
>>> rd1 = s1.getData()
```

We can check that the read data is what we expected:

```python
>>> assert rd1.id == 1
>>> assert rd1.index == 100
>>> assert rd1.description == 'Hello from osplscript'
```

You can continue your exploration by writing a sample via Tester, and confirming that you can read it using OSPL Script. When you are done, exit the interpreter by typing:

```txt
>>> exit()
```

# 9.3.4 Working with QoS settings

By default, OSPL Scripting creates a publisher and a subscriber using the partition pattern ‘\*’. All other publisher and subscriber QoS policies are DDS defaults. Similarly, data readers and data writers have, by default, QoS policies derived from topic to which they are bound. If default QoS policies do not statisfy your requirements, you can explicitly create publishers and subscribers, and assign them explicity QoS policies. Similarly, you can explicitly assign QoS policies to data readers and data writers that you create.

The following example shows the explicit creation of a Subscriber:

```python
>>> from osplscript import dds, qos
>>> topic = dds.findTopic('OsplTestTopic')
>>> # create an explicit subscriber on a partition 'test'
>>> sub = dds.Subscriber(
>>> qos.SubscriberQos().withPolicy(
>>> qos.Partition().withName('test'))
```

# 9.3. A Quick Tour of OSPL Scripting

```diff
>>> )
>>> # create a reader with topic-derived defaults
>>> drDefault = sub.reader(topic)
>>> # create a reader with explicitly reader QoS policies
>>> drExplicit = sub.reader(
>>>    topic,
>>>    qos.DataReaderQos().withPolicy(
>>>    qos.Durability().withVolatile())
>>> )
```

The following example shows adding explicit QoS policies to a data writer on the default publisher:

```txt
>>> dwExplicit = dds.Writer(
>>> topic,
>>> qos.DataWriterQos().withPolicy(
>>> qos.Durability().withVolatile())
>>> )
```

The QoS classes for publishers, subscribers, data readers and data writers are, respectively, PublisherQos, SubscriberQos, DataReaderQos and DataWriterQos. Although OSPL Scripting does not allow creating of topics, topics can return their QoS settings via a TopicQos instance. The help for each of these QoS classes describes the applicable policies. The help for policy classes describes all the methods available to configure the policy. You can view help on QoS classes and policies via the help function:

```txt
>>> help(qos.SubscriberQos)
>>> help(qos.Parition)
>>> help(qos.Durability)
```

# 9.3.5 Working with WaitSets

OSPL Scripting implements DDS wait sets with read conditions, query conditions and status conditions. This allows your code to block until data is available on a data reader. Here is a simple example:

```python
>>> from osplscript import dds

>>> # find the topic, create a data reader and wait set
>>> topic = dds.findTopic('OsplTestTopic')
>>> dr = dds.Reader(topic)
>>> ws = dds.WaitSet()

>>> # create a read condition of Alive, NotRead, New samples
>>> rc = dr.readCondition(dds.DataState().withAlive().withNotRead().withNew())

>>> # attach the read condition to the wait set
>>> ws.attachCondition(rc)

>>> # wait...
>>> ws.waitForConditions()

>>> # waiting returned, we have a sample
>>> sample = dr.take()
>>> # do something with the sample
```

The waitForConditions() method can accept optional arguments, include a timeout. See the help for details:

```txt
>>> help(dds.WaitSet.waitForConditions)
```

# 9.3.6 Filtering data

OSPL Scripting allows you to filter data from a reader using a ‘selector’. The selector can also be used to create a condition for a wait set.

# 9.3. A Quick Tour of OSPL Scripting

A selector is created via a reader’s newSelectBuilder() method. A ‘select builder’ allows you to specify state conditions as well as an optional query expression. The following example creates a selector:

```python
>>> from osplscript import dds

>>> # find the topic, create a data reader
>>> topic = dds.findTopic('OsplTestTopic')
>>> dr = dds.Reader(topic)

>>> # create a selector for Alive, NotRead, New samples with 'index = 100'
>>> selector = dr.newSelectBuilder().withAlive().withNotRead().withNew() \
>>> .content('index = 100').build()
```

Each of the ‘selector builder’ methods returns the builder, so that calls can be chained as above. Apart from build(), none of the builder methods is required. A selector with no filters works identically to the data reader from which it was created.

Once created, a selector can be used like a data reader, with take() or read() methods:

```python
>>> # use the selector like a reader
>>> sample = selector.take()
```

Alternatively, the selector can be used with a waitset, by calling the selector’s condition() method:

```txt
>>> # Use the selector in conjunction with a waitset
>>> ws = dds.WaitSet()
>>> ws.attachCondition(selector.condition())
>>> ws.waitForConditions()
>>> # the selector now has data...
>>> sample = selector.take()
```

In the above example, the selector.condition() method returns a QueryCondition. If the content() method had not been called, a ReadCondition would have been returned.

You can create a QueryCondition directly, and then use it with a wait set:

```txt
>>> queryCond = reader.queryCondition(
>>> 'index = 100', [],
>>> dds.DataState().withAlive().withNotRead().withNew())
>>> ws.attachCondition(queryCond)
```

A selector, however, has the advantage of providing your with filtered access to the data that triggered the query condition. Creating a query or read condition explicitly does not provide such filtering; the data reader from which the condition was defined will still return all available samples, whether they satisfy the condition or not. For this reason, selectors are the preferred method for defining data filters, waiting for filtered data availability, and for accessing the filtered data.

# 9.3.7 Query Expressions, Query Parameters and their Limitations

Both the selector builder’s content() method and the QueryCondition() constructor allow the query expression to contain substitution parameters of the form {n}, where n is a zero-based index into an list of string parameter values. For example, we could filter OsplTestTopic’s index value to be between an upper and lower bound, and specify the query as follows:

```python
>>> from osplscript import dds

>>> # find the topic, create a data reader
>>> topic = dds.findTopic('OsplTestTopic')
>>> dr = dds.Reader(topic)

>>> # create a selector for Alive, NotRead, New samples with 'index = 100'
>>> selector = dr.newSelectBuilder().withAlive().withNotRead().withNew() \
```

```txt
>>> .content('index >= {0} and index &lt; {1}', ['100', '200']) \
&gt;>> .build()
```

We could use similar parameters in creating a QueryCondition directly:

```txt
>>> queryCond = reader.queryCondition(
>>> 'index >= {0} and index &lt; {1}'
&gt;>> ['100', '200'],
>>> dds.DataState().withAlive().withNotRead().withNew())
```

OSPL Scripting attempts to replace the passed parameter values in the query expression, formatting the values as valid query expression constants. However, because of limitations in the APIs available to OSPL Scripting, this formatting is imperfect. In particular, the following values are likely to be formatted incorrectly:

• enumeration values will incorrectly be quoted
• boolean values will incorrectly be quoted
• string values that can be converted to numbers will incorrectly be unquoted.

The work around for all these limitations is to avoid using parameter substitution. For example, instead of the following parameterized condition against the ‘state’ enumeration field in OsplTestTopic:

```python
>>> # DON'T DO THIS FOR AN ENUMERATED FIELD
>>> selector = dr.content('state = {0}', ['init']).build()
```

Instead, write the condition without substitution:

```txt
>>> selector = dr.content('state = init').build()
```

# 9.3.8 Using Coherent access

OSPL Scripting now supports Group and Topic coherence when reading and writing samples.

Group coherence allows a publisher to release a group of samples, possibly spanning several topics to subscribers in a group. Subscribers will not see any samples in a coherent group until the publisher has completed group. A subscriber using Group coherence may, if desired, retrieve the samples, across all readers in the group, in the order that the publisher wrote them.

Topic coherence allows a publisher to release changes across multiple instances of the sample topic as a coherent set. Subscribers will not see any samples in a coherent set util the publisher has completed the set. A subscriber using Topic coherence may, if desired, retrieve the samples with-in a specific topic, in the order that the publisher wrote them.

To establish a publisher or subscriber with coherent access, use the Presentation Policy when creating the publisher or subscriber QoS:

```python
>>> from osplscript import dds, qos

>>> # create a presentation policy, enabling Group coherence and ordered access
>>> groupPresentation = qos.Presentation().withCoherentAccess().withGroup() \
>>> .withOrderedAccess()

>>> # create a publisher with the policy
>>> pub = dds.Publisher(qos.PublisherQos().withPolicy(groupPresentation))

>>> # create a subscriber with the policy
>>> sub = dds.Subscriber(qos.SubscriberQos().withPolicy(groupPresentation))
```

To create a presentation policy with Topic scope, use the withTopic() method. To create a presentation policy with Instance scope (the default), use the withInstance() method.

To write samples using any coherent scope, the publisher object offers the methods beginCoherentChanges() and endCoherentChanges(). Each call beginCoherentChanges() should be matched with a call to endCoherentChanges(). Calls may be nested, for programmer convenience, but only the outer most pair of calls have

# 9.3. A Quick Tour of OSPL Scripting

any impact. Within a coherent change, any of the publisher’s data writers may be used to write samples. When the coherent change is completed (via a call to endCoherentChanges()), the samples are released to subscribers.

To enable subscribers to read coherent changes, the subscriber object offers two methods: beginAccess() and endAccess(). Their use is optional, but without them, the subscriber will not guarantee that samples will be returned according to the coherent groups in which they were created.

The following code pattern my be used to access samples written with Group coherence, or with ordered access:

```python
>>> # sub is a subscriber with Group coherence presentation policy
>>> # the subscriber must create data readers for all the topics
>>> # it wants to access
>>> sub.beginAccess()
>>> # return the dataReaders, in the order their corresponding writers
>>> # wrote samples
>>> drList = sub.dataReaders()
>>> for dr in drList:
>>>    # take (or read) ONLY ONE sample for each element of the list
>>>    sample = dr.take()
>>>    # using the reader's topicDescription() method to identify the topic
>>>    if 'foo' == dr.topicDescription().getName():
>>>    # do something with a 'foo' sample
>>> sub.endAccess()
```

When not using Group access or ordered access, a subscriber may still use the dataReaders() method, however, in this case, dataReaders() will return a set of readers with available data. The subscribing application can then take or read as many samples as are available from each reader in the set.

# Note: Using waitsets with group coherence

The DDS specification indicates that subscribers will raise a ‘data available on readers’ event when a new group is release. However, a defect in underlying APIs prevent OPSL Scripting from receiving this event. In other words, the following will not work:

```python
>>> # This will NOT WORK!!!
>>> from osplscript import status
>>> ws = dds.WaitSet()
>>> sc = sub.statusCondition()
>>> sc.setEnabledStatuses([status.DataOnReadersStatus])
>>> ws.attachCondition(sc)
>>> ws.waitForConditions()
>>> # will NEVER get here
```

As a work around, attached status conditions from each of the subscriber’s readers to the wait set:

```txt
>>> # This will work
>>> ws = dds.WaitSet()

>>> # do this for each reader (dr) you care about
>>> sc = dr.statusCondition()
>>> sc.setEnabledStatuses([status.DataAvailableStatus])
>>> ws.attachCondition(sc)

>>> ws.waitForConditions()
```

# 9.3.9 Creating a unit test script

Although using an interactive interpreter provides instant feedback, it is more likely that you will create script files, and execute them. In this section, we will create and execute a script that performs a unit test using the stand python unittest module. Start by created a text file in your favourite editor. Call the file firstUnitTest.py. Copy and paste the text below:

# 9.3. A Quick Tour of OSPL Scripting

```python
import unittest
from osplscript import dds

class firstUnitTest (unittest.TestCase):
    def testReadOsplTestTopic(self):
    t = dds.findTopic('OsplTestTopic')
    dw = dds.Writer(t)
    OsplTestTopic = dds.classForTopic(t)
    wdata = OsplTestTopic()
    wdata.id = 5
    wdata.x = 5.1
    wdata.y = 5.2
    wdata.z = 5.3
    wdata.t = 5.4
    wdata.state = 'hit'
    wdata.index = 5
    wdata.description = 'test'
    dw.write(wdata)

    dr = dds.Reader(t)
    sample = dr.take()
    rdata = sample.getData()

    self.assertEqual(wdata.id, rdata.id)
    self.assertEqual(wdata.x, rdata.x)
    self.assertEqual(wdata.y, rdata.y)
    self.assertEqual(wdata.z, rdata.z)
    self.assertEqual(wdata.t, rdata.t)
    self.assertEqual(wdata.state, rdata.state)
    self.assertEqual(wdata.index, rdata.index)
    self.assertEqual(wdata.description, rdata.description)

# standard python to run the unit test from the command line
if __name__ == "__main__":
    #import sys;sys.argv = ['', 'Test.testName']
    unittest.main()
```

This test case essentially repeats the test we created in the interpreter. To run the test, enter the following command in your shell command prompt:

```txt
osplscript firstUnitTest.py
```

The script engine will respond with output like the following:

```txt
Ran 1 test in 0.107s
```

```txt
OK
```

The output is compact. Python’s unit test philosophy is to minimize output except in the case of test failures. Experiment with the test to introduce a failure, and see how the output changes.

# 9.3.10 Working with more Complex topics

The OsplTestTopic used above is simple. This section examines working with more complex topics – ones that include sequences, arrays, nested structures and unions. As with the preceding examples, Tester should be running, as it creates the samples that are used in this example. If OSPL Scripting is not running, start it:

```txt
osplscript
```

The use the following Python to find the OsplSequenceTopic DDS topic and create a Python class from it:

# 9.3. A Quick Tour of OSPL Scripting

```python
>>> from osplscript import dds
>>> seqTopic = dds.findTopic('OsplSequenceTopic')
>>> seqClass = dds.classForTopic(seqTopic)
>>> seqInstance = seqClass()
```

From there, you can explore the instance data object. Fundamentally, it behaves pretty much like a C ‘struct’ would: top level fields are accessed via the dot notation:

```txt
>>> seqInstance.id = 1
```

Fields that are arrays or sequences may be indexed with zero-based value. Standard python sequence methods may be used to add and remove elements from the lists. (Fields declared as arrays are pre-allocated to the declared size. OsplSequenceTopic contains no array fields, but you can explore OsplArrayTopic, which does.)

```python
>>> seqInstance.iVector.append(1)
>>> seqInstance.iVector.append(2)
>>> assert seqInstance.iVector[0] == 1
>>> assert seqInstance.iVector[1] == 2
>>> del seqInstance.iVector[0]
>>> assert seqInstance.iVector[0] == 2
```

If a class includes a a sequence of structures, then a fieldName\_new() method is created so you can instantiate instances of the class:

```txt
>>> seqInstance.pVector.append(seqInstance.pVector_new())
>>> seqInstance.pVector[0].state = 'boost'
```

# 9.3.11 Creating a sample time-line

The OSPL Scripting engine includes module (osplscript.recorder) that can automatically read samples from one or more topics and return these in the order received. These sample sequence can then be queried using standard python mechanisms to create tests that consider multiple samples at once. To use the recorder module, do the following:

```python
>>> from osplscript.recorder import Recorder
>>> t1Recorder = Recorder('OsplTestTopic')
>>> t2Recorder = Recorder('OsplSequenceTopic')
>>> # ... time passes ...
>>> # get a snapshot of samples recorded
>>> t1Samples = t1Recorder.getSamples()
>>> t2Samples = t2Recorder.getSamples()
>>> # clear the recorded samples, but keep recording
>>> t1Recorder.clearSamples()
>>> # stop recording, the sample list is still available, but no longer updated
>>> t1Recorder.stop()
```

# 9.4 Using Eclipse and PyDev to create and run OsplScript files

Eclipse is a popular open source IDE. PyDev is a Python specific open source add-on for Eclipse. This chapter describes using Eclipse and PyDev.

# 9.4.1 Download and Installation

Eclipse may be obtained from the Eclipse Download page. Choose the IDE for Java Developers download. Installation Instructions are available on the Eclipse Install Guide page.

# 9.4. Using Eclipse and PyDev to create and run OsplScript files

Once Eclipse is installed, start it and choose or create a workspace. You are then ready to proceed with installing PyDev. See the PyDev Download page for instructions - instructions appear on the right-hand side of the page under Quick Install > Update Manager.

# 9.4.2 Configuration

Once PyDev is installed, you must configure it with the location of you Jython installation:

1. Start Eclipse, and choose a workspace if prompted.
2. From the menu, choose Window -> Preferences.
3. In the left-hand tree, find and click PyDev > Interpreters > Jython interpreters.
4. Click the Add button.
5. Enter a name for the Jython interpreter. Example: Tester Script
6. Browser for the jython.jar file in the root directory of the Tester Script Jython installation.
7. Click OK.
8. Still in the Preferences dialog on the PyDev > Interpreters > Jython interpreters page, select your newly created interpreter entry in the upper list. Then click the Environment tab in the lower half of the dialog.
9. Add the following environment variables: OSPL\_HOME, OSPL\_URI and LD\_LIBRARY\_PATH. Their values should be the same as those found in your command line environment.
10. Click the Libraries tab in the lower half of the dialog.
11. Click New Folder and browse for and select the jar directory under your Vortex OpenSplice installation directory.
12. Click OK to complete the folder selection.
13. Click OK to close the preferences dialog.

You are new ready to create a new Jython project.

# 9.4.3 Creating a PyDev Project

This section describes creating a project for editing Python files.

1. Start Eclipse and choose a workspace, if it is not already running.
2. From the menu, choose File -> New -> Project.
3. In the new project wizard, select PyDev > PyDev Project. Click Next.
4. Enter a project name.
5. Ensure the Project type is set to Jython.
6. Ensure that the Interpreter is set to your Tester Script Jython interpreter configured above.
7. Click Finish.
8. In the Package Explorere, right click over the newly created project, and choose Properties.
9. In the left-hand pane, click PyDev - PYTHONPATH.
10. Click the External Libraries tab.
11. Click Add zip/jar/egg, and choose cmapi.jar from the jar subdirectory of your Vortex OpenSplice installation. Click OK.
12. Click Add zip/jar/egg, and choose osplscript.jar from the jar subdirectory of your Vortex OpenSplice installation. Click OK.
13. Click OK to close the properties dialog.

# 9.4. Using Eclipse and PyDev to create and run OsplScript files

You may be prompted to switch to the PyDev perspective. This is optional. The PyDev perspective adapts the Eclipse display for editing python files with PyDev. If you are new to Eclipse, it is recommended that your switch to the PyDev perspective. The following instructions assume you are in this perspective.

# 9.4.4 Create a Python script

Python files may declare classes, define unit tests, or just provide instructions that are to be executed when the file is run. To create a Python file:

1. From the menu choose File -> New PyDev Module.
2. If not set, browser for a Source Folder, which must be a directory in your project.
3. Optionally, enter a package name.
4. Enter the name of the python file. PyDev will add a .py extension automatically.
5. Click OK

An editor will open, and you will be prompted for a template for the newly created file. The most common choices are: \* one of UnitTest variations, if you want to write tests. \* Main, if you want to write a python script to be executed directly by the interpreter \* Class, if you want to define python classes to be consumed by other modules.

# 9.4.5 Running a Python script

To run a python script (or unit test), do the following:

1. Right click anywhere in the editor and choose Run As -> Jython Run. (For unit tests, choose Run As -> Jython unit-test.)

# 9.4.6 Debugging a Python script

Launching a debugger is similar to running a script. Right click the script, and choose Debug As and then the appropriate sub-menu item. While debugging, note the following:

• You can set break points in a script by clicking in the left margin of the script editor.

# 9.5 Using PyCharm to create and run Tester Scripting

PyCharm is a Python specific IDE developed by Jet Brains, the makes of IntelliJ IDEA. PyCharm comes in several forms. This chapter describes using the free Community Edition.

Note that similar instructions apply for using IntelliJ IDEA with the Python Plugin, as the Python Plugin adds very similar capabilities.

# 9.5.1 Download and Installation

PyCharm may be obtained from the PyCharm Download page. Choose the Community Edition download. The page includes a link to Installation Instructions appropriate to your platform.

# 9.5.2 Configuration

This subsection explains how to configure PyCharm so that is will work with the Jython installation you created and configured with Tester Script.

1. Start PyCharm. On the Welcome script.
2. Click the Configure drop down near the bottom of the screen, and then choose Settings.

3. In the left-hand tree, find Default Project, expand it and select Project Interpreter.
4. On the right-hand side of the dialog, click the gear icon, and choose Add Local.
5. In the file selection dialog, browse for the your Jython executable from your Jython installation. The Jython installation instructions used the following location: \$OSPL\_HOME/jython/bin/jython
6. Click OK to close the selection dialog. Click OK again to close the Settings dialog.

You are new ready to create a new Jython project.

# 9.5.3 Creating a PyCharm Project

This section describes creating Python projects in PyCharm.

1. Start PyCharm, if it is not already running.
2. If the Welcome screen is showing, click Create New Project. Otherwise, select New Project from the File menu.
3. Provide a project name and location. Verify that the Interpreter is the Tester Scripting Jython interpreter. Click Create.

# 9.5.4 Create a Python script

Python files may declare classes, define unit tests, or just provide instructions that are to be executed when the file is run. To create a Python file:

1. From the menu choose File -> New....
2. In the pop-up that displays, click Python File.
3. Provide a name. If you do not add it, PyCharm will add a .py extension.
4. The Kind drop down allows you to choose between Python file or Python unit test.
5. Click OK to create the file. The file will open in an editor.

# 9.5.5 Running a Python script

Running a script requires some the first time setup:

1. From the menu, choose Run -> Edit Configurations.
2. In the left-hand tree, expand Defaults and click Python
3. Press the button containing ellipsis at the end of the Environment Variables line.
4. Add the following environment variables (as defined in your environment): OSPL\_HOME, OSPL\_URI and LD\_LIBRARY\_PATH
5. Click OK to close the Environment Variables dialog
6. In the Interpreter Options edit box, enter: -Djava.ext.dirs=&lt;full-path-to-OSPL\_HOME&gt;/jar
7. Ensure Python intepreter is set to the Jython implementation you created earlier.

If you plan on running Python unit tests, you will have to repeat the above steps for the Python tests default.

Once the default configurations are setup, you can run Python script as follows:

1. Right click anywhere in the editor and choose Run

# 9.5.6 Debugging a Python script

Once run configurations are setup, debug is essentially another form of running. Note the following:

• You can launch a debug session by right clicking in a script editor, and choosing Debug
• You can set break points in a script by clicking in the left margin of the script editor.

# 10

# Appendix A

# 10.1 Scripting BNF

This Appendix gives the formal description of the Tester Scripting language.

# 10.1.1 TOKENS

```txt
TOKENS
&lt;DEFAULT&gt; SKIP : {
    " "
    | "\t"
    | "\n"
    | "\r"
    | &lt;"//" (~[\n","\r])* ("\n" | "\r" | "\r\n")&gt;
    | &lt;"--" (~[\n","\r])* ("\n" | "\r" | "\r\n")&gt;
    | &lt;"/"* (~[*])* *"("*" ( "*" | ~[*","/"] (~[*"]) * "*") * "/"&gt;
}
&lt;DEFAULT&gt; TOKEN : {
&lt;INTEGER_LITERAL: &lt;DECIMAL_LITERAL&gt; (["1","L"])?
| &lt;HEX_LITERAL&gt; (["1","L"]) ?
| &lt;OCTAL_LITERAL&gt; (["1","L"]))? >
| &lt;#DECIMAL_LITERAL: ( ["+",-"] ) ? ["0"-9"] ( ["0"-9"] )*&gt; >
| &lt;#HEX_LITERAL: "0" [ "x","X"] ( ["0"-9","a"-f","A"-F"] )++)
| &lt;#OCTAL_LITERAL: "0" ( ["0"-7"] )*&gt; >
| &lt;FLOATING_POINT_LITERAL: ( ["+",-"] ) ? ( ["0"-9"] ) + "." ( ["0"-9"] ) *
    (&lt;EXPONENT&gt;) ? ( ["f","F","d","D"] ) ?
| "." ( ["0"-9"] ) + (&lt;EXPONENT&gt;) ? ( ["f","F","d","D"] ) ?
| ( ["0"-9"] ) + &lt;EXPONENT&gt; ( ["f","F","d","D"] ) ?
| ( ["0"-9"] ) + (&lt;EXPONENT&gt;) ? [ "f","F","d","D"] >
| &lt;#EXPONENT: [ "e","E" ] ( ["+",-"] ) ? ( ["0"-9"] )++)
| &lt;CHARACTER_LITERAL: "\"" (~[\n","b","r","f","\\","\n","\r"]
| "\"" ( ["n","t","b","r","f","\\","\n","\r"]
| [ "0"-7"] ( ["0"-7"] ) ?
| [ "0"-3"] [ "0"-7"] [ "0"-7"] )) "\""&gt; >
| &lt;STRING_LITERAL: "\"" (~[\n","b","r","f","\\","\n","\r"]
| "\"" ( ["n","t","b","r","f","\\","\n","\r"]
| [ "0"-7"] ( ["0"-7"] ) ?
| [ "0"-3"] [ "0"-7"] [ "0"-7"] ]
| [ "\n","\r"]
| [\r\n])) * "\""&gt; >
| &lt;HASH_LITERAL: "#" ( ["0"-9"] )++)
| &lt;JAVASCRIPT: "\"" (~[\"))] * "\""&gt; }
&lt;DEFAULT&gt; TOKEN : {
&lt;SEND: "send"&gt;
| &lt;REPEAT: "repeat"&gt;
```

```textproto
&lt;PERIODIC: "periodic"&gt;
  &lt;MACRO: "macro"&gt;
    &lt;DISPOSE: "dispose"&gt;
    &lt;WRITEDISPOSE: "writedispose"&gt;
    &lt;WAIT: "wait"&gt;
    &lt;WAITABS: "waitabs"&gt;
    &lt;CALL: "call"&gt;
    &lt;RUN: "run"&gt;
    &lt;CHECK: "check"&gt;
    &lt;CHECK_LAST: "check_last"&gt;
    &lt;CHECK_ANY: "check_any"&gt;
    &lt;RECHECK_LAST: "recheck_last"&gt;
    &lt;DISPOSED: "disposed"&gt;
    &lt;MARK: "mark"&gt;
    &lt;MISS: "miss"&gt;
    &lt;MARKMSG: "markmsg"&gt;
    &lt;MISSMSG: "missmsg"&gt;
    &lt;SCENARIO: "scenario"&gt;
    &lt;UNIQID: "uniqid"&gt;
    &lt;VAR: "var"&gt;
    &lt;END: "end"&gt;
    &lt;MSG: "message"&gt;
    &lt;LOG: "log"&gt;
    &lt;FAIL: "fail"&gt;
    &lt;CLEAR: "clear"&gt;
    &lt;IF: "if"&gt;
    &lt;THEN: "then"&gt;
    &lt;ELSE: "else"&gt;
    &lt;ENDIF: "endif"&gt;
    &lt;FOR: "for"&gt;
    &lt;IN: "in"&gt;
    &lt;LOOP: "loop"&gt;
    &lt;ENDLOOP: "endloop"&gt;
    &lt;WHILE: "while"&gt;
    &lt;READER: "reader"&gt;
    &lt;WRITE: "write"&gt;
    &lt;READ: "read"&gt;
    &lt;CONNECT: "connect"&gt;
    &lt;DISCONNECT: "disconnect"&gt;
    &lt;EXEC: "execute"&gt;
    &lt;CONTROL: "control"&gt;
    &lt;SET: "set"&gt;
    &lt;COLUMN: "column"&gt;
    &lt;GRAPH: "graph"&gt;
    &lt;REVERSE_FAIL: "reverse_fail"&gt;
    &lt;EXIT: "exit"&gt;
  }
&lt;DEFAULT&gt; TOKEN : {
  &lt;IDENTIFIER: &lt;LETTER&gt; (&lt;LETTER&gt; | &lt;DIGIT&gt;)*> |
  &lt;#LETTER: ["$", "A"-"Z", "_", "a"-"z"]&gt;
  &lt;DIGIT: ["0"-"9"]
}
```

# 10.1.2 NON-TERMINALS

```autohotkey
NON-TERMINALS
Scenario := &lt;SCENARIO&gt; &lt;IDENTIFIER&gt; (InstructionList) ? &lt;END&gt;
&lt;SCENARIO&gt;
Macro := &lt;MACRO&gt; &lt;IDENTIFIER&gt; "(" (ArgumentList) ? ")" (InstructionList) ? &lt;END&gt; &lt;MACRO&gt;
```

# 10.1. Scripting BNF

```autohotkey
| &lt;SCENARIO&gt; &lt;IDENTIFIER&gt; ( InstructionList )? &lt;END&gt; &lt;SCENARIO&gt;
InstructionList := ( Instruction )+
Instruction := SendInstruction
| RepeatInstruction
| PeriodicInstruction
| DisposeInstruction
| WriteDisposeInstruction
| WaitInstruction
| WaitabsInstruction
| CheckInstruction
| CheckLastInstruction
| CheckAnyInstruction
| RecheckLastInstruction
| DisposedInstruction
| MarkInstruction
| MarkMsgInstruction
| MissInstruction
| MissMsgInstruction
| CallInstruction
| ForInstruction
| WhileInstruction
| SetInstruction
| VarDeclaration
| IfInstruction
| MessageInstruction
| ClearInstruction
| LogInstruction
| FailInstruction
| ReaderInstruction
| WriteInstruction
| ReadInstruction
| ConnectInstruction
| DisconnectInstruction
| ExecuteInstruction
| ControlInstruction
| ColumnInstruction
| GraphInstruction
| ReverseFailInstruction
| ExitInstruction
| ScriptInvocation

ReaderInstruction := &lt;READER&gt; (&lt;DISPOSE&gt;) ? "(" Constant (&lt;HASH_LITERAL&gt;) ? ( ", " &lt;IDENTIFIER&gt; ( ", " Constant ( ", " Constant ) ? ) ? ) ? ) ;"
ColumnInstruction := &lt;COLUMN&gt; (&lt;CLEAR&gt;) ? "(" Constant ( ", " Constant ) ? ) ;"
GraphInstruction := &lt;GRAPH&gt; "(" ParameterList ");" MessageInstruction := &lt;MSG&gt; "(" &lt;STRING_LITERAL&gt; ( Constant ) ? ) ;"
LogInstruction := &lt;LOG&gt; "(" &lt;STRING_LITERAL&gt; ( Constant ) ? ) ;"
FailInstruction := &lt;FAIL&gt; "(" &lt;STRING_LITERAL&gt; ( Constant ) ? ) ;"
ControlInstruction := &lt;CONTROL&gt; &lt;IDENTIFIER&gt; "." &lt;IDENTIFIER&gt; ( ( "(" ParameterList ( ( ";") | ( ") " ";" ) ) ) | ( ";" ) )
ClearInstruction := &lt;CLEAR&gt; ";"
ExitInstruction := &lt;EXIT&gt; (&lt;IF&gt; &lt;FAIL&gt;) ? ";"
ScriptInvocation := Script ";"
SendInstruction := &lt;SEND&gt; &lt;IDENTIFIER&gt; ( ( "." &lt;IDENTIFIER&gt; ) ) ?
"(" ( ParameterList ) ? ) ;"
RepeatInstruction := &lt;REPEAT&gt; &lt;IDENTIFIER&gt; FloatValue IntValue "(" ( ParameterList ) ? ) ;"
PeriodicInstruction := &lt;PERIODIC&gt; &lt;IDENTIFIER&gt; &lt;IDENTIFIER&gt; FloatValue IntValue "(" ( ParameterList ) ? ) ;"
WriteInstruction := &lt;WRITE&gt; &lt;IDENTIFIER&gt; "." &lt;IDENTIFIER&gt; "(" ( ParameterList ) ? ) ;"
VarDeclaration := &lt;VAR&gt; FieldName "=>" Constant ";"
```

```lisp
DisposeInstruction := &lt;DISPOSE&gt; &lt;IDENTIFIER&gt; ( ("." &lt;IDENTIFIER&gt;) ) ? "(" ( ParameterList )? ");"
WriteDisposeInstruction := &lt;WRITEDISPOSE&gt; &lt;IDENTIFIER&gt; ( ("." &lt;IDENTIFIER&gt;) ) ? "(" ( ParameterList )? ");"
CheckInstruction := &lt;CHECK&gt; &lt;IDENTIFIER&gt; ( ("." &lt;IDENTIFIER&gt;) ) ?
    "(" ( ChkParameterList )? ");"
CheckLastInstruction := &lt;CHECK_LAST&gt; &lt;IDENTIFIER&gt; ( ("." &lt;IDENTIFIER&gt;) ) ? "(" ( ChkParameterList )? ");"
CheckAnyInstruction := &lt;CHECK_ANY&gt; &lt;IDENTIFIER&gt; ( ("." &lt;IDENTIFIER&gt;) ) ? "(" ( ChkParameterList )? ");"
RecheckLastInstruction := &lt;RECHECK_LAST&gt; &lt;IDENTIFIER&gt; ( ("." &lt;IDENTIFIER&gt;) ) ? "(" ( ChkParameterList )? ");"
ReadInstruction := &lt;READ&gt; &lt;IDENTIFIER&gt; "." &lt;IDENTIFIER&gt; "(" ( ChkParameterList )? ");"
MarkMsgInstruction := &lt;MARKMSG&gt; &lt;IDENTIFIER&gt; "." &lt;IDENTIFIER&gt; "(" ( ChkParameterList )? ");"
MissMsgInstruction := &lt;MISSMSG&gt; &lt;IDENTIFIER&gt; "." &lt;IDENTIFIER&gt; "(" ( ChkParameterList )? ");"
ConnectInstruction := &lt;CONNECT&gt; &lt;IDENTIFIER&gt; ( Constant )? ";"
DisconnectInstruction := &lt;DISCONNECT&gt; &lt;IDENTIFIER&gt; ";"
DisposedInstruction := &lt;DISPOSED&gt; &lt;IDENTIFIER&gt; ( ("." &lt;IDENTIFIER&gt;) ) ? "(" ( ChkParameterList )? ");"
MissInstruction := &lt;MISS&gt; &lt;IDENTIFIER&gt; ( ("." &lt;IDENTIFIER&gt;) ) ?
    "(" ( ChkParameterList )? ");"
MarkInstruction := &lt;MARK&gt; &lt;IDENTIFIER&gt; ( ("." &lt;IDENTIFIER&gt;) ) ?
    "(" ( ChkParameterList )? ");"
CallInstruction := &lt;CALL&gt; &lt;IDENTIFIER&gt; ( ("." &lt;IDENTIFIER&gt;) ) ?
    "(" ( ParameterList )? ");"
SetInstruction := &lt;SET&gt; &lt;IDENTIFIER&gt; "(" ( ParameterList )? ")"
    "(" ( "ParamHeaderList ")" ParamSetList ");"
ParamHeaderList := &lt;IDENTIFIER&gt; ( "," ParamHeaderList )?
ParamSetList := "," ParamSet ( ParamSetList )?
ParamSet := "(" ParamValueList ")"
ParamValueList := Constant ( "," ParamValueList )?
IfInstruction := &lt;IF&gt; "(" CompareExpression ")" &lt;THEN&gt;
    InstructionList (&lt;ELSE&gt; InstructionList )? &lt;ENDIF&gt; ";"
CompareExpression := CalcExpression ( CompareOperator CompareExpression )?
CalcExpression := PrimaryExpression ( CalcOperator CalcExpression )?
PrimaryExpression := Constant
|    "(" CompareExpression ")"
CompareOperator   := "="
|    "!="
|    ">"
|    "&lt;"
|    "&gt;="
|    "&lt;="
|    "| | "
|    "&&"
CalcOperator   := "|"
|    "&"
|    "+"
|    "-"
|    "*"
|    "/"
ForInstruction := &lt;FOR&gt; &lt;IDENTIFIER&gt; &lt;IN&gt; (
    ( IntValue ".." IntValue )
|  "(" VarList ")")  ) &lt;LOOP&gt; InstructionList &lt;ENDLOOP&gt; ";"
WhileInstruction := &lt;WHILE&gt; "(" CompareExpression ")" &lt;LOOP&gt;
    InstructionList &lt;ENDLOOP&gt; ";"
VarList := Constant ( "," VarList )?
WaitInstruction   := &lt;WAIT&gt; "(" Constant ");"
WaitabsInstruction   := &lt;WAITABS&gt; "(" Constant ");"
```

```txt
ExecuteInstruction := &lt;EXEC&gt; (&lt;WAIT&gt;)? (&lt;LOG)&gt;
&lt;STRING_LITERAL&gt;";
ReverseFailInstruction := &lt;REVERSE_FAIL&gt;";
ParameterList := Parameter ( ", " Parameter ) * ( ", " ) ?
Parameter := FieldName "=" Constant
ChkParameterList := ChkParameter ( ", " ChkParameter ) * ( ", " ) ?
ChkParameter := FieldName "=" ( " ! ") ? Constant ( ":" Constant ) ?
ArgumentList := Argument ( Argument ) *
Argument := FieldName ":" FieldName ( " :=" Constant ) ? ";
FieldName := &lt;IDENTIFIER&gt; (" [" &lt;INTEGER_LITERAL&gt;] ") ?
( ( "." FieldName ) ) ?
IntValue := &lt;INTEGER_LITERAL&gt;
| "&lt;&lt;" &lt;IDENTIFIER&gt;
| &lt;IDENTIFIER&gt;
FloatValue := &lt;FLOATING_POINT_LITERAL&gt;
| "&lt;&lt;" &lt;IDENTIFIER&gt;
| &lt;IDENTIFIER&gt;
Constant := &lt;INTEGER_LITERAL&gt;
| &lt;FLOATING_POINT_LITERAL&gt;
| &lt;CHARACTER_LITERAL&gt;
| &lt;STRING_LITERAL&gt;
| " >> " &lt;IDENTIFIER&gt;
| " >> " &lt;JAVASCRIPT&gt;
| " &lt;&lt; " &lt;IDENTIFIER&gt; ( "." &lt;IDENTIFIER&gt;) ?
| &lt;IDENTIFIER&gt;
| &lt;UNIQID&gt;
| &lt;JAVASCRIPT&gt;
Script := &lt;JAVASCRIPT&gt;
```

# 11

# Contacts & Notices

# 11.1 Contacts

# ADLINK Technology Corporation

400 TradeCenter

Suite 5900

Woburn, MA

01801

USA

Tel: +1 781 569 5819

# ADLINK Technology Limited

The Edge

5th Avenue

Team Valley

Gateshead

NE11 0XA

UK

Tel: +44 (0)191 497 9900

# ADLINK Technology SARL

28 rue Jean Rostand

91400 Orsay

France

Tel: +33 (1) 69 015354

Web: http://ist.adlinktech.com/

Contact: http://ist.adlinktech.com

E-mail: ist\_info@adlinktech.com

LinkedIn: https://www.linkedin.com/company/79111/

Twitter: https://twitter.com/ADLINKTech\_usa

Facebook: https://www.facebook.com/ADLINKTECH

# 11.2 Notices

Copyright © 2018 ADLINK Technology Limited. All rights reserved.

This document may be reproduced in whole but not in part. The information contained in this document is subject to change without notice and is made available in good faith without liability on the part of ADLINK Technology Limited. All trademarks acknowledged.
[🔗 Link to the original document](.vortex-opensplice-test-tool-user-guide/vortex-opensplice-test-tool-user-guide.pdf)
